


Wood Carving Pattern: TINY Hippo
By Steve Tomachek, Author of Scrap Wood Whittling
My niche has always been animal miniatures. I’ve chosen not to work at a consistent scale but rather to carve in sizes that relate to the human hand. I’ve created a menagerie, a collection of exotic animals. Some took ten minutes to make; some took ten hours. My miniature menagerie has thousands of carvings and hundreds of species representing years of exploring the animal world. I’ve studied and created animal art for over twenty years, and my new book, Scrap Wood Whittling, allows me to share some of that experience.
Below you will find a sample project and pattern of the types of projects you can find inside Scrap Wood Whittling. The object of this book is to set forth a collection of miniature animal projects that meet learners at all levels of experience and that require only a knife. Fundamentals and simple projects are explained in depth to start the beginner on the path to realize the fun and fulfillment of whittling. The novice can slowly gain confidence and skill as they learn to carve intricate details using illustrated step-by-step instructions. More experienced carvers will find value in the projects that focus on the major themes in my process and art form. Every learner will benefit from the multitude of tips, ideas, and plans as they explore this unique style of painted sculpture.
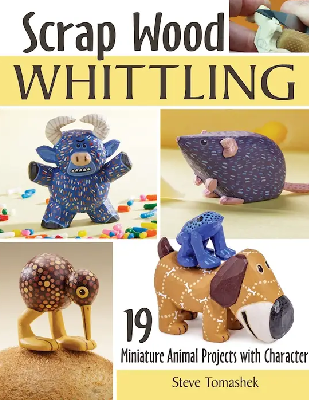
Scrap Wood Whittling
19 Miniature Animal Projects with Character
$18.99Scrap Wood Whittling is a must-have guide for any woodcarver looking to achieve something small, charming, and easy! Small wood carvings tend to intimidate, but author and master carver Steve Tomashek makes it approachable for anyone, even beginners. Opening with helpful insight on materials, tools, cuts, and safety, you’ll then go on to complete 19 tiny animal carvings that slowly progress in difficulty. From a leaping pig and a penguin family to an aquarium and cat diorama, each project contains clear, step-by-step instructions, coordinating photography, full-size patterns, tips on technique, painting, display ideas, and more!
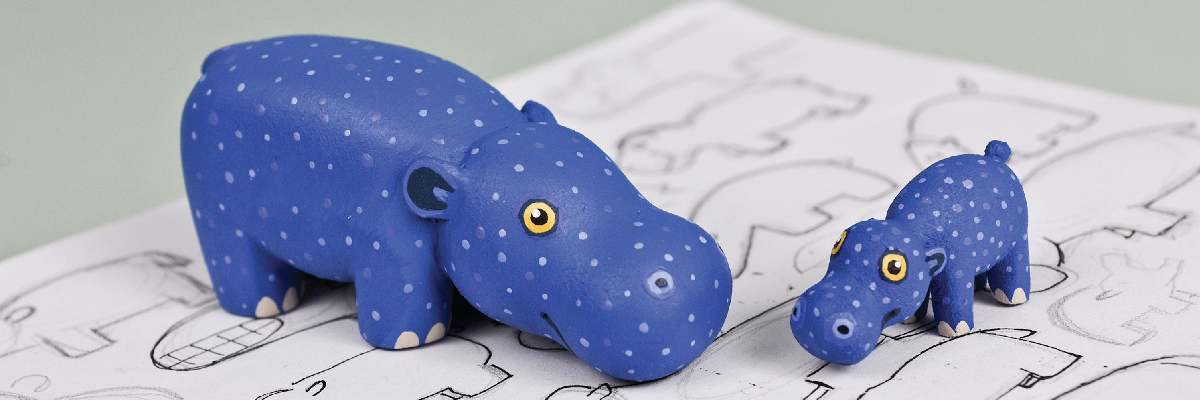
Carve A Tiny Hippo
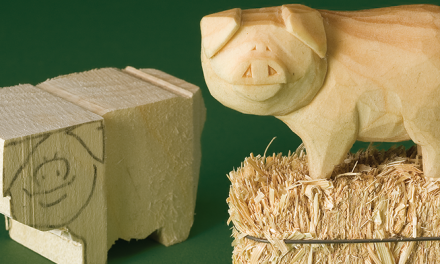
The hippopotamus has simple features that are nonetheless sculpturally interesting and make good fodder for comic exaggeration. With its huge muzzle and plump body, the hippo looks like one of the simplest critters on four legs. I made my hippo’s legs even shorter and thicker. The model I chose came out of a page full of drawings I made while studying hippo themed art and photos.
The ears and tail of the beast are tiny and may be difficult for beginners to carve. These features could be painted on rather than carved. I sanded this piece and finished it with acrylic paints, but that is not necessary—the generous curves and toy-like aspects of this carving also lend themselves to a natural finish. For more experienced woodworkers, this design could serve as the handle for a small box or be scaled up to make a pull toy.
Getting Started
Transfer the pattern to the blank. I sketch it, but you could use graphite transfer paper if desired.

1. Rough out the bottom of the head. Make matching V-shaped cuts under the head on both sides. Repeat and expand the grooves to make them deeper, and extend them inward until they meet in the middle. Expand the grooves up to the front legs. Round the edges and scoop out a slight dip behind the muzzle.

2. Separate the front and back legs. Make V-cuts between
the legs on both sides. Use the process explained in Step 1 to
extend the grooves across the belly until they meet. Carve away
from the legs first, and then carve up to the first cut from the
opposite direction. As the grooves expand, smooth the belly with
the second cuts.

3. Separate the right and left legs. Use the point of the knife to carve a shallow V-shaped cut on the boundary between the legs. Carve a small slit. Repeat the cuts to make the slit deeper and deeper. I hold the knife like a pencil to carve the slit. Repeat to separate the back legs.

4. Round the rear end. Remove the sharp corners, but
preserve the material in the middle for the tail. The length of the
tail is up to you. Draw the tail, make stop cuts around it, and then carve up to the stop cuts to separate the tail and blend the rear end with the rest of the body. Round the corners of the tail slightly.

5. Rough out the head. Draw the ears. Scoop out two grooves on the top of the head to establish the muzzle and the cranium. Round the edges of the entire head and blend the sides with the top and bottom. The humor in this carving lies in the head and body curves, so take your time with this step.

6. Round the rear end. Remove the sharp corners, but
preserve the material in the middle for the tail. The length of the tail is up to you. Draw the tail, make stop cuts around it, and then carve up to the stop cuts to separate the tail and blend the rear end with the rest of the body. Round the corners of the tail slightly.

7. Begin rounding the legs. Redraw the round footprints on the bottoms of the feet. Carefully use paring cuts to round the fronts and backs of the legs from the belly down to the bottom of the feet. Clean up any fuzzies where the legs meet the body.

8. Finish the legs. Hold a small knife like a pencil. Make deep
cuts on both sides of each slit through repeated knife strokes. Draw the knife through the slit at an angle to remove the material. Slide the knife between the legs from the belly, front to back, to remove the excess material to finish shaping the legs.

9. Finish the hippo. First, spend a few minutes cleaning up any rough areas with the knife. Use durable, flexible sandpaper to smooth away the tool marks, if desired. This is also the time to finish carving the details, like the eyes and mouth, or correct any mistakes.

10. Paint the hippo. I drill a small hole in the belly and insert a toothpick into the hole to hold the hippo as I paint. Paint any designs or details you wish. The hippo doesn’t have to be realistic; a famous hippo statue from ancient Egypt was decorated with river plants. Treat this figure as a canvas for your imagination.
More Projects Inside Scrap Wood Whittling:

The Minotaur was a beast of myth in the origin story of the Greek world, a murderous character confined inside a labyrinth. I’ve reinterpreted it as a toylike figure wrapped in a coat of chaotic confetti. The design is goofy, vibrant, and full of life-giving energy. In a spirit of levity, it’s meant not to scare, but to delight; after all, small as it is, there’s little chance of it
being a bully—it could hardly hurt a flea.

From the artist’s perspective, penguins can be carved in a variety of dynamic
poses despite their stilted stride: they swim with elegance underwater, and their terrestrial form is easily caricatured. For this project, I’ve designed a form in which the beak follows the grain of the wood so it’s less likely to snap off accidentally as you carve. I’ve also included a pattern for a baby penguin so you can carve a whole family.

This carving is an homage to the natural world, the source of the substance and subject of my work. It’s largely a naturalistic treatment, a mirror to the minutiae of nature, designed to pleasure the eye. As with all my work, I’ve used some artistic freedom by exaggerating the features, thereby giving the figure a somewhat caricatured look.
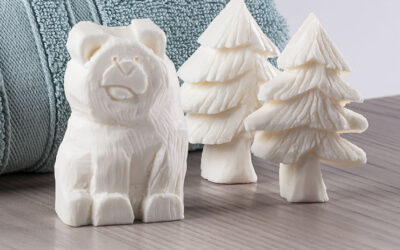
Carving: Soap Edition – Carve A Rustic Bear With Free Pattern
These fun and charming patterns will bring the rustic charm of a mountain-nestled cabin to your city dwelling or your country home. Not sure if wood carving is for you? Soap carving is a great introductory step towards whittling wood for beginners. Try your...

Master the Art of Nordic-style Carving
Guided by noted carvers, Frank and Balder Egholm you'll master the art of one of the most historic and traditional carving styles. This online-only exclusive title is filled with rustic, yet functional projects from utensils to decorative and functional pieces that...
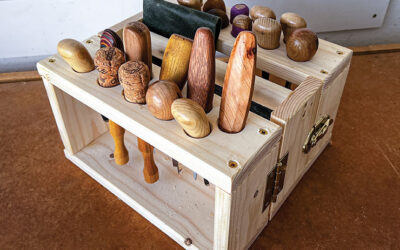
Easy Workshop Organization Projects
Making a Basic Caddy to Hold All Your Tools By Casey Foster Spring is upon us! There's no better time to clean out your workshop and implement new organization techniques to keep your work area looking tidy all year round. Below is a tool caddy project by Casey...
Get Exclusive Email Offers And Receive 15% OFF On Your First Book Order!
Recent Comments