


Traditional. functional. sensible.
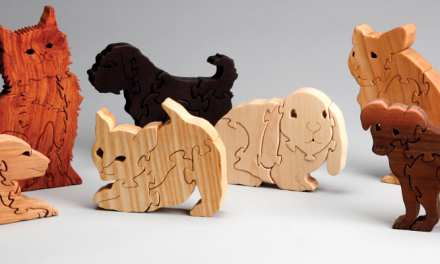
Intro to Nordic Style Carving
Renowned for its use of natural materials and close connection to nature, Nordic-style woodcarving is rich in history, tradition and cultural significance. Originating in the Viking age, this style of carving experienced substantial growth throughout Europe in the 17th and 18th century. Today, Nordic-style carving continues to thrive in the wood artisan community. From new carvers looking to learn by creating small functional or decorative pieces, to advanced carvers looking to hone their skills with larger projects, Nordic-style carving will provide you a basis for creating beautiful and meaningful projects.

INSIDE YOU’LL FIND
- 22 rustically functional projects with materials list and step-by-step instructions with guiding photos
- How to choose the right type of wood for your project
- Preparing and working with green wood
- List of required materials and tools along with safety tips
- Efficient ways to sharpen and hone your knife
- Guide to traditional paint and food-safe finishes
Starting with a guide to selecting the wood (emphasizing the use of “green wood’) along with embellishing and finishing techniques, you’ll have ALL of the necessary information to complete each project with ease and enjoyment.
Get Started with Nordic-style Carving: Carve a Kuksa
Ready to try Nordic-style carving? Check out the FREE hand-hewn wooden cup pattern below.

PATTERN BY RICK WEIBE
What is a Kuksa?
A wooden cup is traditionally referred to as a Kuksa in Finland or Kasa in Sweden. Most commonly hand-carved from birch burl wood, when crafted and finished correctly, the cup can last a lifetime.
MATERIALS
- Birch, 2 1/2″ (64mm) thick: 3 1/2″ x 6″ (8.9cm x 15.2cm)
- Finish, such as beeswax, flax seed oil, mineral oil, or walnut oil
TOOLS
- Band saw or axe and bush saw
- Drill with Forstner bit (optional)
- Knives: carving, hooked
- Gouges (optional): assorted deep and shallow, short bent
Choosing your wood
As previously emphasized, the use of green wood is essential to most Nordic-style carving projects. Green wood refers to any wood that is freshly felled or preserved with 100% moisture content. The greenwood adds a rustic feel to your finished project. Kuksas are usually carved from birch burl wood. Since burls are difficult to find, you may utilize regular birch for more advanced carvers. For a beginner friendly wood that is more manageable you can utilize:
- Maple
- Alder
- Willow
- or even Tulip Poplar
For more wood selection tips, check out the Beginners Guide to Nordic-style Carving.
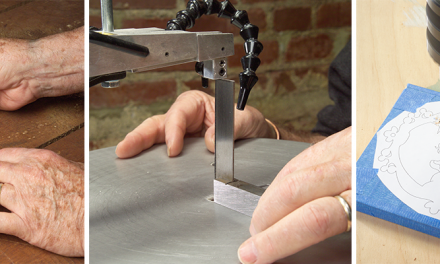
Instructions:
ROUGHING OUT YOUR CUP
step 1

Hollow the inside of the cup. The quickest way to hollow out your Kuksa? A drill with a Forstner bit. Want to spend more quality time with your wood? A variety of straight and bent gouges will also do the trick. Are you in for an even bigger challenge? Use your pocket knife.
step 2

Sketch your desired shape onto the outside of your blank. Turn the cup over on firm solid surface (not your leg) and carve off the excess wood with a knife or gouge.
REFINING YOUR PROJECT
step 3

Smooth the rim and flatten the bottom for optimal comfort and stability.
step 4

Sketch out the handle shape and rough it out with your knife
step 5

Refine the handle. Carve a small groove on the top of the handle for your thumb. Test the grip for comfort and adjust as needed.
step 6

Carve the rim. For ultimate lip comfort, smooth the underside at an angle to create and round the top.
Finishing touches
step 7

Add in your details. This is where you can let your creativity take its course. Carve a grove underneath your kuksa, drill a hole to implement a hanging cord or let the wood dry thoroughly and make it an ongoing project to decorate the cup on your trails!
step 8

Finish and protect your Kuksa by boiling it in beeswax.

Enjoyed this pattern? For more wood selection tips, check out the Beginners Guide to Nordic-style Carving.

About the Author
Rick Wiebe lives in Westbank, B.C., Canada, with his wife of 45 years. He spends the colder months in the warmer parts of the U.S. He has been carving for 60 years and has spread his enthusiasm to children and adults in classes and demonstrations in many venues. He is the author of Adventures in Fan Carving and Whittling Flutes and Whistles, as well as several magazine articles.
Love Rick’S work