


Learn about wood burning pen tips and textures by making a pretty but practical practice board
By Deborah Pompano
Article originally from Pyrography Volume 3 2013
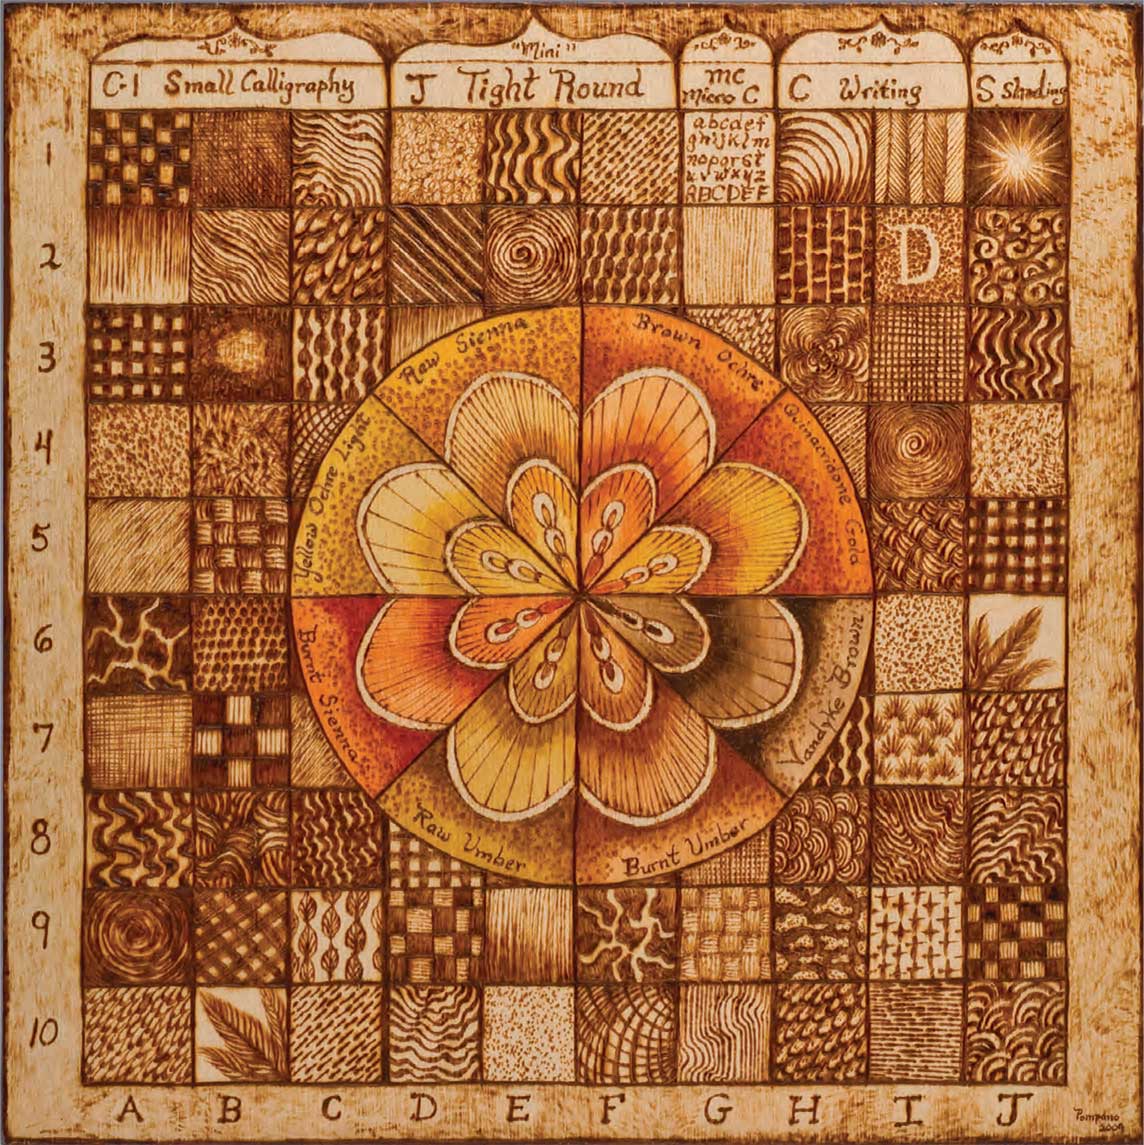
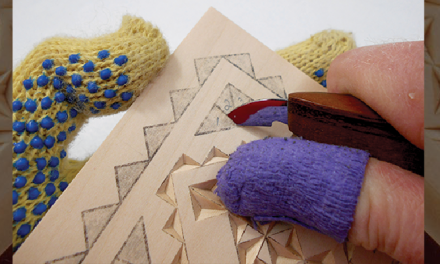
If you are new to pyrography, you’re no doubt eager to try a project, but you may also be a little uncertain what your new machine can do. You may have a collection of pens or tips and some attractive patterns, but not know how to use one to make the other. The best place to start is with a practice board. I designed this practice board to look like a crazy quilt, so it is attractive as well as functional. You can use it to experiment with various tips, practice specific patterns, play with texture, and even try some color tints commonly used to accent pyrography. The grid system will help you keep a record of what you did in each square.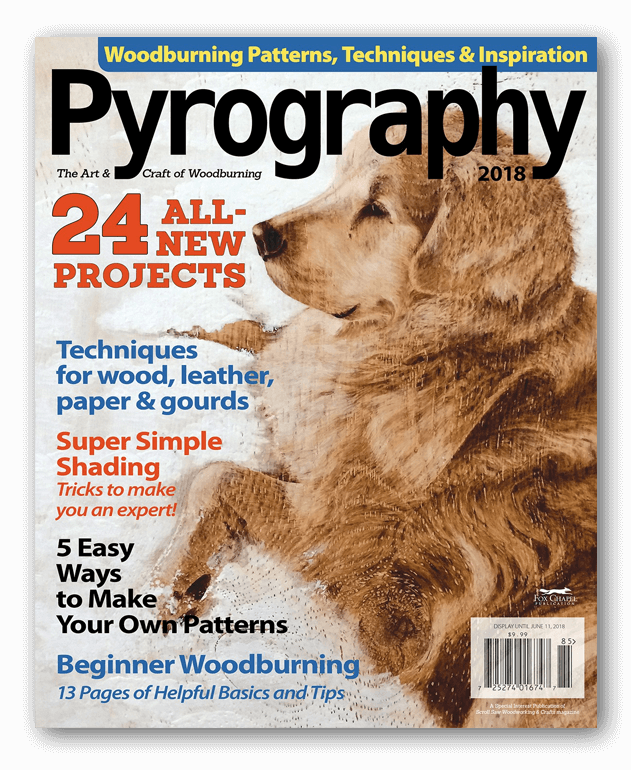
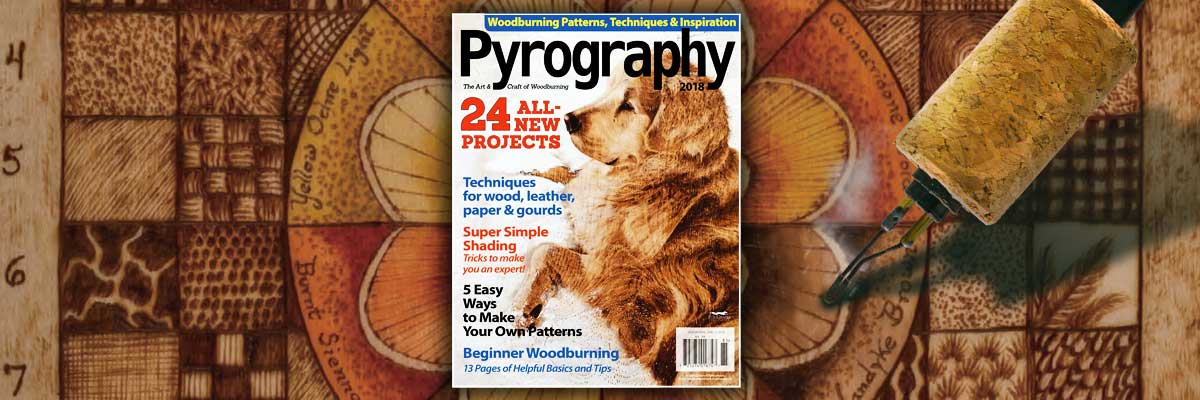
Pyrography Volume 6 (2018)
The 2018 issue of Pyrography features a variety of projects, patterns, and features, as well as interesting techniques.
I designed this practice board to look like a crazy quilt, so it is attractive as well as functional. ~ Deborah Pompano
The squares of my sampler are deliberately loose and imperfect. It’s okay to have rough areas and inconsistencies in our work—it adds to the charm and handmade quality of the woodburnings. Woodburning has long been considered to be a rustic, natural type of folk art, so we can always claim that our errors are intended to add to the rustic quality! Be patient and tolerant with yourself in this learning stage; we often learn more from our mistakes than from our successes. Relax and have fun as you experiment.
The examples I’ve given for each square of the sampler are simply suggestions to guide you. Please feel free to discover and use variations on them or to experiment with your own lines, patterns, and textures in the sampler blocks. Be creative as you complete your own sampler.
GETTING STARTED
Start with a scrap of wood (not your project board) and simply burn lines to get a feel for holding the pen and to test the effects of various temperatures (see page 57). This isn’t just an exercise for newcomers; it’s always a good idea to test tips and practice strokes on scraps before starting any project to reduce the risk of spoiling your work. When you feel comfortable with the pen and the different heat settings, it’s time to draw the sampler grid and experiment with your pens.
Enlarge or reduce the Crazy Quilt Sampler pattern to fit your wood, and then transfer the design to the wood using graphite transfer paper. You can use a ruler to guide the pen as you transfer the straight lines from the pattern. I lined up my pattern with the grain, so that the grain runs vertically from top to bottom. The direction of the grain lines will strongly affect the lines you burn.
Next, outline the squares with the corner of a writing tip. You can outline just a few blocks at a time or burn all of the lines at once. Although using a ruler when transferring the pattern is helpful, you do not need to use a ruler for this wood burning stage. Don’t worry about making the woodburned outlines perfectly straight—once you have filled in all of the blocks, it will not matter if the lines are slightly wavy. You can make the lines medium dark for now. After you have completed all the blocks in the sampler and textured the edges, you can go back and darken all of the lines with the writing tip. Now, use the writing tip to label the rows numerically and alphabetically as shown.
Note: I use a Colwood Detailer woodburner with five types of fixed-tip pens:
the Mini J, or tight round;
the C-1, or small calligraphy;
the S, or shading;
the C, or writing;
and the MC, or micro writing.
You can use the tips that came with your burner; just compare them to the photos or descriptions here and use those that are similar. Of course you can also experiment with other types of tips to find your favorites.
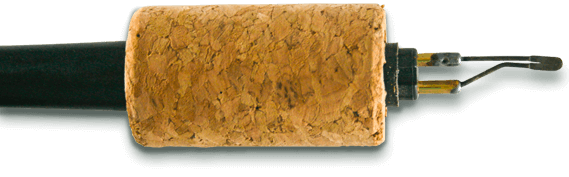
Wood Burning Pen Tips
C-1 Small Calligraphy Tip
This extremely useful tip is actually three tips in one. When using the corner of the tip, it performs like a writing tip. When used with the wide edge held horizontally, it can make broad areas of shading. When held at a 45° angle to the wood and rotated between the thumb and fingers, it can be used as a calligraphy tip, creating gracefully curved thin and thick lines.C-1 | Pen Instructions
• A-1 checkerboard. Lightly draw guidelines to create a checkerboard pattern with evenly spaced squares. Using the entire wide edge of the tip, make the dark squares. Using the corner edge, draw the light vertical lines in each light square of the checkerboard. Use a knife to gently scrape areas that may burn too darkly.
• A-2 parallel lines. Use the corner edge of the tip to draw vertical lines from top to bottom in the square, close together. In the top half, go more slowly and use slightly more pressure to make the line darker. Lighten the line toward the bottom by stroking faster, with less pressure. Always pull the stroke toward you and then lightly lift off at the bottom of the stroke. This should create a lighter, thinner line toward the bottom of the square.
• A-3 interwoven strokes. Similar to large, thick crosshatching, this design will help you practice going across the wood grain. With the tip on its wide side edge, stroke horizontally in 5 or 6 stripes across the square. Repeat the motion vertically to create a criss-cross effect.
• A-4 stippling (dots). Stippling is the use of dots to create shadows, textures, and 3-D effects. Tap the corner edge of the tip on the wood at a 45° angle. Experiment with dots and short dashes on different heat settings, closer together or farther apart.
• A-5 short strokes. Position the wood so you can pull the pen strokes toward you. Make short or longer lines, slightly curved, going in the same direction, and slightly overlapping or askew, rather than strictly parallel. This technique is useful for fur lines, short grass, and hair. To make fur look natural, curve each stroke to follow the contours of the animal’s body.
• A-6 stone path. Use the wide edge of the tip on high heat to create random shapes separated by thin unburned areas of wood.
• A-7 fine crosshatch. Crosshatching is two groups of parallel lines that are perpendicular to each other; it’s a handy way to create shading, texture, shadows, and depth in your work. Turn the wood so you can pull the tip toward you.
• A-8 curves. Practicing curved lines will help you develop control and flexibility of the pen tip. As you progress through the curve, roll the pen between your thumb and fingers. Use the wide edge of the tip, and move it from side to side in a smooth motion, angling it as you make the turns.
• A-9 concentric circles. Begin by filling the four corners of the square with short, curved strokes, rotating the wood so the pen tip pulls toward you as you make the curved lines. After filling in the four corners, which creates a blank circle in the center, make short, curved connecting strokes, working toward the center. There is no need to try to draw the whole spiral all in one stroke.
• A-10 small fish scales stroke. Use the corner edge of the tip to draw this curved, hooked stroke. Holding the pen so the corner edge touches the wood, move the tip to the left, making the thinner line. Curve down and around the C-shaped hook, and then back to the right. On the C curve and back stroke, make the line wider by using the wide edge of the tip and holding the tip down longer.
• B-1 triple crosshatch. Use this pattern in the darkest shaded areas of your woodburnings to create depth and texture. On top of regular perpendicular crosshatching (as in A-7), add a layer of diagonal woodburned lines using the corner of the tip.
• B-2 wavy, curved lines. Roll the pen between your thumb and fingers, using the corner of the tip. Wavy lines are useful for depicting the grainy patterns of wood or the rippled patterns on water.
• B-3 short, overlapped dashes. Using the corner of the tip, make heavy layers of short dashes, leaving the inner circle lighter than the edges to create a 3-D effect.
• B-4 random dashes with “tails”. Here’s your chance to make blobs on purpose! Hit the wood hard with the tip corner and trail off lightly to make the tails. Turn the work as you go, and aim for a random pattern.
• B-5 basket weave pattern. A handy texturing pattern for filling blank areas on borders. Draw the horizontal and vertical guidelines lightly in pencil first. For more definition, darken the striped lines of each tiny basket weave square on one side only.
• B-6 large dots. Using the corner of the tip, experiment with raising and lowering the heat setting to intentionally create a light golden brown halo of “scorch” surrounding each dot.
• B-7 nine block cross. Make the dark squares from vertical lines burned close together on a high heat setting. Create the lighter squares with lightly burned lines drawn farther apart and on a lower heat setting.
• B-8 curved line basket weave. A random design of interesting curved lines.
• B-9 diagonal crisscross. Use the wide edge of the tip and make lengthwise lines from corner to corner.
• B-10 feathers. Position the wood upside-down and pull the strokes toward you. First, make three long, slightly curved lines for the central quills of the three feathers. Beginning from the central lines, use the corner of the tip to make short, curved feather vane lines. Do not outline the feather edges.
• C-1 wavy lines. Similar to B-2, but with thicker and thinner lines; useful for depicting wood grain or water ripples. Use the corner edge of the tip but roll slightly to left and right, onto the wider edge, as you make the curves.
• C-2 large fish scale. Follow the instructions for square A-10. After drawing the scales, use the corner of the tip to make shaded parallel lines at the base of each “scale” to add depth and dimension.
• C-3 wide-thin pattern. Draw the shapes with the corner of the tip and fill them with parallel lines.
• C-4 curved contour lines crosshatch. Contour lines, made with the corner of the tip, follow the shape of the object—great for depicting rounded objects.
• C-7 fur lines. Make short, diagonal strokes with the corner of the tip.
• C-8 wavy lines. Gently roll the wide edge of the tip between your thumb and fingers as you pull the pen toward you.
• C-9 leaf pattern. This technique is similar to the feathers in B-10. Turn the board upside-down and pull the pen toward you. Outline the leaf shapes. Draw the central leaf veins. Make curved lines, gracefully radiating outward from the central vein to the leaf edge with the corner of the tip.
• C-10 diagonal dashes. Use the corner of the tip to make quick movements, setting the tip down and lifting off.
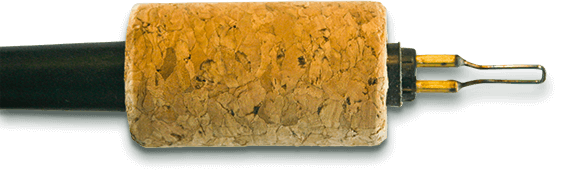
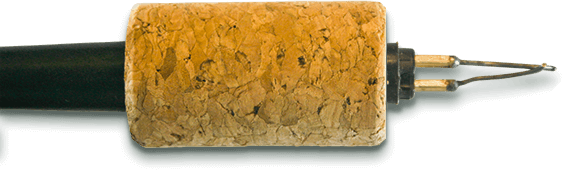
Mini J Tight Round Tip
The edge of the rounded tip of the Mini J allows you to easily make straight or curved lines in a tight radius, and it can also be laid flat on its side and used as a shader in tight spaces.Mini J | Pen Instructions
• D-1 random squiggles. Use the thin edge of the tip held at an 80° angle to the wood.
• D-2 diagonal wide lines. Hold the pen at a 45° angle to the wood and use the flat surface of the tip laid on its side.
• D-3 vertical lines. Draw from top to bottom using the thin edge of the tip.
• D-8 crisscross lines. Draw with the tip flat on its side.
• D-9 checkerboard. Make the vertical lines in the darker squares with the edge of the tip using higher heat and placing the lines closer together. Draw the horizontal lines in the lighter squares with lower heat and place the lines farther apart.
• D-10 curved wavy lines. Use the thin edge and the flat surface of the tip in each line by rotating the tip between your thumb and fingers as you move across the wood grain.
• E-1 vertical wavy lines. To create a halo effect of light golden “scorch,” turn up the heat and make vertical lines while rolling the pen between your fingers so you alternate using the wide edge and thin edge of the tip.
• E-2 spiral. Using the thin edge of the tip and beginning at the four outer corners, first make thin, curved lines in each corner, which will create a blank circle in the middle. Then, rotating the wood, make short, curved connecting strokes until you reach the center.
• E-9 vertical lines. Pull the tip toward you, moving it more slowly at the bottom to darken the line.
• E-10 stippling dots. Hold the thin edge of the tip at an 80° to 90° angle to the wood and tap to create dots.
• F-1 diagonal dashes with light gold “scorch” halo effect. Turn up the heat a bit to get the halo effect.
• F-2 leaf shapes. Outline the shapes with the thin edge of the tip and fill in with the flat edge.
• F-9 stone path. Outline the shapes with the thin edge and fill in with the flat edge on a higher heat setting.
• F-10 curved contour lines. Use the thin edge of the tip.
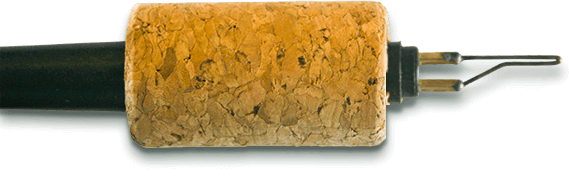
MC Micro Writing Tip
This tip glides along the surface of the wood just like a fine ballpoint pen. It is useful for very fine details, including lettering, signatures, and shading.MC Micro Writing Tip | Pen Instructions
• G-1 alphabet. Practice writing letters.
• G-2 light vertical lines. Draw lines from top to bottom.
• G-3 fish scales. Make a curved, hooked stroke.
• G-8 fine crosshatch. Draw horizontal and vertical lines to create a crosshatch pattern.
• G-9 fine basket weave. Alternate squares with vertical lines and squares with horizontal lines. Emphasize the thickness of the lines on one edge of each tiny square to create dimensionality.
• G-10 wavy lines in random patterns. This pattern is handy for depicting wood grain and water ripples.
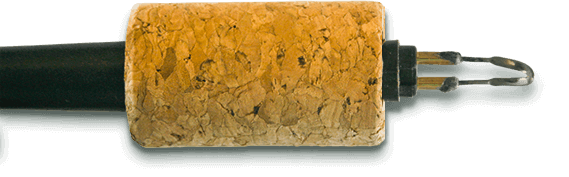
C Writing Tip
The C writing tip is just like the Micro C tip except that it is larger and has more of a curved surface to work with.C Writing Tip | Pen Instructions
• H-1 curved contour lines. Make these lines darker at the edge by going slower and using slightly more pressure. Keep the lines in the center area lighter.
• H-2 brick pattern. Outline the bricks first and then fill them with dark lines close together. If you accidentally burn too far into the light area between the bricks, gently scrape to lighten them.
• H-3 semi-circles converging in the center. This is a random pattern designed to help you practice curved lines.
• H-4 diagonal lines. Simple diagonal lines running from corner to corner.
• H-7 wide-thin pattern. Outline the shapes and fill them with dark lines close together.
• H-8 overlapping waves. An attractive pattern with curved, overlapped lines.
• H-9 textured flagstone. Outline the “flagstones” and stipple inside the shapes. Fill the dark areas between the stones with short, dark lines placed close together.
• H-10 large fish scales. Shade each “scale” with parallel lines at its base to indicate overlapping and create a sense of depth.
• I-1 herringbone pattern. A simple line pattern filled with short lines going in opposite directions.
• I-2 your initial. Lightly sketch your initial in pencil. Leave the inside area of the letter blank and surround it with stippling.
• I-3 crosshatch. A simple crosshatch pattern, useful for many applications.
• I-4 spiral. Begin by filling the four corners of the square with short, curved strokes, rotating the wood so you pull the pen tip toward you. Then, make short, curved connecting strokes, working toward the center from the outside of the circle. Don’t try to draw the spiral line all in one stroke.
• I-5 curved line basket weave. Alternate two-strand and three-strand basket weave and use curved lines between the woven areas.
• I-6 stippling dots. Hold the tip at an 80° to 90° angle to the wood and tap.
• I-7 grass clumps. Turn the sampler upside-down and pull the tip toward you in short, curved strokes to create clumps of “grass.”
• I-8 wavy lines. Move your whole hand and the pen tip in graceful curving motions.
• I-9 random cross pattern. Simply write with the wood burning tip as you would with a pen. Touch down lightly and lift off gently to prevent blobs.
• I-10 horizontal broken dash lines. Set the heat on medium low to prevent blobbing and scorching as you burn the short dashes.
S Shading Tip
The curved, flat edge of the shader can create a huge variety of effects and cover large areas of shading quickly and smoothly. Experiment with different heat settings.S Shading Tip | Pen Instructions
• J-1 star. Using the flat, curved surface of the tip and rotating the wood as you work, pull shaded bands of woodburning from the outer edge of the square toward the center, leaving the center area lighter. Then, using a scraper, scrape rays of light coming from the central light area and extending into the dark shaded areas. This is very dramatic in night scenes.
• J-2 random swirls. Draw with the flat, curved surface of the shader.
• J-3 wavy vertical lines. Draw with the flat, curved surface of the tip.
• J-4 stippling dots and dashes. Hold the shader upside-down with the tip at an 80° to 90° angle to the wood and tap on the surface. Use a low heat setting to keep the effect light and delicate.
• J-5 crisscross. Create horizontal and vertical bands with the flat, curved surface of the shader.
• J-6 soft feathers. Turn the wood sideways so you can pull the tip toward you. Make the central quill line of each feather with the tip of the shader. Then, using the flat, curved surface of the tip, gently make curved lines to represent the feather vanes coming from the central quill line. Straight lines on feathers will look unnatural.
• J-7 large fish scales. Use the flat, curved surface to create curved, hooked shapes.
• J-8 wavy lines. Use the flat, curved surface of the shader and vary the pressure and the speed to get the dark and light effects in each line.
• J-9 checkerboard pattern. Make the darker squares with the flat, curved surface of the shader. Turn the tip upside-down to make the lighter squares with vertical lines. You can also draw the lines around each small square with the upside-down tip.
• J-10 overlapping waves. Use the flat, curved surface of the shader to draw the curved lines of the waves.
CRAZY QUILT: PROJECT MATERIALS AND TOOLS
MATERIALS:
- Basswood, 1″ (25mm) thick: 12″ x 12″ (305mm x 305mm)
- Scraps of basswood
- Acrylic paint: yellow ochre light, raw sienna, brown ochre, quinacridone gold, burnt sienna, raw umber, burnt umber, Van Dyke brown
TOOLS:
- Woodburner and pens or tips, such as Colwood: Mini J, or tight round; C-1, or small calligraphy; S, or shading; C, or writing; and MC, or micro writing
- Basic pyro kit (see page 108 of Pyrography Volume 3 2013)
- Paintbrushes
The author used these products for the wood burning project. Substitute your choice of brands, tools, and materials as desired.
Other Pyrography Titles
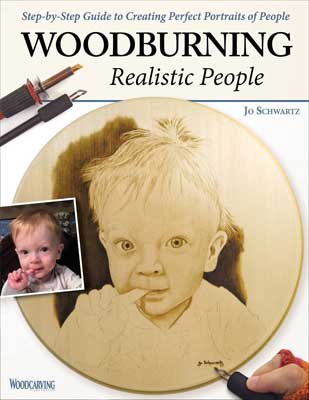
Woodburning Realistic People
Turning a photograph of a loved one into a realistic pyrography pattern is easier than you think! Discover the art of portrait burning, and start creating perfect likenesses of your favorite people in wood.

Woodburning with Style
This beautifully photographed, hands-on instructional guide to the art of pyrography will take you on a journey of skill-building lessons to create nine attractive projects.
Get Exclusive Email Offers And Receive 15% OFF On Your First Book Order!
Trackbacks/Pingbacks