


8 Scroll Saw Tips of the Trade
We might be bias but scroll sawing is our favorite past time! Some days we just want to spend more time actually woodworking instead of doing the little things like shop clean up and sanding. That’s why we’ve compiled 8 tips of the trade from our readers to make life easier and give you more quality time with your scroll saw!
New archive CDs are now available – 24 Issues of Scroll Saw Woodworking & Crafts:
Hundreds of projects, patterns, expert tips, technique lessons, and more – all in one place! Each CD archive contains 12 scanned editions of Scroll Saw Woodworking & Crafts magazine.
Get 12 magazines, including 3-holiday issues, for just $34.95 – that’s less than $3 an issue!
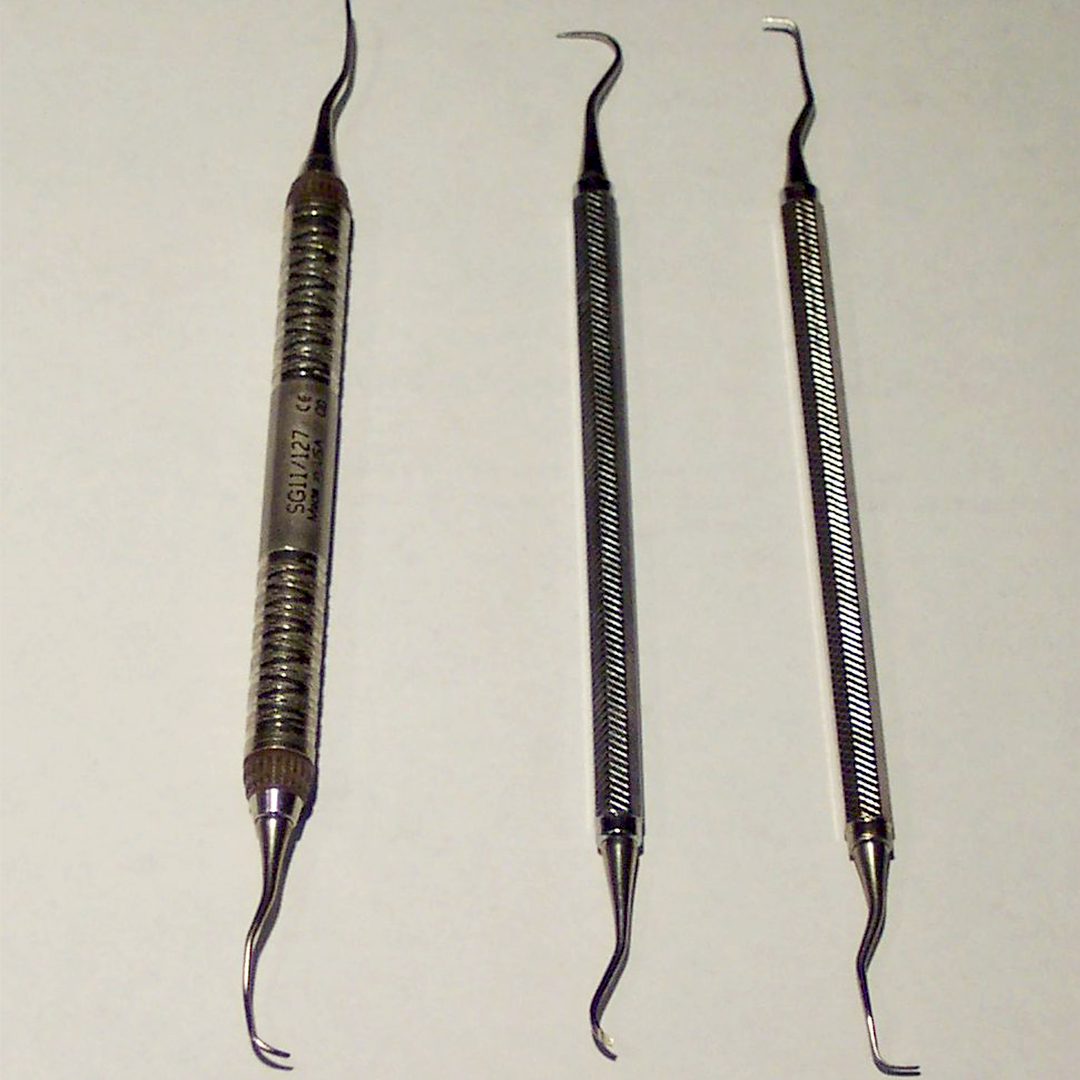
Using Tiny Tools for Intricate Fretwork
Rodney Plowman of Oakboro, NC, suggests that you get old dental picks from your dentist. The tools eventually wear out to the point the dentist can’t use them anymore. Rodney found that they still work great for cleaning sawdust or burrs from delicate frets or veins. – Originally featured in Scroll Saw Woodworking & Crafts, Issue 24, Fall 2006 Issue.
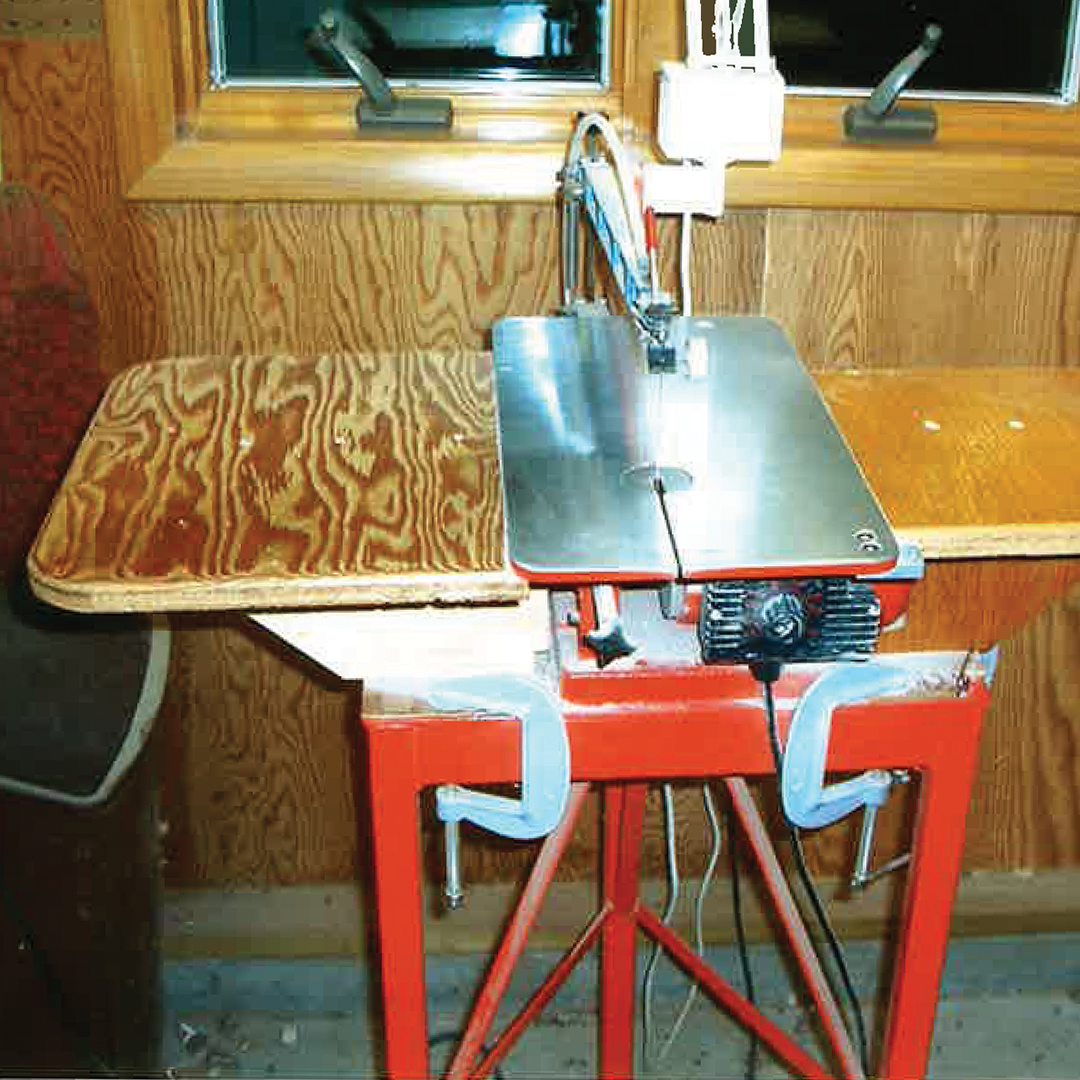
Making a Scroll Saw Table Extension
I had trouble while I was working on a large project—my saw table was too small. Using scrap plywood, I built extensions that clamp onto my saw base. It’s easy to make extensions for a saw with a square table, like an Excalibur or Hegner. For tables with a different shape, trace the shape onto a piece of tempered hardboard and use it as a template while you cut the plywood. – Jerry Jones, Winamac, Ind. Originally featured in Scroll Saw Woodworking & Crafts Magazine, Issue 48, Fall 2012.
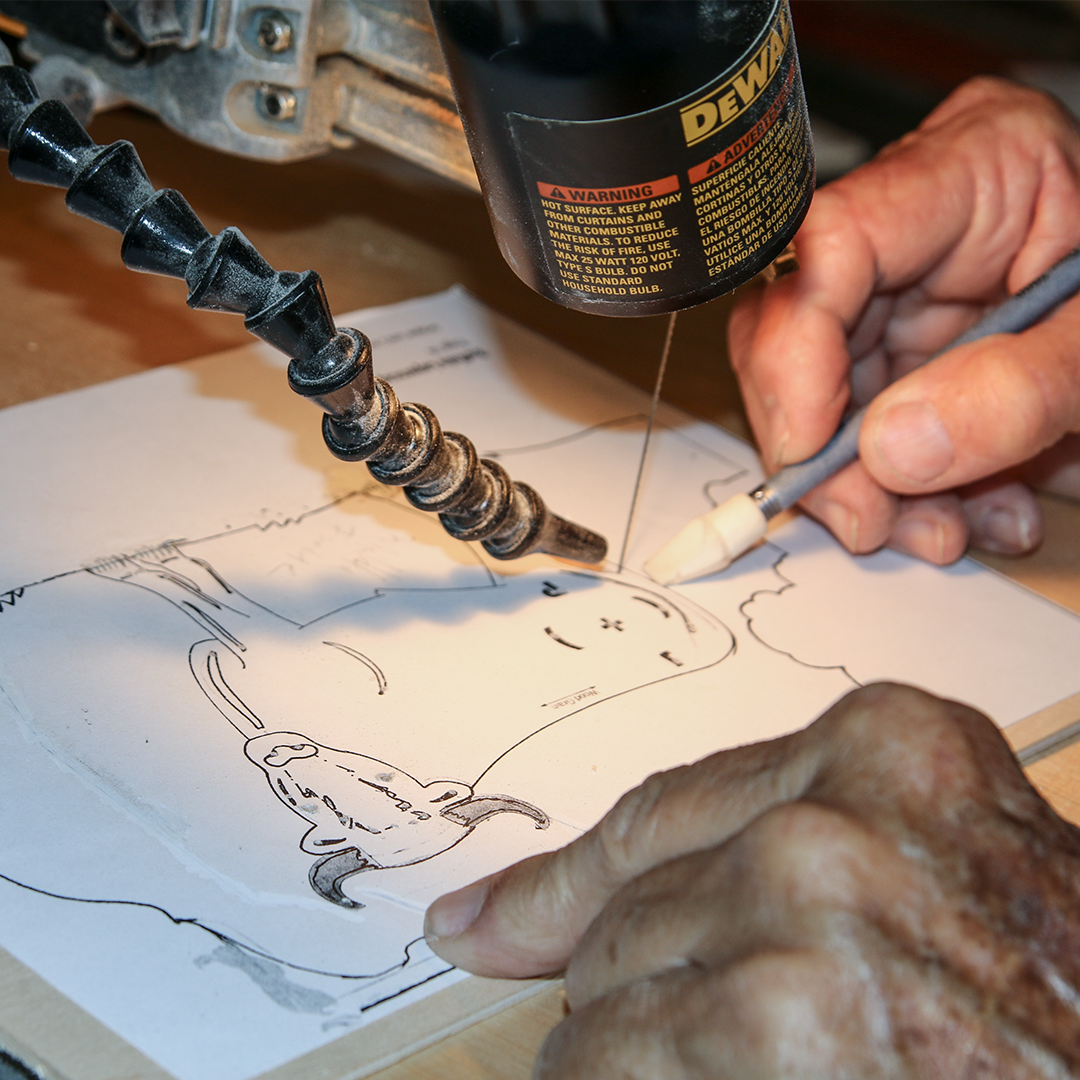
Keeping Your Fingers Safe
To keep your skin away from the blade, use a slip-on eraser on an unsharpened pencil. The eraser is small, grips the wood, and is much easier to replace than your fingertips. – Don Nichols, San Antonio, Texas from the Scroll Saw Woodworking & Crafts, Issue 67, Summer 2017 Issue.
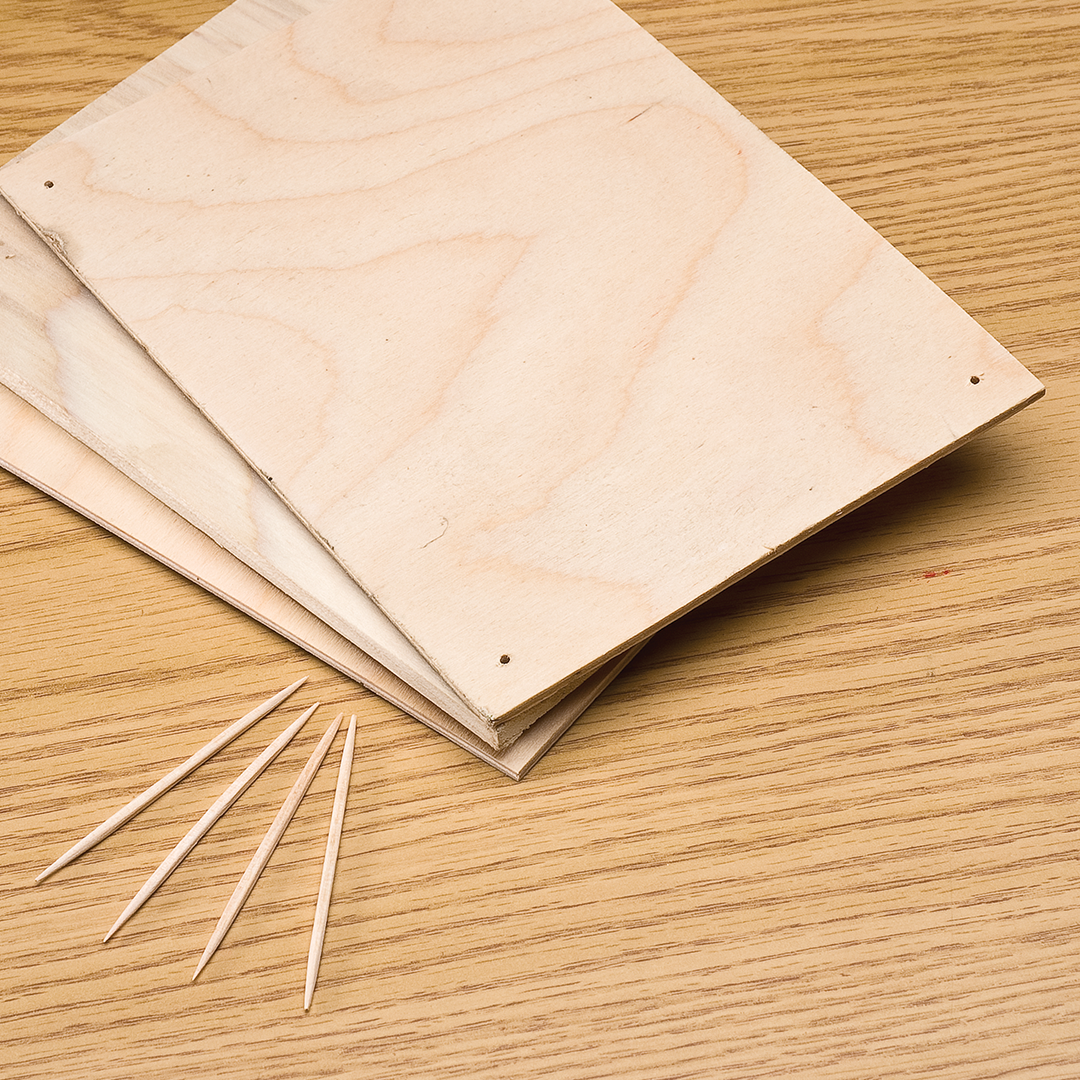
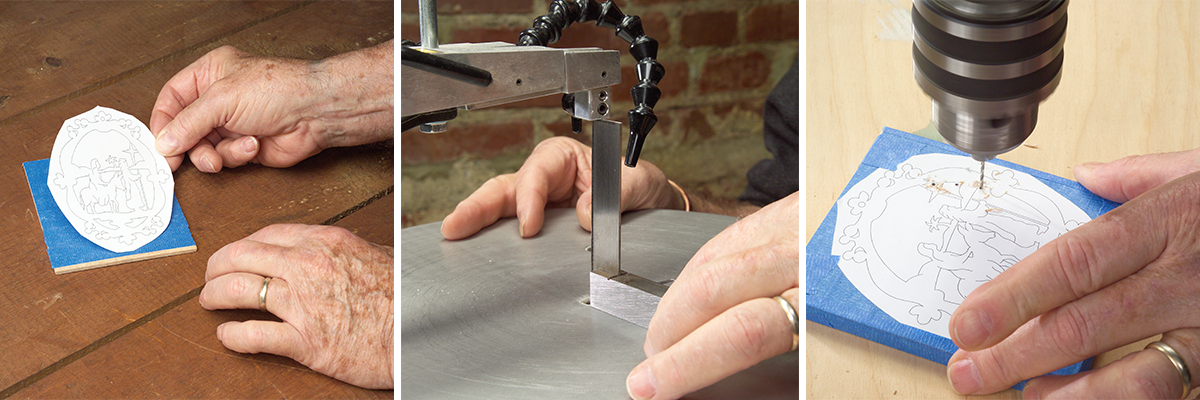
Attaching Blanks for Stack Cutting
Instead of glue, tape, or metal brads, I use wooden toothpicks to hold a stack of blanks together. Wooden toothpicks will not scratch your saw table and if you accidentally cut through one, it won’t break the saw blade. Most round wooden toothpicks are approximately 5/64″ diameter holes where I want to place the toothpicks. Apply a little glue to the toothpicks and slide them into the holes. After the glue dries, trim the toothpicks flush with the top and bottom of the blank. – Alfred Peirolo
North Fort Myers, Fla. Originally featured in the Scroll Saw Woodworking Issue 43, Summer 2011 Issue.
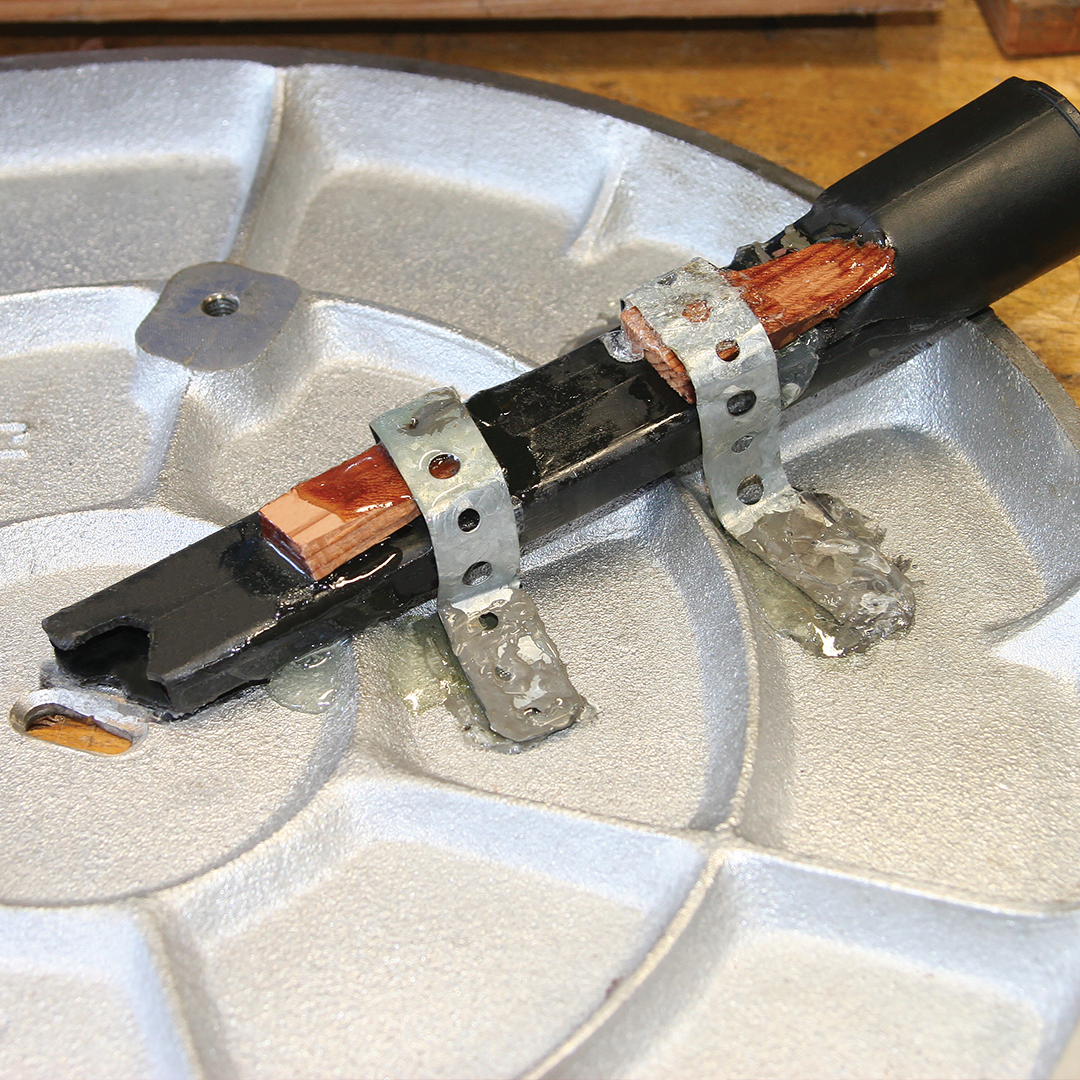
Keeping the Shop Clean
Instead of buying a dust collector for my scroll saw, I created my own from an old vacuum cleaner nozzle. Epoxy a few rare earth magnets to the nozzle. Then, you can position the nozzle wherever you want and remove it as necessary. I use a small rubber squeegee to push dust and wood bits into the hole to be sucked up. If you don’t have any rare earth magnets, or the bottom of your saw is uneven so magnets wouldn’t hold well, use pipe strap iron instead. Epoxy it to the saw and secure the nozzle with a few wooden wedges as needed. – Lee Hockman, Sugar Hill, Ga. Featured in the Scroll Saw Woodworking & Crafts Issue 71, Summer 2018
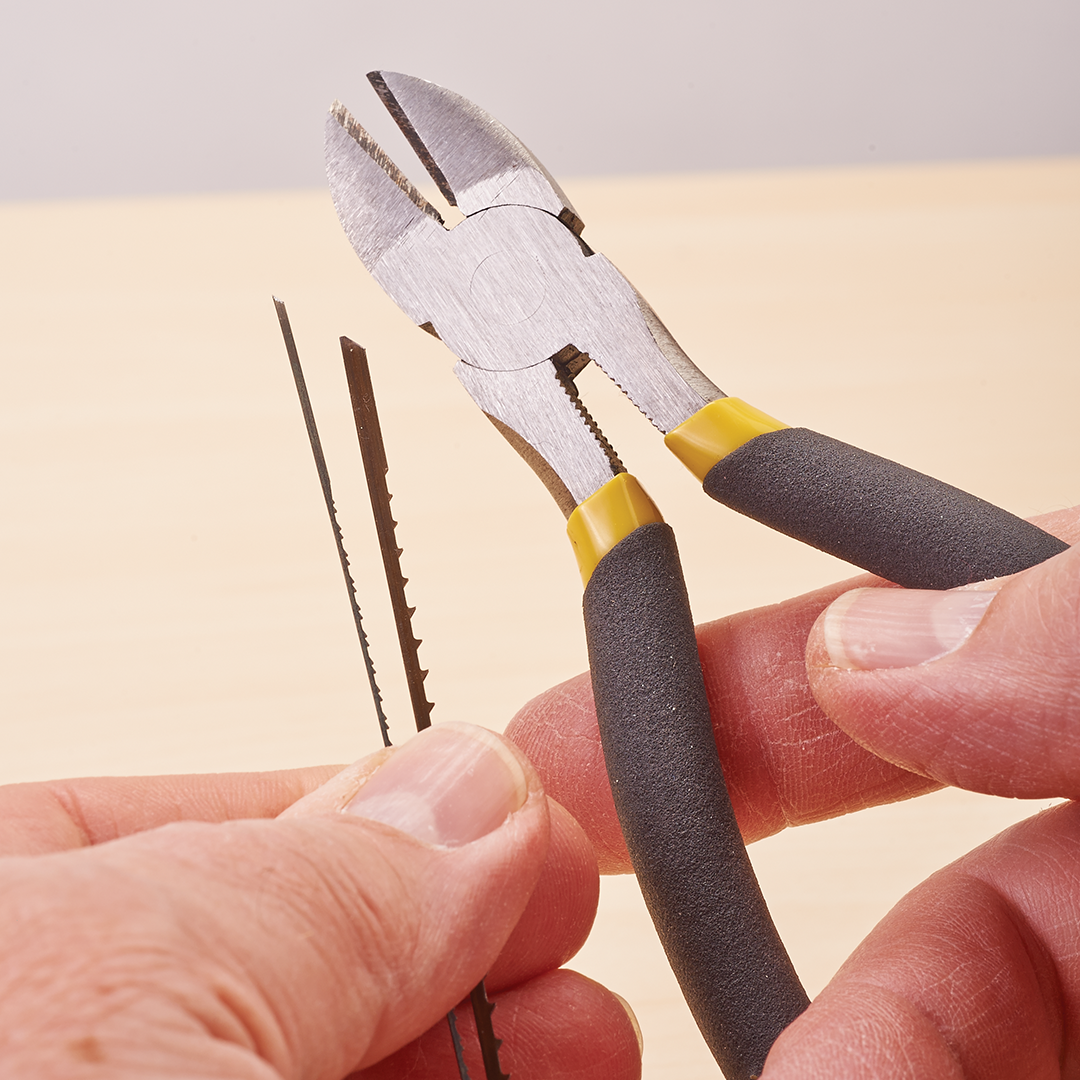
Clipping Scroll Saw Blades
When you’re cutting fretwork, the end of the blade bends and distorts as you unclamp, move, and reclamp it. This distortion makes it difficult to feed the blade through small blade-entry holes, especially if you feed the blades from the bottom. Clipping the excess off the blade can make the blade easier to feed. Install the blade in the saw, and then free the blade from the top clamp. Note the mark the blade clamps make on the blade, and use side cutters to nip the blade off at an angle about 1/8 ” above the mark. This leaves enough blade to clamp securely, but not enough to distort. Plus, the angle helps the blades fit into the blade-entry holes more easily. If you feed from the top, install the blade, free it from the bottom clamp, and nip the bottom of the blade off at an angle. In either case, be careful that you don’t cut off so much blade that you can’t secure it in the clamps. I also rub the blade-entry holes with a small pencil. The pencil makes the holes black and easier to see, and the pencil graphite helps to lubricate the blades as you push them through the holes. – Carl E. Jacobs, Euharlee, Ga. Featured in the Scroll Saw Woodworking & Crafts Issue 57, Winter 2014 Issue.
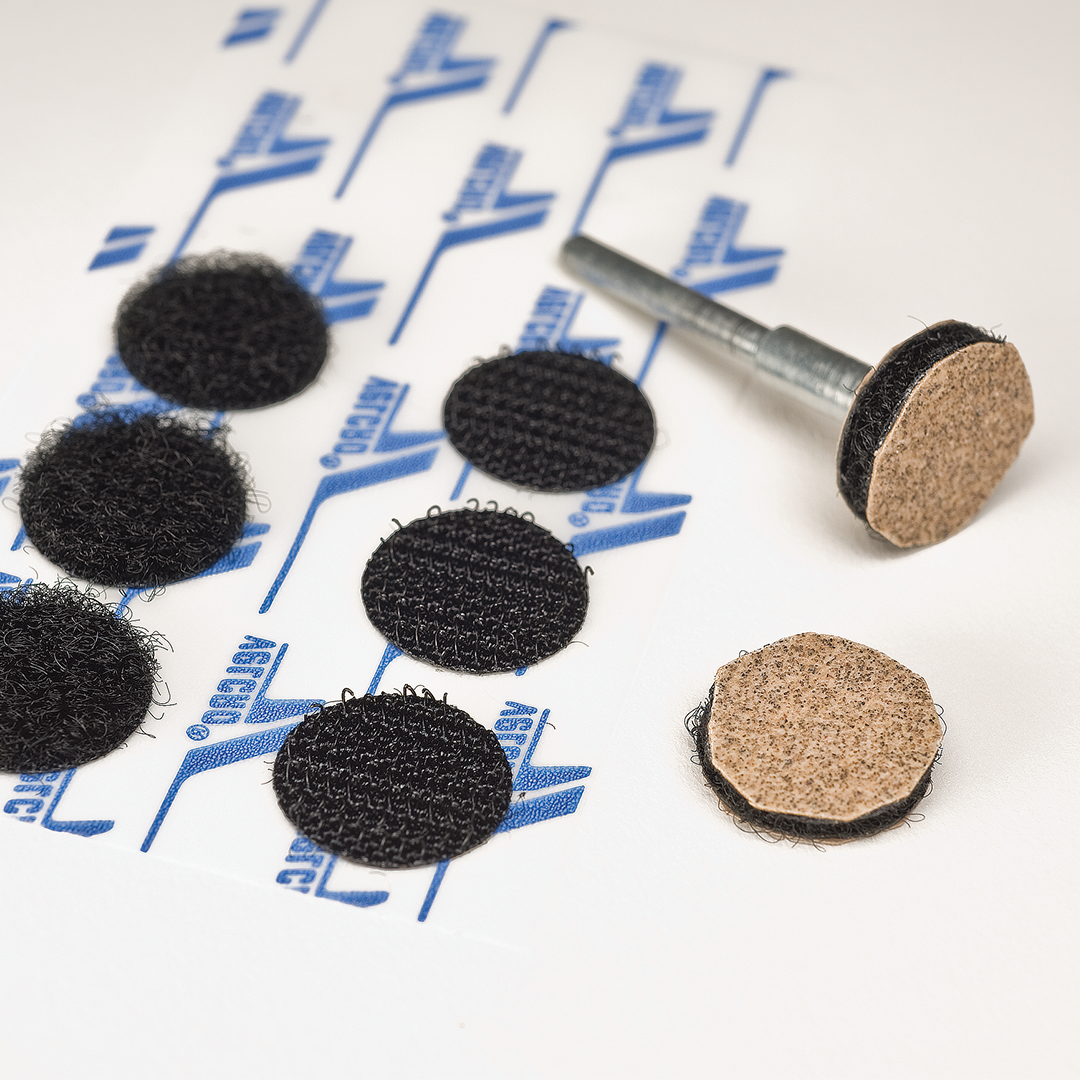
Sanding Quickly
A simple modification to the disc sander mandrels for rotary power carvers allows you to use any sandpaper instead of the pre-cut discs. The modification uses precut Velcro or hook and loop discs, making it easy to change grits. – Neil Dancer, Uxbridge, Middlesex, England. Full tutorial is featured in the Scroll Saw Woodworking & Crafts, Issue 38, Spring 2010.
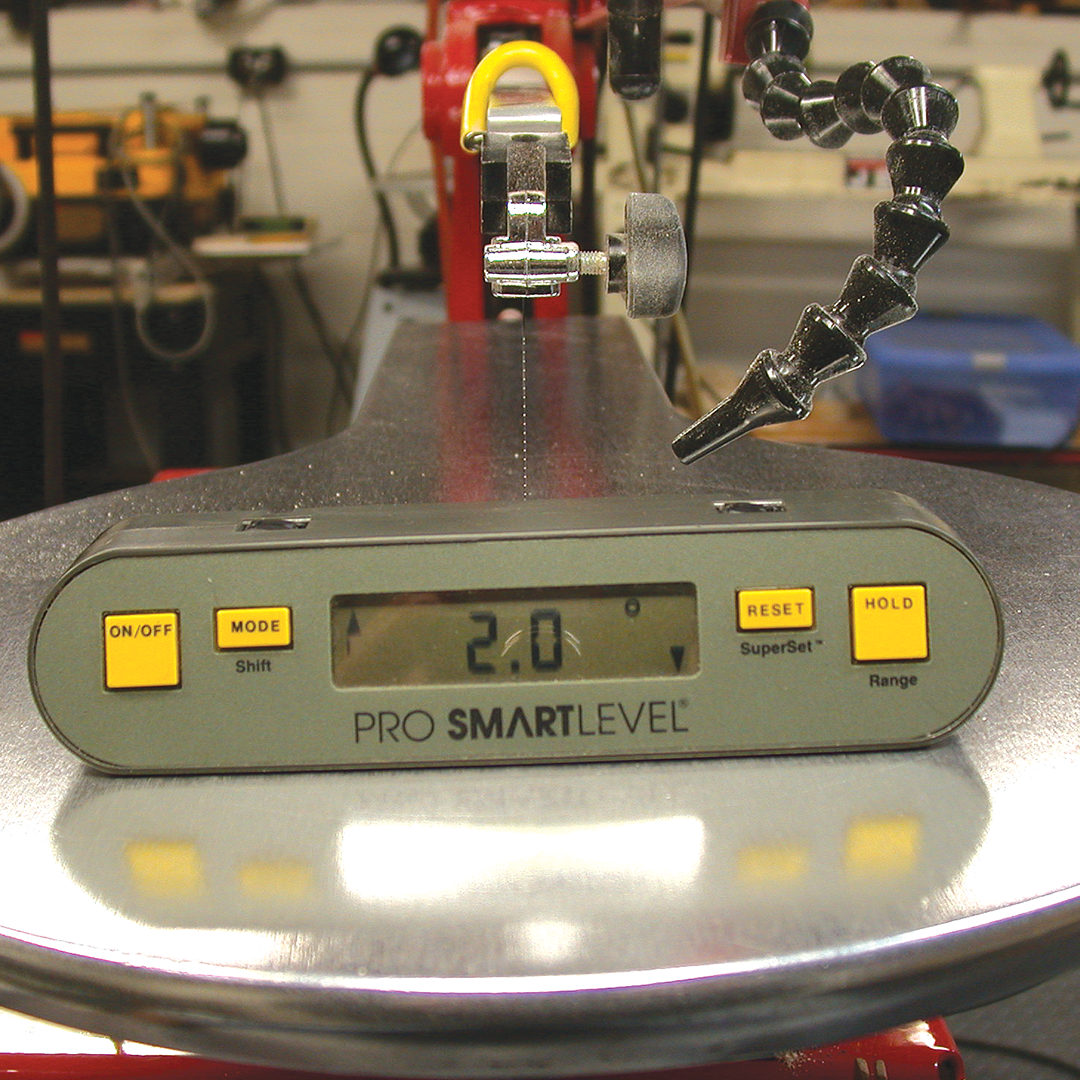
Cutting on an Angle
I do inlay work, so I am constantly changing the table angle. The angle indicators on most scroll saws are not bad, but they do leave a bit of room for improvement. The readily-available plastic angle gauges are not that precise either. Even if the gauges were precise, it is hard to see when the blade is in line with them. I have had a smart level with a digital readout for many years and decided to try it on the saw. Start by making sure the blade is absolutely square to the table using your method of choice. Level the saw so the smart level reads 0°. Adjust the saw table to the angle you want with the digital readout. It’s easy to repeat that same angle, just be sure to put the level on the same spot on your table every time. – Rolf Beuttenmuller, Bellport, NY. Originally featured in the Scroll Saw Woodworking & Crafts Magazine, Issue 28, Fall 2007.
Get Exclusive Email Offers And Receive 15% OFF On Your First Book Order!


Recent Comments