


Detail this simple smiling face by piercing through the beard
by Roger Beane
You can carve this Santa shelf sitter quickly, and it’s easy to change the expression to create a host of unique gifts. To make this piece stand out, I pierce through the beard to add depth and dimension.
Getting Started
Trace the front- and side-view patterns onto the basswood block. Cut the front view, but stop before cutting the scrap free. This gives you a flat surface when you cut the side view. Rotate the blank 90° and cut the side view. Then, return to the front view and free the scrap.
WCI Issue 81 Winter 2017
The 20th anniversary issue of the world’s best how-to magazine for woodcarvers is packed with carving patterns, how-to tips, and step-by-step projects for all skill levels.
When I paint eyes, I wear an Opti-Visor to see the small details. Before painting the hair and accents.
~ Roger Beane
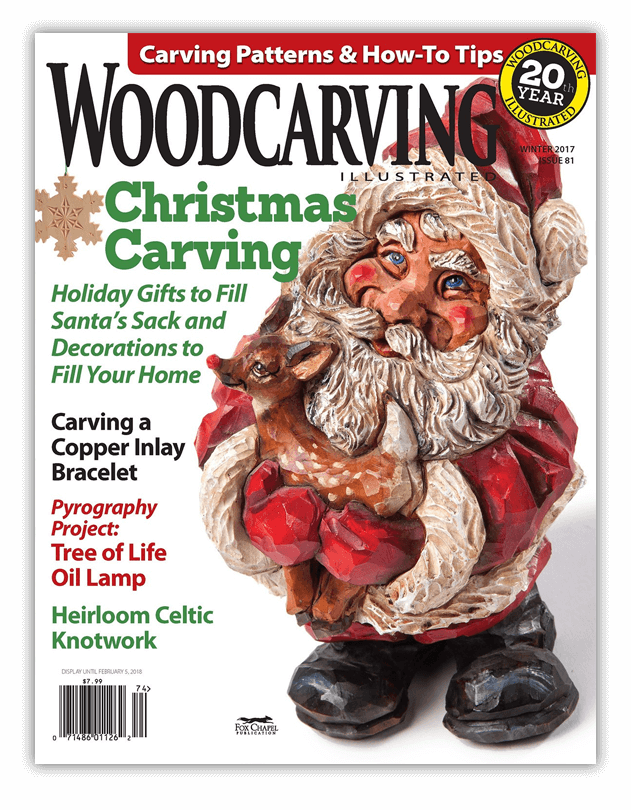
Carving a Santa Shelf Sitter: BLOCKING IN THE FACE
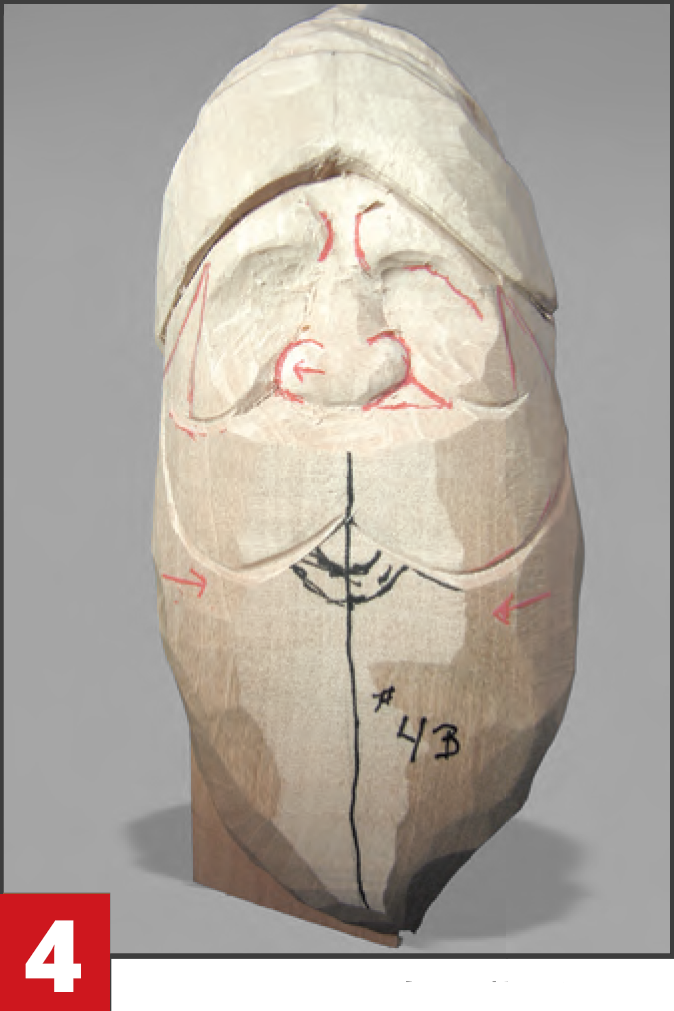
Round the carving toward the centerline. Use a carving knife. Carve above and below the fur trim with a 1/4″ (6mm) V-tool.
Separate the nose from the mustache. Use a V-gouge. Remove wood from the mustache to give the nose height. Use the knife to carve the bulbs on the sides of the nose. Remove a small triangle piece between the bulb and smile line. Shape the nose and wings. Use a 5/16″ (8mm) #7 gouge to round the bulb at an angle. Do not carve straight in. Use the same gouge to round the end of the eyebrows closest to the nose.
Carve the outline of the side of the face, the mustache, and the hair alongside the face. Use the 1/4″ (6mm) V-tool. Make a stop cut in the V-grooves with the knife and shape these areas to the stop cuts. Make the temple the narrowest part of the face to make the cheeks more prominent.
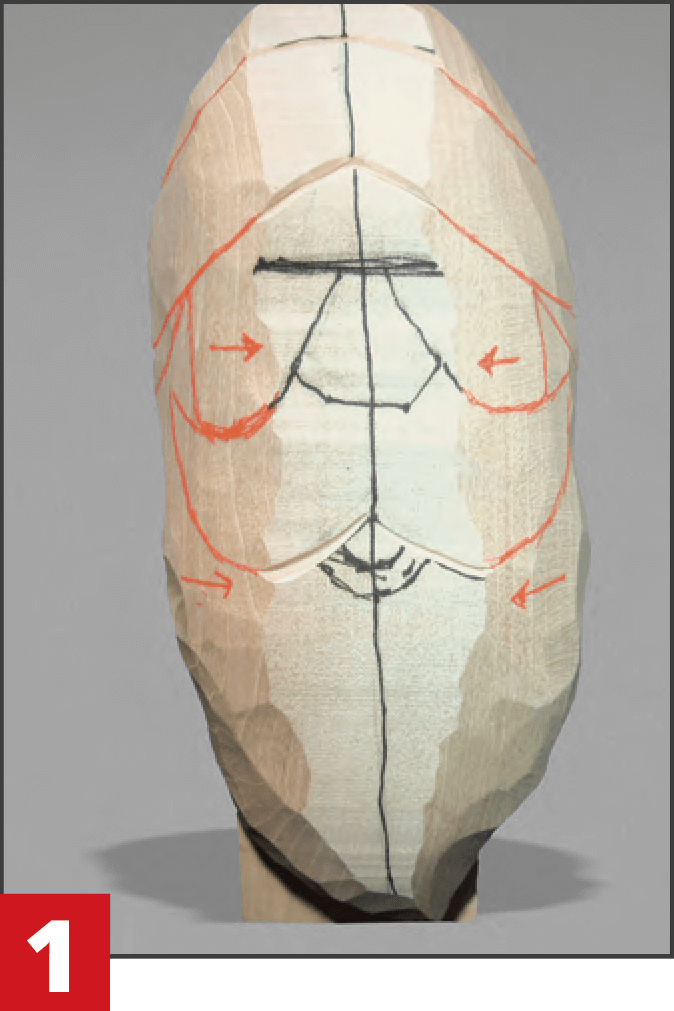
Santa: ROUGHING OUT THE CARVING
Separate the nose from the mustache. Use a V-gouge. Remove wood from the mustache to give the nose height. Use the knife to carve the bulbs on the sides of the nose. Remove a small triangle piece between the bulb and smile line. Shape the nose and wings. Use a 5/16″ (8mm) #7 gouge to round the bulb at an angle. Do not carve straight in. Use the same gouge to round the end of the eyebrows closest to the nose.
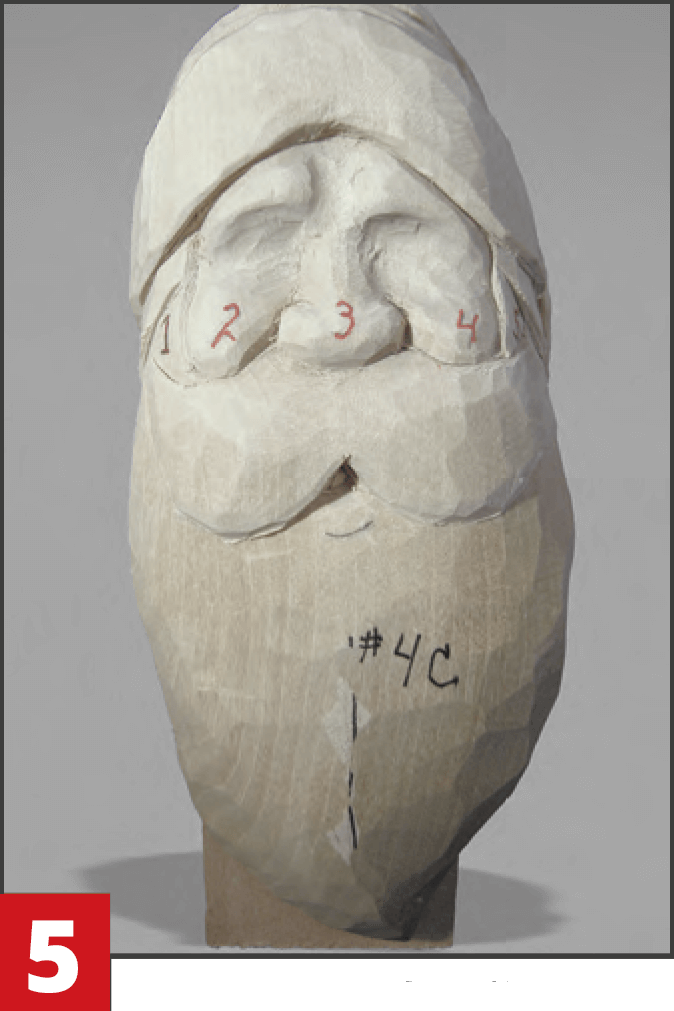
Carve the outline of the side of the face, the mustache, and the hair alongside the face. Use the 1/4″ (6mm) V-tool. Make a stop cut in the V-grooves with the knife and shape these areas to the stop cuts. Make the temple the narrowest part of the face to make the cheeks more prominent.
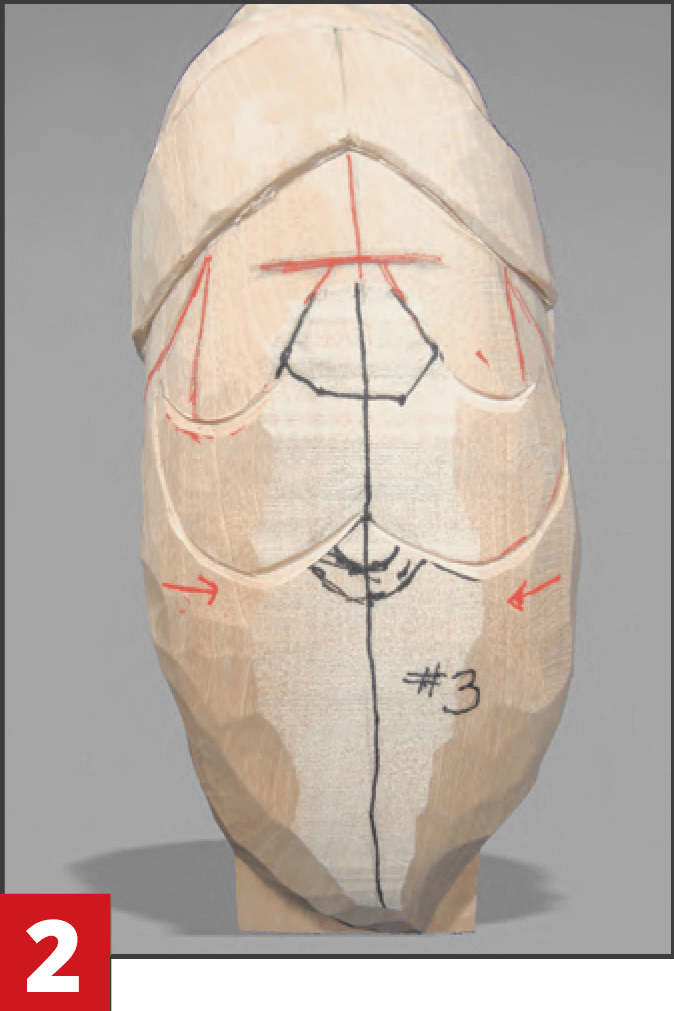
Santa Shelf Sitter: ADDING THE DETAILS
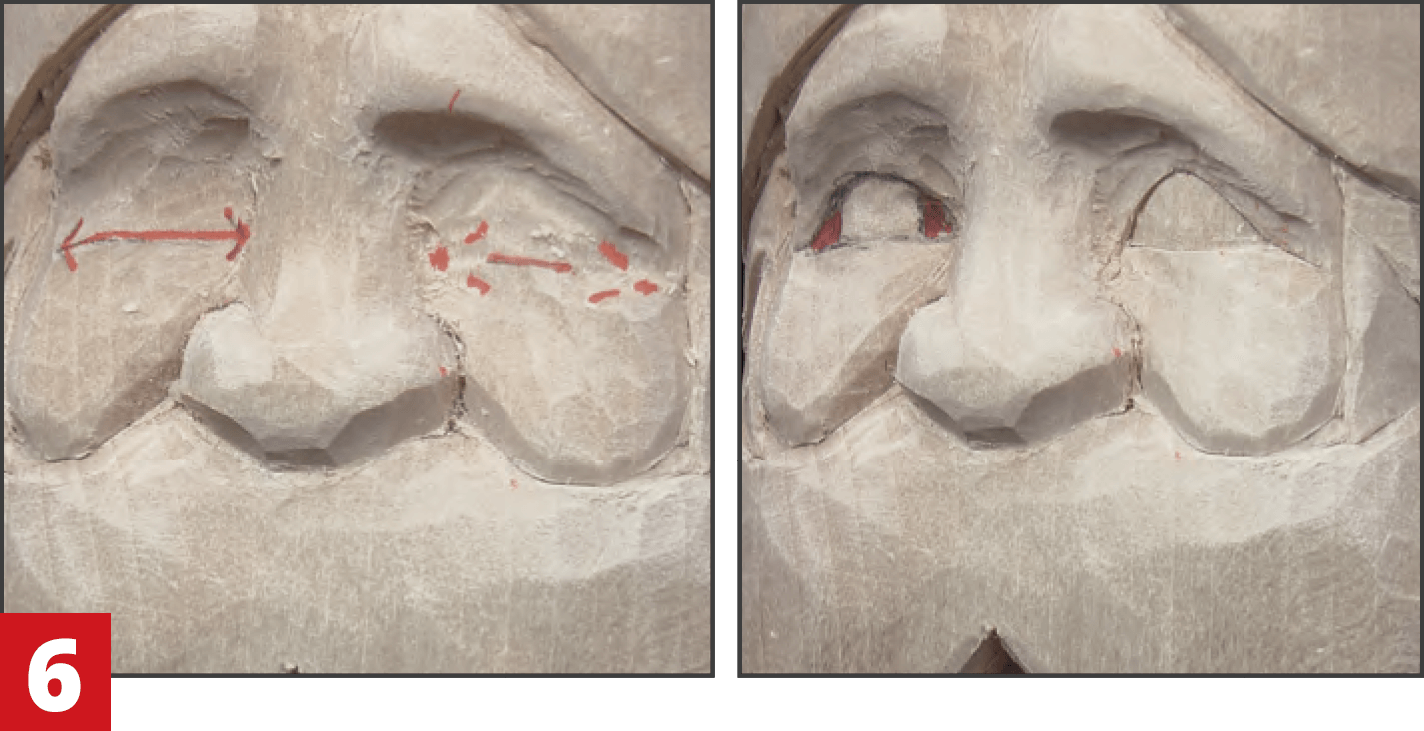
Draw the top of each bottom eyelid. Use a 1/8″ (3mm) gouge to deepen the inside and outside corners, which creates each eye mound. Use calipers to ensure that the eyes are the same size. Draw the bottom of each top eyelid. Make stop cuts on the lines with the knife. Remove small triangles from the corners of the eyes at a slight angle. Round the eyes. Carve the bottom lid under the top lid.
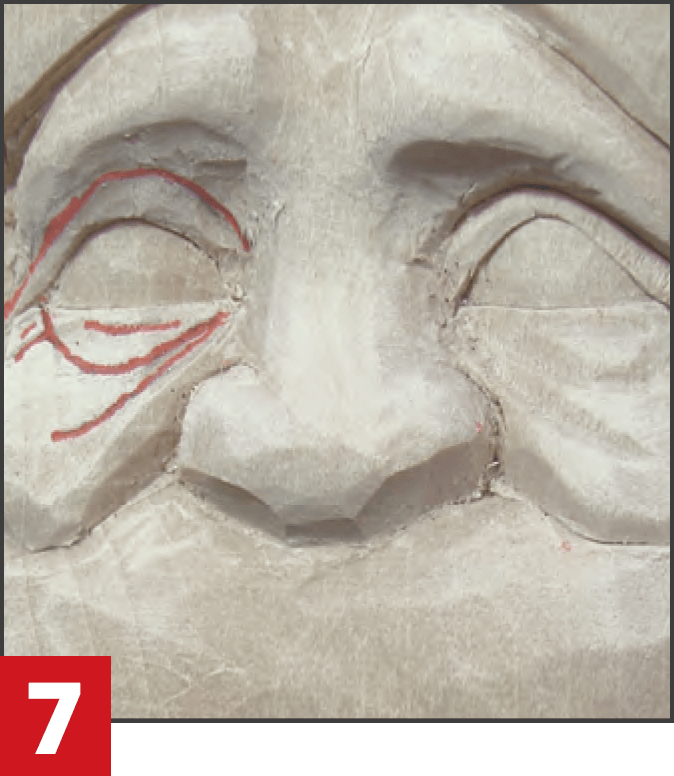
Carve the top of each upper eyelid. Use a sharp 1/8″ (3mm) V-tool. Use the same tool to carve the bags under the lower eyelids, the crow’s-feet, and the wrinkles.

Make long, sweeping S-shaped cuts in the beard. Use the 7mm #11 gouge. Start at the bottom. This technique, which I learned from Harold Enlow, produces soft-looking hair. Switch to a 3/16″ (5mm) #11 gouge, and make more S-shaped cuts adjacent to the previous cuts. After a short distance, merge with the previous cuts. Repeat the process with a 1/8″ (3mm) #11 gouge. Avoid any repeating pattern. Do not leave any flat spots. Deepen some random areas and use the knife or V-tool to carve accents.
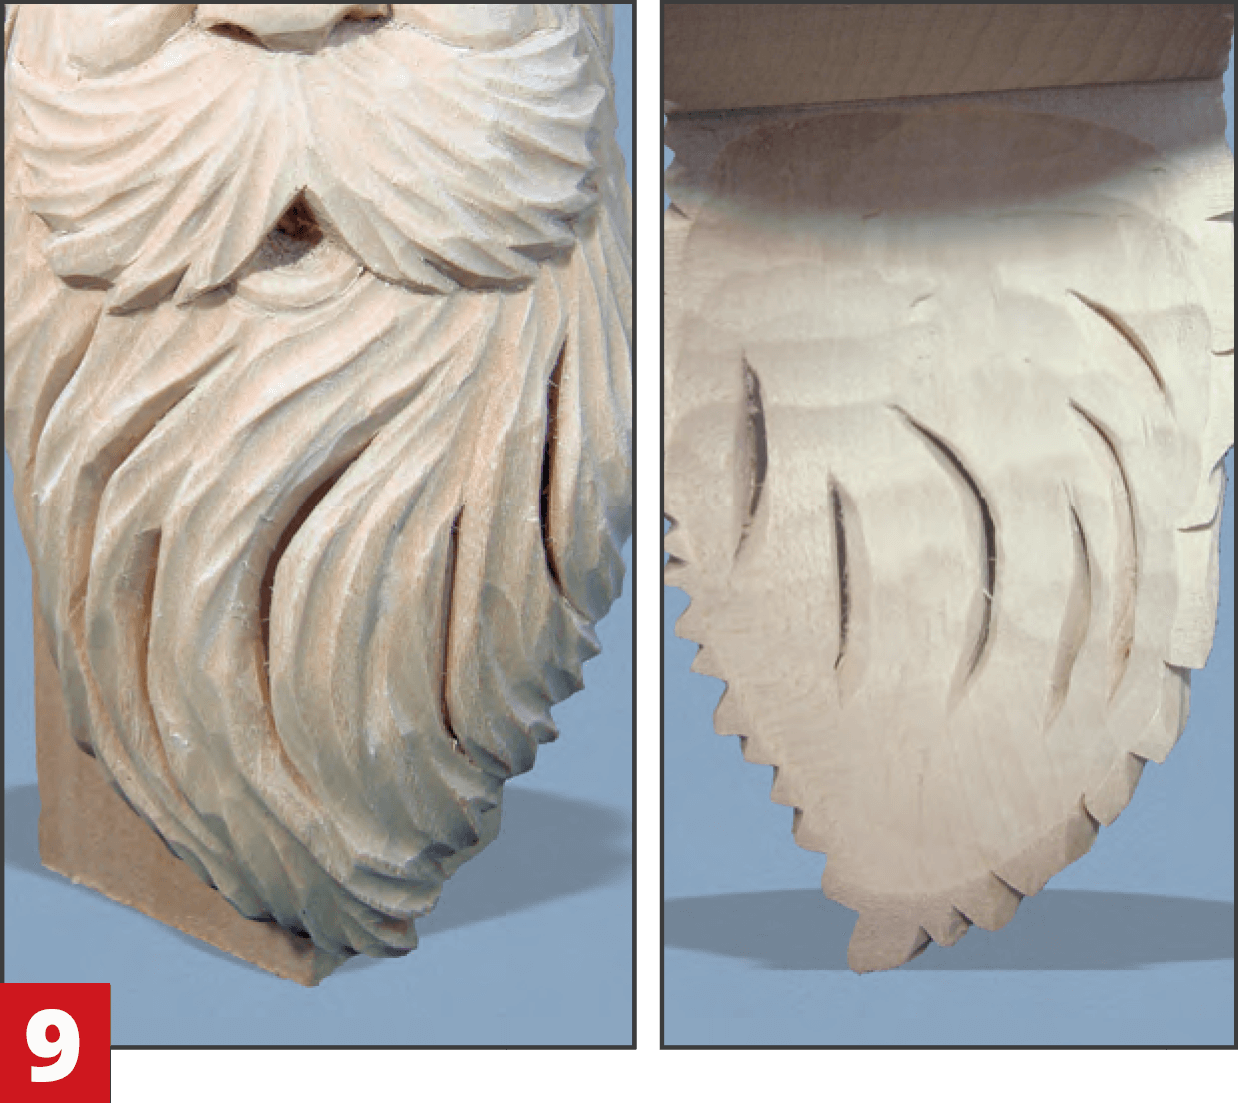
Mark the areas to pierce through in the beard. Use a bent 3/8″ (10mm) #5 gouge to undercut the beard. Then, use the knife to pierce through the marked areas from front to back. Work from both sides to make the pierced slits larger and smoother. I learned this from Mark Gargac.
For More Instruction on Carving a Santa Shelf Sitter Issue 81 of Woodcarving Illustrated
The 20th anniversary issue of the world’s best how-to magazine for woodcarvers is packed with carving patterns, how-to tips, and step-by-step projects for all skill levels. We offer plenty of carving ideas for Christmas gifts and decorations, plus many great projects unrelated to Christmas that will make terrific gifts.
For More Great Tutorials Subscribe to Woodcarving Illustrated
Get Exclusive Email Offers And Receive 15% OFF On Your First Book Order!
Article by Roger Beane
Roger Beane is a retired middle school teacher who started carving in the early 1980s. He carves a variety of caricatures and Christmas items and teaches carving classes. He lives in Oskaloosa, Iowa, with his wife, Andrea (who helped him write this article).
Holiday Wood Carving Titles
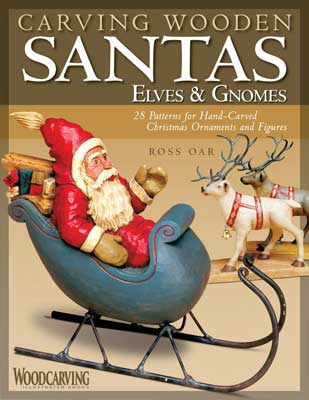
Carving Wooden Santas, Elves & Gnomes
Woodcarving Illustrated Books presents its latest how-to guide for carving the jolly man in red and his crew of friends – elves, gnomes, reindeer and much more! With more than 20 delightful patterns from accomplished carver Ross Oar, you’ll craft the adventurous Luge-Riding and Sky-Diving Santas, a Cowboy Santa, the classic Sledding Santa, European-inspired Olde World Santa and more.
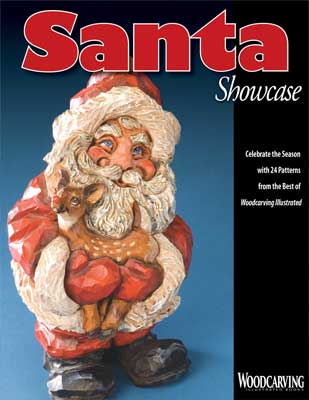
Santa Showcase
24 of the best and most loved Santa patterns from the pages of Woodcarving Illustrated. Includes four step by-step projects, finishing tips, and more.

Recent Comments