


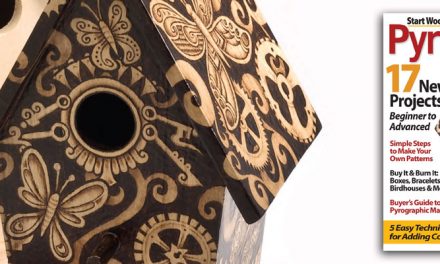
Summer Woodburning Contest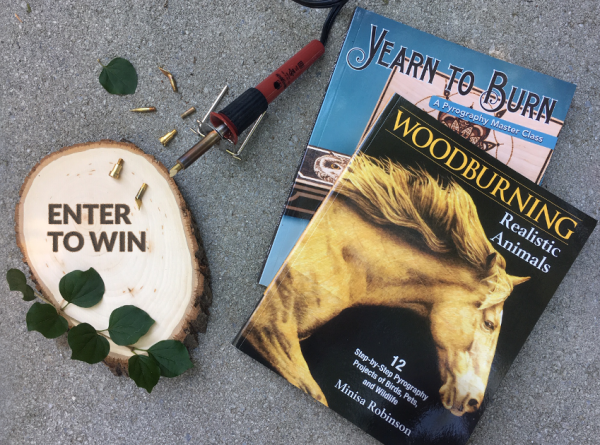
Click here to enter! Five winners will recieve a copy of Yearn to Burn Book by Simon Easton, Woodburning Realistic Animals Book by Minisa Robinson, the Walnut Hollow Creative Versa Tool and wood blanks. Contest ends 8.31.19!
 I still get a thrill out of starting work on a new commission for a customer. The excitement of developing a design to satisfy the needs of that individual, to make real the intangible idea in their head of a piece that they are envisaging, is an honor and a pleasure. They’re not buying an anonymous mass-produced item from a generic store, they are a crucial part of creating something unique, something individual, something that will be cherished by the recipient for years to come. The item we create together is an original piece of inspired consequences, a project that has only come into fruition because of the personality, ideas, preferences, and history of both craftsperson and consumer.
Before you know it, people will be looking at what you can make and declaring that they trust you to make something special and meaningful for them, whether they are a family member, a friend, or a potential paying customer. Enjoy and treasure those moments, as they are a measure of your own abilities demonstrated through the faith that these people place in you to create something magical from just a quantity of raw materials, your trusted pyrography machine, and a sprinkling of imagination. Get inspired with a sneak peek into Simon’s new book, Yearn to Burn: A Pyrography Master Class!
Yearn to Burn: A Pyrography Master Class
Master Pyrographer Simon Easton will spark your wood burning creativity with his project demonstrations in this inspired sequel to the bestselling book Learn to Burn. With Yearn to Burn, you can follow the guidance contained within these pages recreate 14 step-by-step designs to hone your pyrography skills and confidence if the craft is still new to you. As you become more comfortable and proficient, you can tinker with the suggested projects, adding your own flair. Ultimately, once you get to the point where your head is brimming with visions of your own invention, you can take elements from Simon’s work that you find useful or helpful as a starting point to enable you to develop your own design vocabulary.
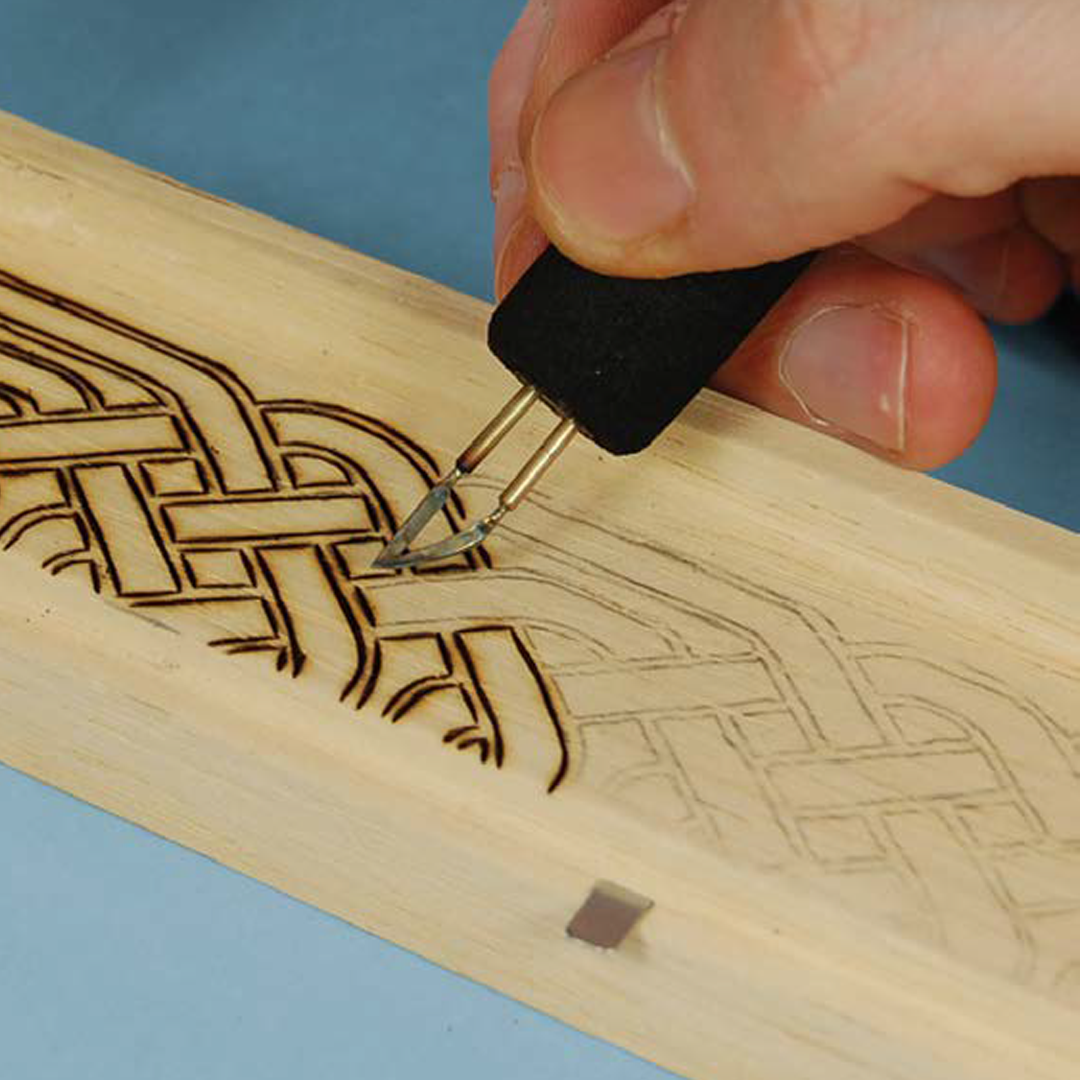
Simon’s Techniques
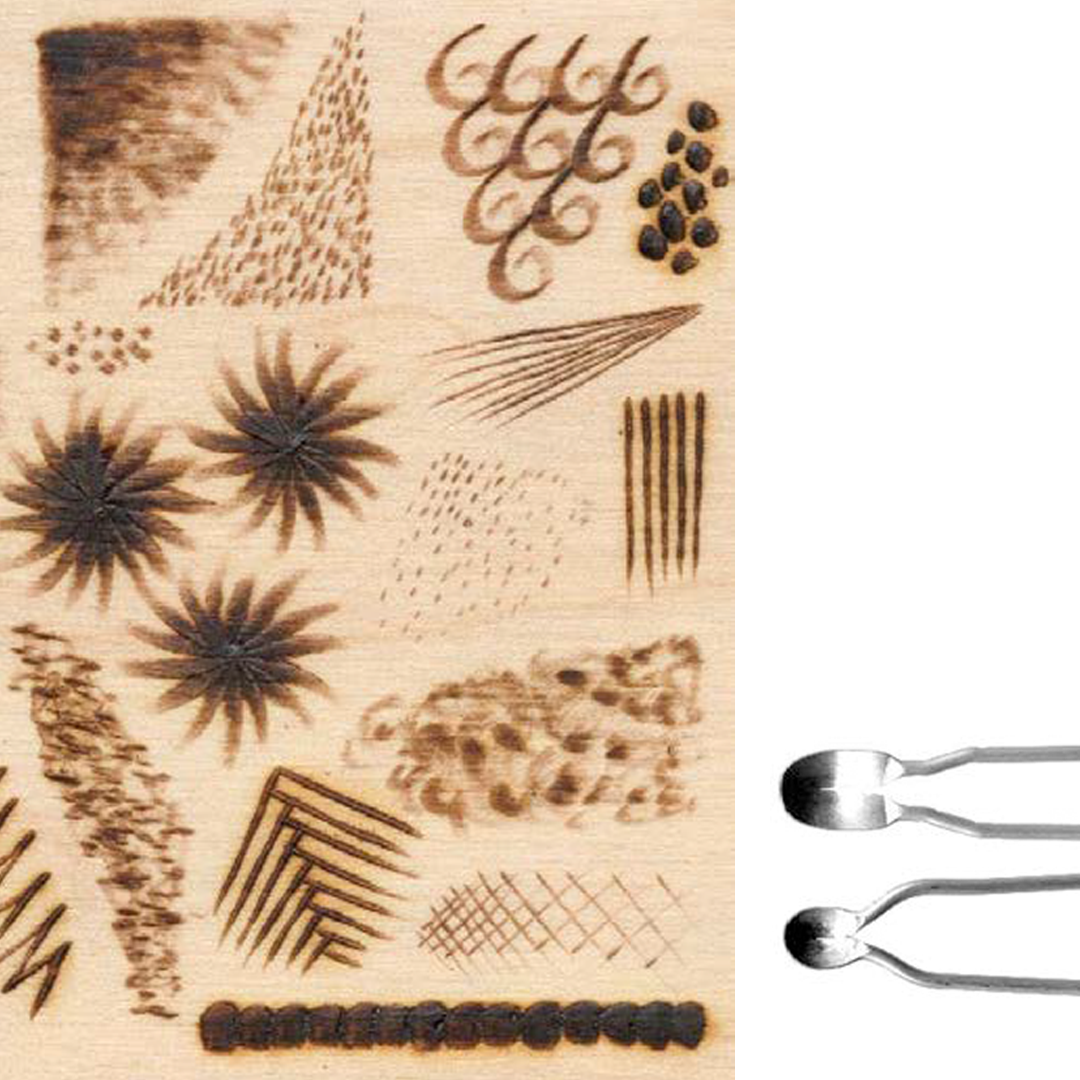
Spoon Point Nib
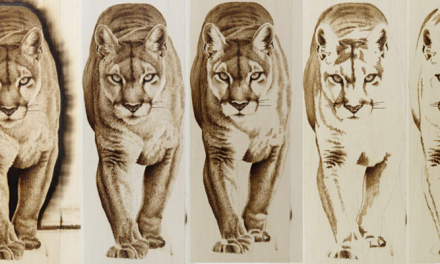
If you were restricted to working with just a single pyrography nib, my recommendation would always be to choose the spoon point nib due to its adaptability over a wide range of effects. The lip of the nib can be used to create fine lines and sharper marks. The nib itself can be rotated so that the bowl of the spoon point is brought in contact with the surface, creating a softer and broader mark that is suited to shading or similar effects. With just this single nib, I could happily work on and complete a wide range of pyrography designs and would not feel restricted or limited in any way through only having a single “weapon” in my arsenal. The spoon point is my nib of choice for versatility and flexibility.
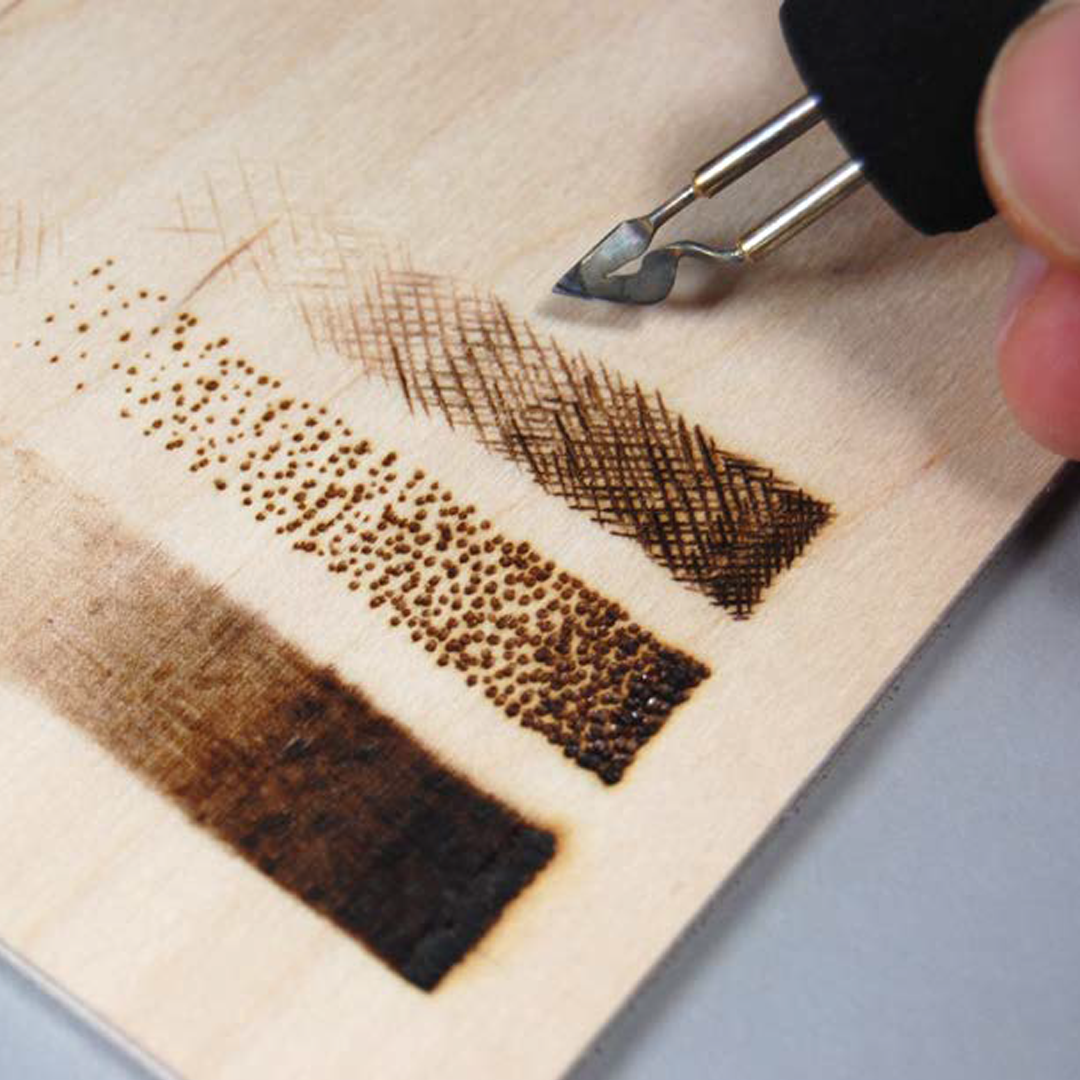
Shading
Start with a lower temperature and don’t press too hard on the surface. Try to keep the motion of your nib across the surface as smooth as possible, gliding lightly to build up the tone gradually. Stippling (the use of dots) and cross-hatching (the use of lines) are equally successful in bringing different tonal values into your work. I recommend practicing these techniques on spare pieces of wood, experimenting with the nib that you select, the way that you hold or apply it to the surface, the temperature setting, and the pressure and duration of the contact.
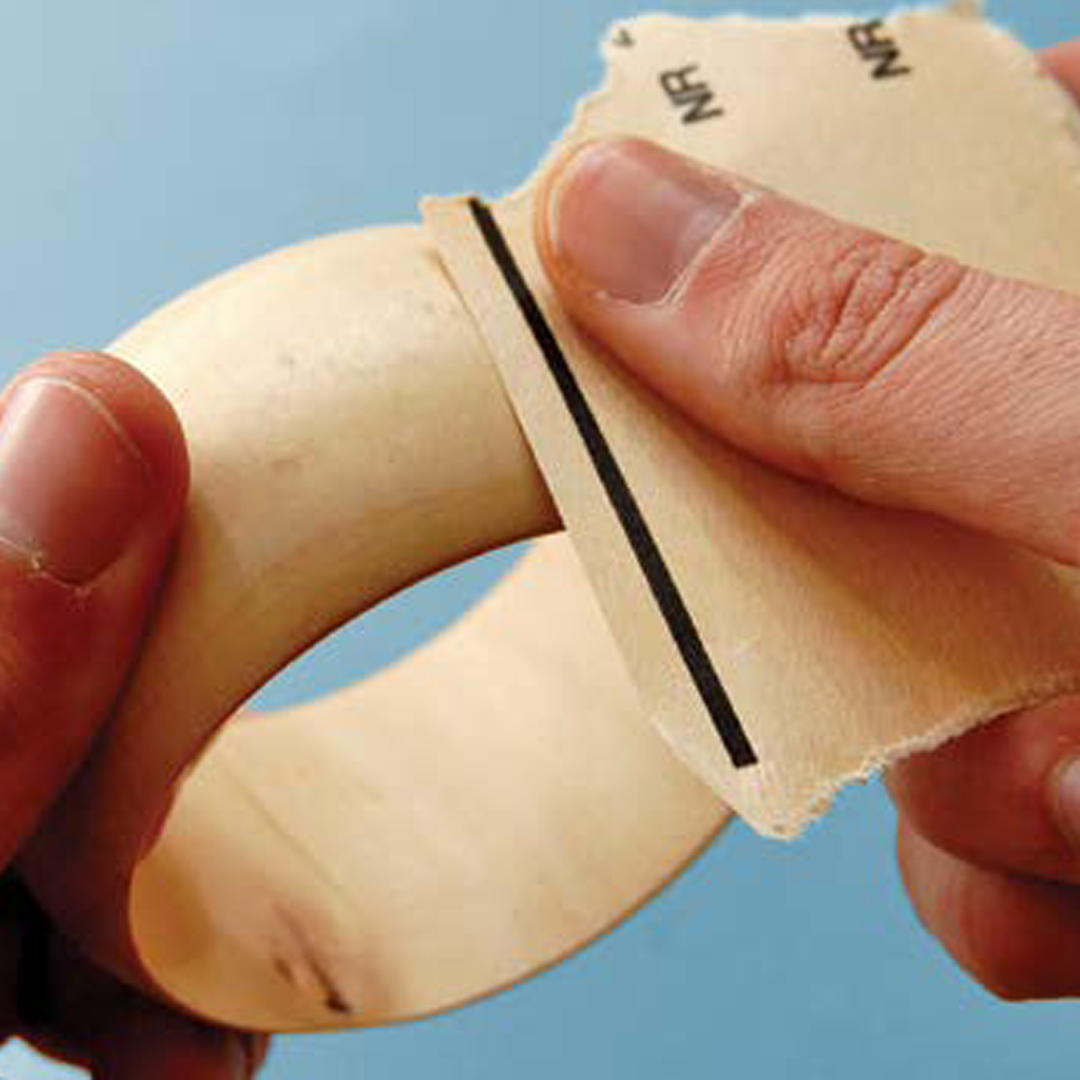
Preparing Wood Surfaces
Most wooden surfaces are best prepared for the application of a pyrography design by being rubbed down with a 180- to 320-grit sandpaper. The higher the numbered grade of sandpaper, the finer the grit is. Use coarser sandpaper if the wooden surface requires heavier sanding to prepare it for burning and work your way up through a progression of finer grades to give a smooth finish. Get the bangle blanks here!
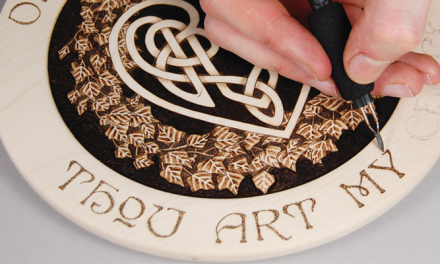
Transferring a Wood Burning Pattern
I generally use traditional tracing paper in my design work when required to do so, but there are other alternative methods that you could consider using. Graphite or carbon paper can be used as a potential substitute. These sheets are placed under a piece of paper with the design that you intend to transfer so the carbon or graphite marks transfer to the wood as you draw over the source material.
4 Projects in Yearn to Burn
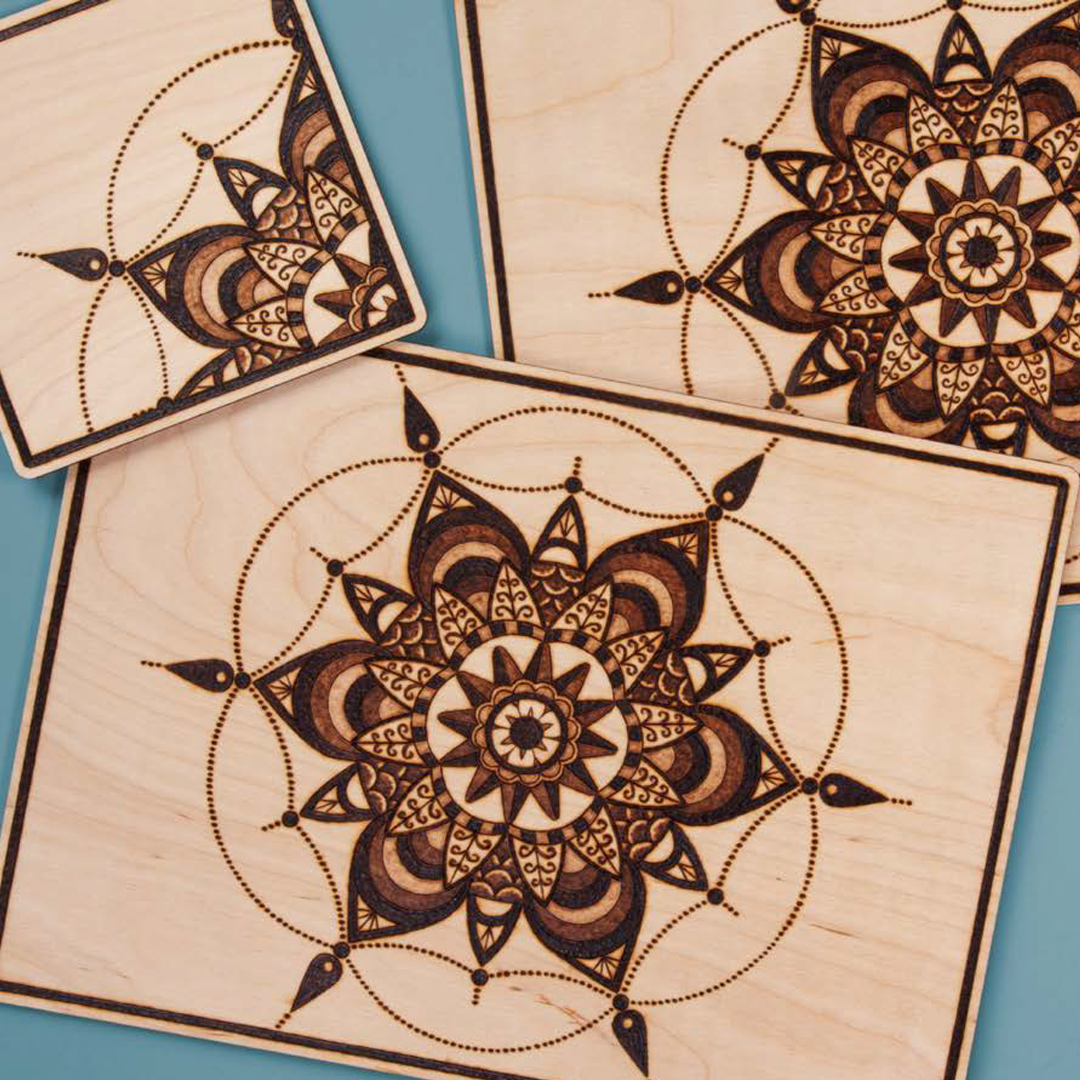
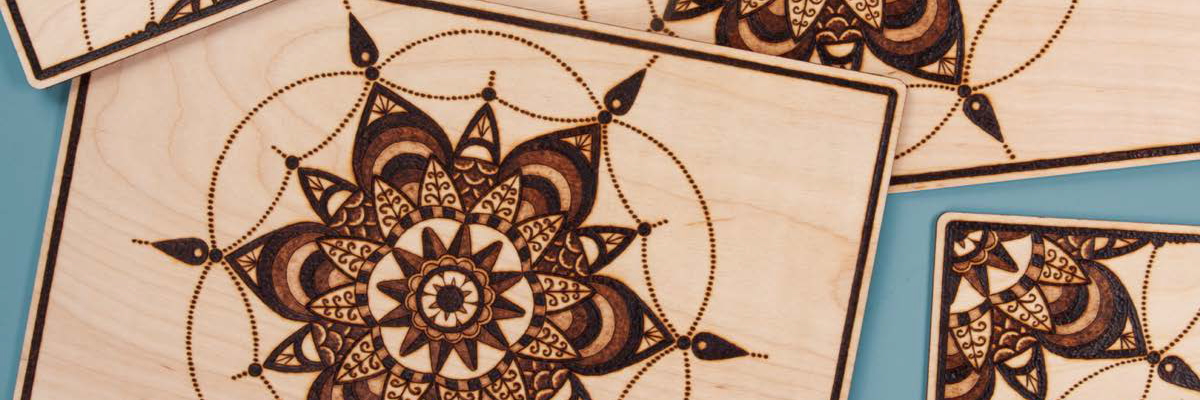
Mandala-esque Table Set
In recent years, there has been a massive surge in popularity for “adult” coloring books, designed to promote relaxation and calmness by encouraging us to take a step away from our busy daily lives and into the activities we enjoyed as children. These books are available in many themes, but I have always been the most drawn to the beauty of the books featuring mandala designs. These elegant, exquisite patterns are a joy to admire and provide an ideal challenge for any craftsperson to incorporate into their work.

Owl Keepsake Box
Animal portraits are a very common request for any craftsperson, and there is no exception from this if you are a pyrographer. Pet owners adore their pets and love to commission special designs to commemorate this fact. I’ve made many pet portrait plaques while selling pyrography designs, and it is always a challenge to accurately portray the character of an individual pet from a photograph. Many of my designs have featured badgers, hedgehogs, mice, foxes, swans, frogs, bees, and much more. One of my absolute favorites, however, has always been the owl; they have such a wise and worldly expression and are so beautiful in flight. I’m very fortunate to live in an area where it is not uncommon to see owls in flight while traveling at night.
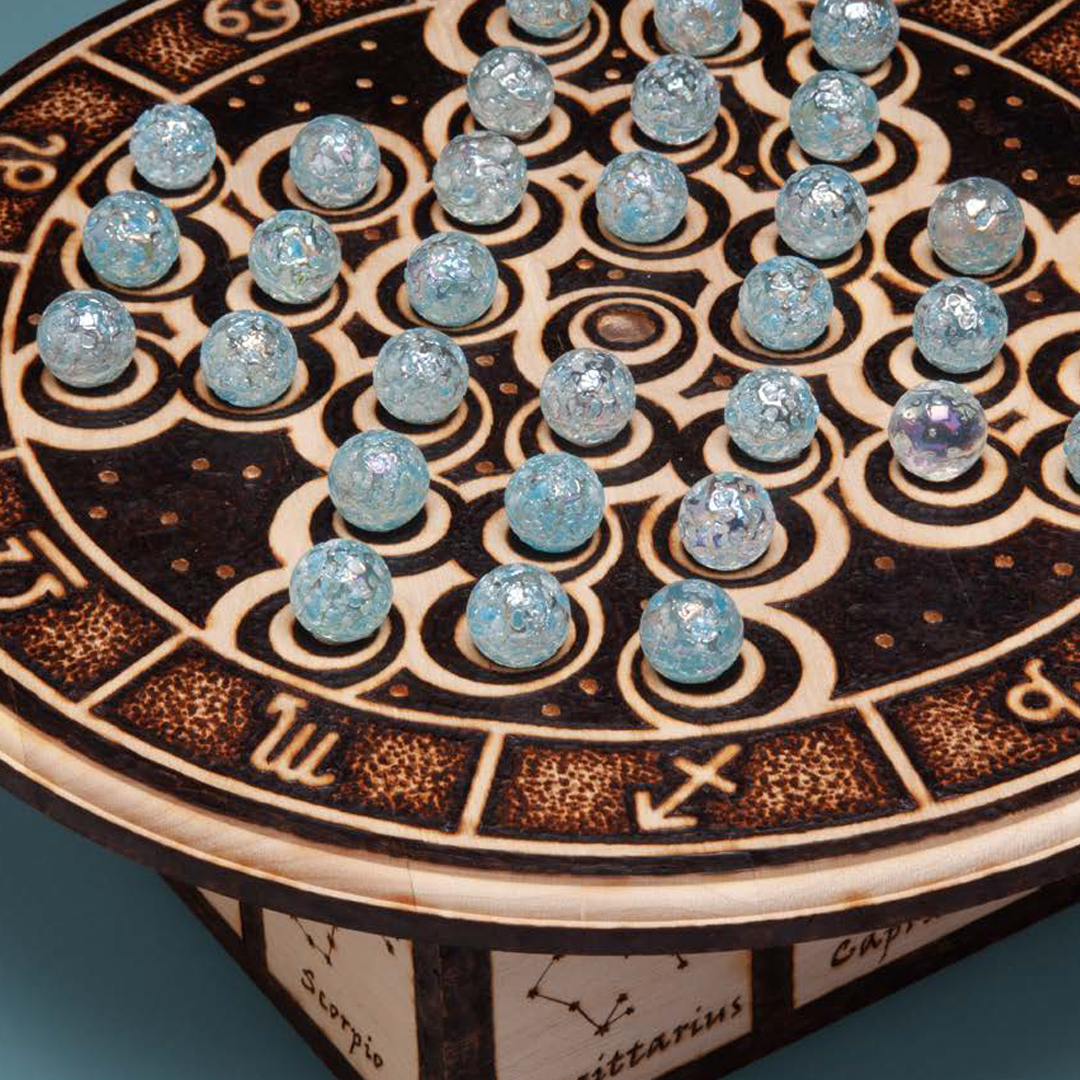
Zodiac Solitaire Game Board
For this project, I have used a theme derived from the astrological signs of the zodiac, working in a bold manner with my pyrography to ensure a high level of contrast. As well as decorating the game board’s border and the base of the piece with the symbols and constellations for each individual star sign, I decided to experiment with the use of light in my design to give a playful technological slant to the whole item. I have used an LED lighting unit (often used in swimming pools or garden ponds) to enable colored lights to vividly illuminate the game board from below and within. The lighting unit that I chose has a remote control in order to select between a range of different colors and interval settings so that the game itself becomes alive at the touch of a button.
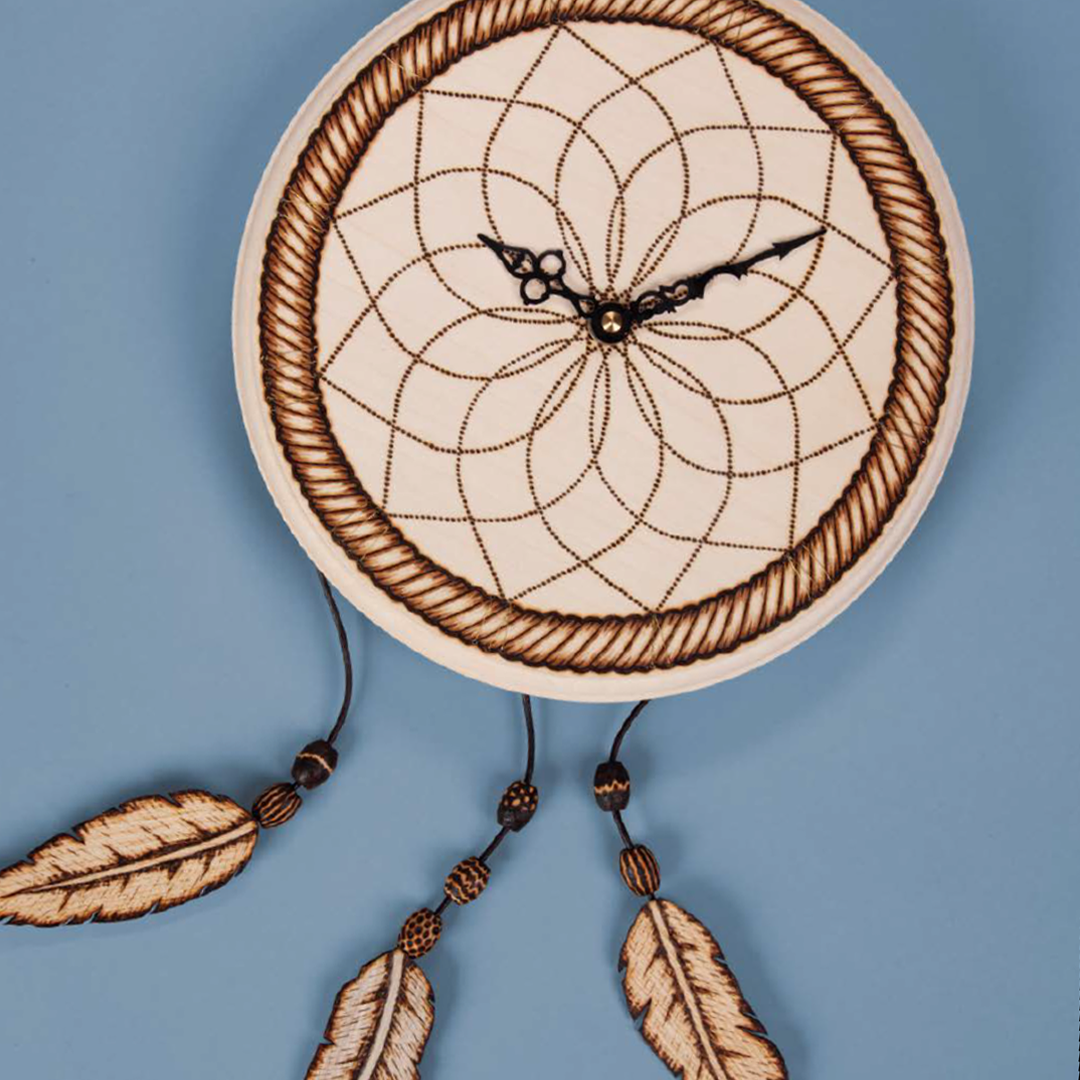
Dream Catcher Clock
Using this idea to create a clock to hang on the wall also allowed me to think about different ways in which I could recreate the elements of the design. The main ring and web formed the central elements on the clock face and are relatively simple to draw or create without the use of a complex pattern to copy. I used fine metal wire to mark out the numerals of the clock as I wanted to make something that delicately caught the eye when seen at certain angles. You could use thicker wire if you wanted to make the numbers more obviously visible, or possibly colored ribbon or cord as another alternative.
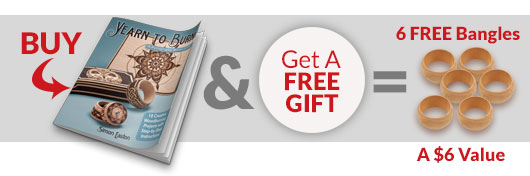
Get Exclusive Email Offers And Receive 15% OFF On Your First Book Order!
Recent Comments