


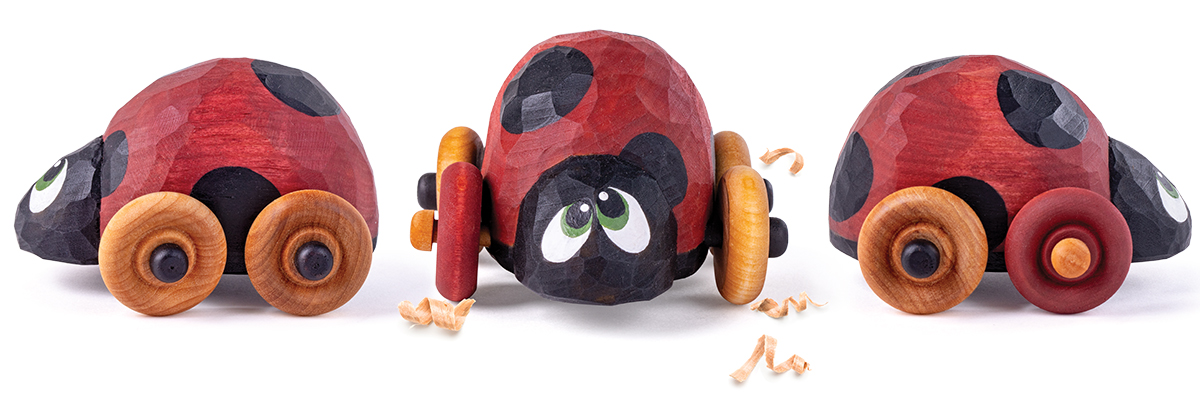
Free Wood Carving Pattern and Project: Ladybug Wheelie
Excerpt from Quick Whittles by Sara Barraclough
The ladybug wheelie was the very first wheelie design I came up with (I’ve since expanded my collection to include ducks, donkeys, turtles, and other critters). One of my kiddo’s favorite things to do in the spring is to find the ladybugs in the garden. I’ve done a couple of variations of a ladybug and thought it would be fun to make one that really moves. Once you carve a couple, you’ll start to have ideas of what else can be modified to put on wheels. The ladybug is an easy and fun project. Get comfortable with the basic steps and the wheel measurements and placements, and then get creative! Download the full-size pattern and follow along with this step-by-step project below.
One of my favorite parts about carving is giving expression and life to the piece. Learning how to convey emotion in an inanimate project isn’t always easy, and it takes practice, so don’t get discouraged! I have always loved the cartoonish or caricature style of art, which has carried into my preferred carving style. There is (in my opinion) a greater level of freedom in how much or how far you can stretch the expressions and “silliness” of the subject.
My new book, Quick Whittles, is geared toward helping you become familiar with conveying expression and adding extra elements to your carving. The projects inside are intended to be stepping-stones, to help build an arsenal of sorts that you can apply to future carves and projects. Try swapping expressions from one carve to the next, change up the paint, and just have fun!
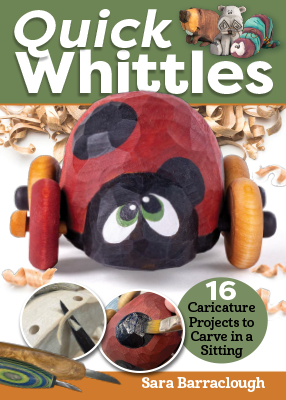
Quick Whittles
The ultimate guide to whittling quick and quirky caricature projects!
- 16 step-by-step projects, i
- Small, on-the-go carvings made with just one knife
- Full-size patterns, step-by-step instructions
- Essential information on all the basics,
- Author Sara Barraclough is an extremely talented caricature carver with a popular, fun-loving style
Ladybug Wood Carving: Materials & Tools
- Knife
- Basswood blank: 4″ x 2 1/8″ x 2 1/2″ (10.2 x 5.4 x 6.4cm)
- Felt-tip marker
- Drill/drill press
- 1/4″ (0.6cm) drill bit
- 1″ (2.5cm) wheels with 1/4″ (0.6cm) axles
- Wood glue
- Ruler
- Round file or sandpaper
- Assorted paintbrushes
- Acrylic paints
- FolkArt: Black, Clover
- Ceramcoat: Barn Red
- Americana: Titanium White
- Antiquing wax (optional)
Wood Carving Project Step-By-Step

1. Drill the Axle Holes.
The distance between the two drilled holes should be 1 1/2″ (3.8cm). The holes should be 1/4″ (0.6cm) from the bottom of the blank. Practice drilling on a scrap piece of wood prior
to drilling into your project piece. If one of the holes is off just slightly, the wheelie will sit unevenly on the surface and only three of the wheels will spin.

2. Start rounding the edges.
There isn’t a lot of material that needs to come off. Draw a centerline down the back of the blank and begin to round the back of the ladybug by taking off the sharp edges.

3. Round the body.
Work equally from both sides, carving toward the centerline. What you take off from one side, also take off the other. Round the head and remove all the saw marks. Taper the back end of the ladybug so that it forms an oval.

4. Check the fit.
When you have carved the majority of the body, do a fit test with the wheels. Check to see how the wheels are sitting in relation to the body. You may have to remove some of the wood from the sides so that the wheels spin freely without hitting against the sides of the ladybug

5. Finalize the fit.
Remove wood as needed to improve the fit. The wheels should fit fairly close to the body, with as little of the axle showing as possible. Here is how far I reduced the body to clear the wheels.

6. Round the base.
Remove the sharp ridge around the base of the ladybug just to soften the overall look of the project. Go back and make sure all the saw marks are removed and that you are happy with the final look and shape.
Paint the Details: Wood Carving Step-by-Step

7. Start Painting.
About 1/4″ (0.6cm) up from the bottom of the ladybug, draw a line that goes from one side of the body where the head
and body meet to the other. Paint the whole head Black as well as this 1/4″ (0.6cm) band and the underside of the ladybug

8. Paint the back and eyes.
Paint the back of the ladybug with a slightly watered-down
Barn Red (about a 1:1 ratio of water to paint). Pencil in some large round dots on the back. Paint a large Titanium White oval for each eye and allow them to dry. Then paint a smaller
oval inside the white with Clover.

9. Paint the spots.
Paint the spots with Black
(it’s a little easier using a wide, flat brush).
I also applied watered-down antiquing wax to
three of the wheels and one axle and painted
one wheel Barn Red and the remaining three
axles Black. This is just a suggestion—feel free
to get creative with the wheels, or just paint
them all the same color.

10. Detail the eyes.
Add a Black circle for each pupil and allow to dry. Then
add a small Titanium White highlight to each eye.

11. Install the Wheels.
Before you glue the wheels in, do a dry fit to make sure that all four wheels sit on the surface evenly. If one wheel is raised slightly, use a round file to open the drilled hole so that, with
some pressure, the axle will allow the wheel to sit flush. Once the wheels have been dry fit and the paint is dry, apply a few drops of wood glue to each hole and insert the wheels and axles into the holes. Do not overfill the holes with glue—
you don’t want any glue to come back out of the holes when the axles are inserted.

Quick Whittles – ABout the Book
Get started in caricature carving with this collection of beginner-friendly whittling projects and just one knife!
An excellent way to try your hand at carving adorable caricatures and learn how to capture the personality and expressive elements within your caricature carvings — from exaggerated facial features to whimsical googly eyes — Quick Whittles offers 16 unique and portable projects you can carve in one sitting or even on-the-go!


Other Carving Titles
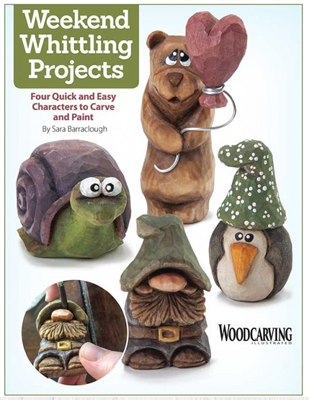
Weekend Whittling Projects
These 4 little projects are filled one-of-a-kind personalities and charm! Weekend Whittling Projects features step-by-step instructions, coordinating photography, and full-size patterns for a snail, bear, troll, and penguin. Author and talented woodcarver Sara Barraclough guides you through each adorable whittling project.
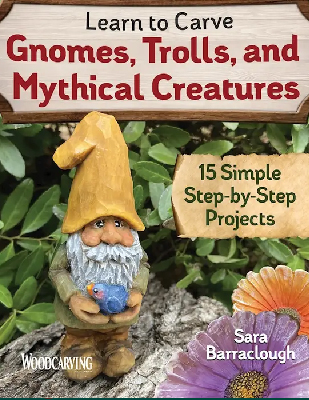
Learn to Carve Gnomes, Trolls, and Mythical Creatures
A woodcarving book devoted solely to magical little creatures! Learn to Carve Gnomes, Trolls, and Mythical Creatures boasts a menagerie of 15 step-by-step woodcarving projects, from a mushroom house, unicorn, and gnome to a wizard, dragon, elf, and more.
Other Blogs That May Interest You

Master Flat-Plane Caricature Carving with 3 Easy Steps
Carver Spotlight: Charles BanksFlat-plane carving is rooted in simplicity. Expert caricature carver and author of Learn to Whittle Fascinating People in Wood, Charles Banks specializes in this technique and firmly believes in the one-knife concept. Woodcarving...
Six Things to You Need to Know Before You Start Carving
Ready to Start your Carving Journey? Lifelong carver Alec LaCasse is known for his approach to carving naturalistic and stylized portraits with “found” materials. As the founder and lead instructor of Fundamentals of Woodcarving School, LaCasse has learned a thing or...
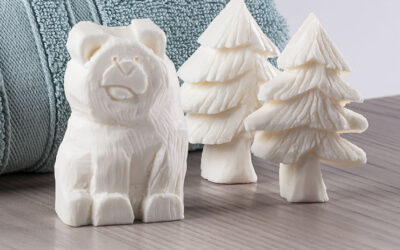
Carving: Soap Edition – Carve A Rustic Bear With Free Pattern
These fun and charming patterns will bring the rustic charm of a mountain-nestled cabin to your city dwelling or your country home. Not sure if wood carving is for you? Soap carving is a great introductory step towards whittling wood for beginners. Try your...
Get Exclusive Email Offers And Receive 15% OFF On Your First Book Order!
Recent Comments