WCI SUBSCRIPTION
Get Woodcarving Illustrated delivered to your door 4 times a year.
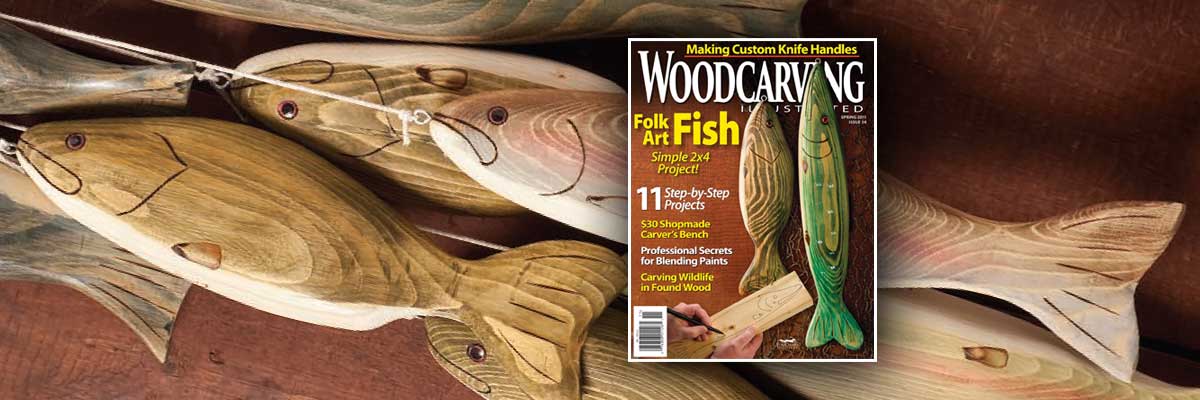
Wood Carving a Fish From Two by Fours
Easy finishing technique highlights the grain in ordinary construction lumber
By Robert Triplett
ARTICLE ORIGINALLY FROM Woodcarving Illustrated Issue 54 2011
I was picking through lumber in a big box store for a building project when I noticed how the grain of one piece of wood reminded me of fish scales.
After that, it seemed like every piece I picked up reminded me of one type of fish scales or another. It didn’t take much to decide to carve a few fish. Now, I pick out 2 by 4s based on the grain pattern. Depending on how the lumber is cut from the log, the grain pattern can vary greatly
Choose boards with long curly lines of grain in the area that will be the sides of the fish. These long lines suggest long rows of scales.
~ Robert Triplett
I choose boards with long curly lines of grain in the area that will be the sides of the fish. These long lines suggest long rows of scales. Look for large pronounced rings of grain on the top and bottom of the fish. These larger rings remind me of the subtle changes in the scale pattern. The overall position of the grain may change a bit as I carve the fish, but I find if the rings of grain shift to the sides slightly, it resembles sunlight shining down through the water onto the fish’s scales.
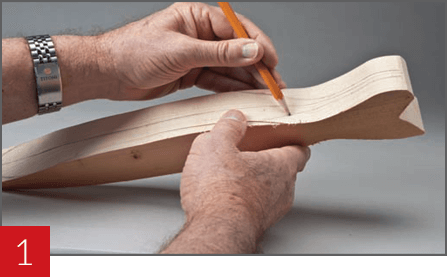
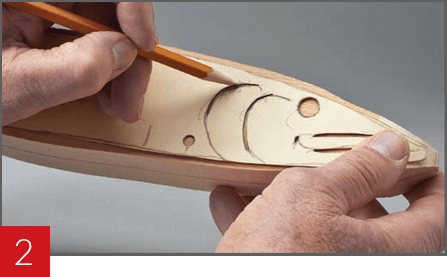
Create a pattern template by tracing the pattern onto card stock, such as a manila folder. With a template, you can move the pattern around on the blank to make the best use of the wood grain. Position the pattern so the visible rings of grain are centered on the highest point of the fish’s back and on the belly close to where the front fin will be located.
Cut slots for the gills, fins, and eyes in the template so you can easily align these features on both sides of the blank.

Wood Carving a Fish: Begin the Carving
1. Rough out the blank.
Trace the side profile onto the blank. Cut along the lines with a band saw or your saw of choice. Transfer the top profile to the blank. Tape the bottom waste back in place, and then cut the top profile.
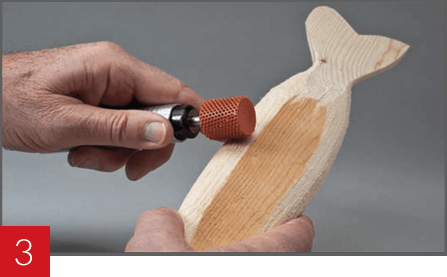
3. Remove the sharp corners.
Use a carbide-point bit in a rotary-power carver to round the body of the fish, removing the sharp corners on the body and head of the fish.
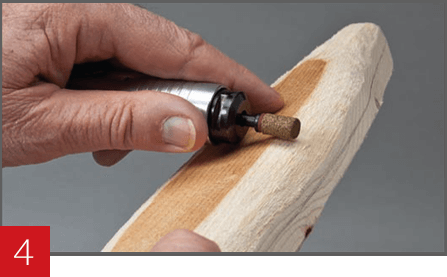
4. Shape the fish.
Use finer bits, such as carbide bits, to remove the deep scratches from the carbide-point bits. Gently shape and round the tail. Sand the fish with a sanding drum using progressively finer grits of sandpaper up to 120 grit. Wet the wood and allow it to dry. Sand any rough areas revealed by wetting the wood.
Wood Carving a Fish: Adding the Details
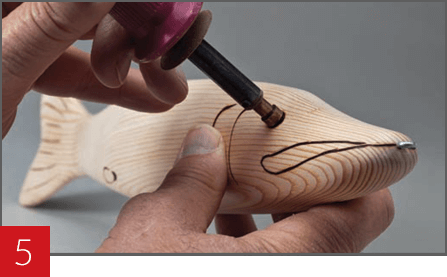
5. Burn in the eyes, gills, and mouth.
Use your burning tip of choice to burn in the mouth, gills, and tail. I drilled out the tip of a solidtip
woodburning tool to make the round eye. You can burn the circle of the eye using your wood burning tip of choice. Add a small screw eye near the mouth.
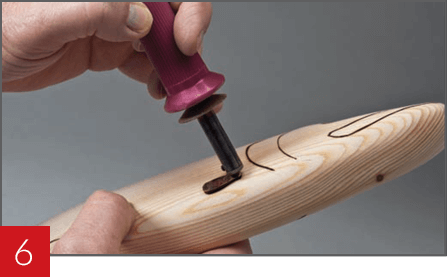
6. Burn in the fins.
I cut a piece of brass to shape and silver soldered it to a brass screw. The screw is then threaded into
my solid-tip woodburner. This homemade tip produces easy symmetrical fins. Once the tool is hot, rock the tool back and forth to give the fins a regular shape. You can burn the fins with your wood burning tip of choice.
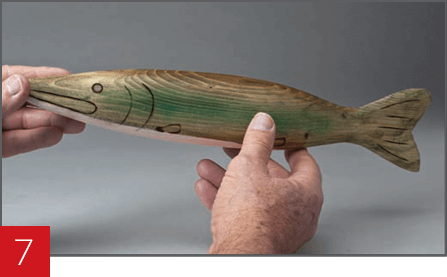
7. Paint the fish.
Mix artist oil paints with mineral spirits to make a thin stain. I squeeze out about 1″ (25mm) from a tube of paint into a 2.5-ounce (75ml) jar. Add small amounts of mineral spirits until the paint reaches the consistency you want; keep it thin enough so you can see the wood grain through the paint. Apply a basecoat of brown or burnt sienna to the top and sides of the fish. Apply white stain, such as limed oak or pickling stain, to the white belly area. Allow the stain to dry, and then blend the second oil color, such as the green on the pike, into the other color using your fingers or a rag.
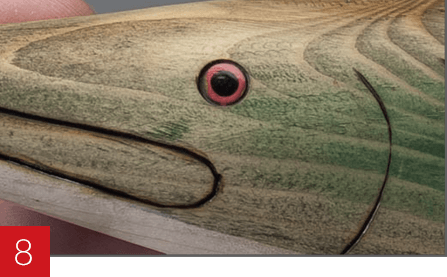
8. Paint the eyes and highlights.
I use water-based house paint. Use a cotton swab to add dots of white paint to the sides if desired. Mix yellow and red paint to make an orange color and apply the mixture to the eye with a cotton swab. Allow the orange paint to dry, and then add a black dot to the center of the eye. After the black paint dries, seal the carving with a water-based satin polyurethane.
Wood Carving a Fish: Materials & Tools
MATERIALS:
- 2″ x 4″ x 141/2″ (51mm x 102mm x 369mm) construction lumber or wood of choice
- Assorted grits of sandpaper up to 120 grit
- Mineral spirits
- Artist oils of choice: I use green and brown or burnt sienna for the pike
- Limed oak or pickling stain
- Water-based house paint: yellow, red, black, white
- Water-based satin polyurethane
- Cotton swabs
- Rags
TOOLS:
- Band saw
- Rotary-power carver or Dremel
- Carbide-point bit of choice
- Carbide bits of choice
- Sanding drum
- Solid-point wood burner with modified tips or burner and tips of choice
- Shopmade fin burner (optional)
Other Wood Carving Titles
Carving Award-Winning Songbirds
This one-stop information center contains all the carving and painting how-tos for making realistic songbirds, plus everything from texturing feathers to building legs and feet to planning dramatic poses.
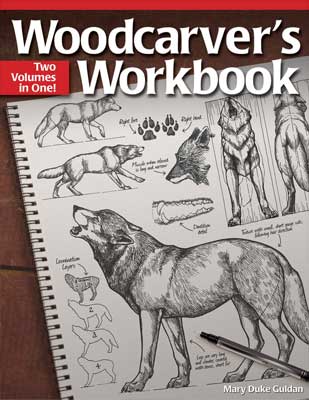
Woodcarver's Workbook
Get started in woodcarving animals with these high quality patterns and illustrated instructions from Mary Duke Guldan. You only need a simple craft knife. Two volumes in one! Cougars, rabbits, wolves, dogs, whitetail deer, bighorn sheep, mustang, unicorn and moose all included.
Get Exclusive Email Offers And Receive 15% OFF On Your First Book Order!
About the Author
Robert Triplett has been carving for most of his life. He retired from the U.S. Army after twenty-five years of service and later worked as a safety engineer at electrical power plants. Born and raised in Bedford County, Pa., Robert lives in Hummelstown, Pa.




Recent Comments