


How to Carve a 3D Pumpkin: Uncle Gourdy Tutorial
From Realistic Pumpkin Carving by Lundy Cupp
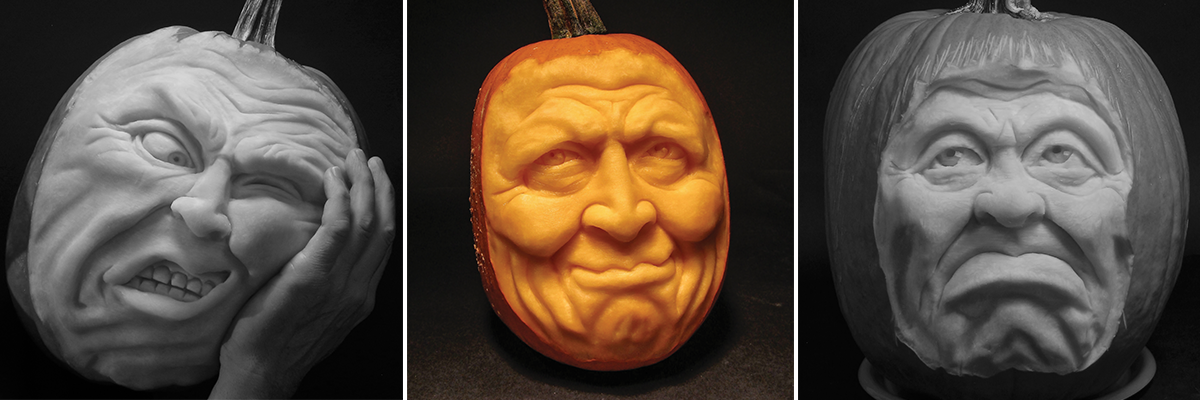
You may feel confused by this pumpkin’s name—Uncle Gourdy? It’s not a gourd, it’s a pumpkin. But gourds and pumpkins are actually the same thing—they’re both squashes! Gourds are inedible squash, and pumpkins are edible round squash. The more you know! With the tutorial and pattern download below, you will impress your neighbors and trick-or-treaters with 3D Uncle Gourdy. If you love this tutorial, check out Realistic Pumpkin Carving by Lundy Cupp.
Rinse the pumpkin with cold water and use a stiff plastic scrub brush to remove any dirt. Then, spray the entire pumpkin with a mild bleach solution to kill any mold and bacteria. I sometimes wear latex or vinyl gloves when carving to prevent bacteria on my hands from prematurely molding the pumpkin. As with any carving, a light directly above your work area that casts a strong shadow will help with symmetry and depth.

Book Feature
Pumpkin Carving: Materials & Tools
MATERIALS:
- Pumpkin
- Bleach
- Latex gloves
- Spray bottle of water
- Sanding pad, such as 3M: medium grit
TOOLS:
- Ribbon tool, large triangle: 1 15/16″ (49mm) wide
- Deep gouges: 1/8″ (3mm), 1/4″ (6mm), 1/2″ (13mm)
- V-tools: 1/8″ (3mm), 1/4″ (6mm), 1/2″ (13mm)
- Flat chisel: 1/2″ (13mm) wide
- Scalpel with #11
3D Pumpkin Design: Getting Started
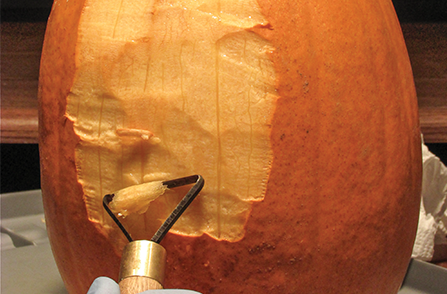
1. Remove the skin.
Use a peeler to remove the outer orange skin in the area to be carved; I use a 1 15/16″ (49mm) large triangle ribbon tool. Try not to take too much of the pumpkin meat in the process. A pumpkin begins to dry as soon as the skin is removed, so spray it with water while you carve to keep it hydrated and pliable.
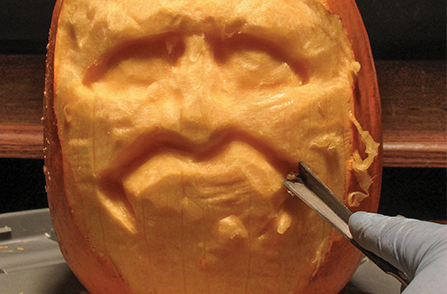
2. Establish the main features.
Using a 1/2″ (13mm) gouge, make shallow cuts where the brow line and nose will be. Then, carve the eye sockets and begin the barrel of the mouth with a 1/2″ (13mm) V-tool.

1. Create some depth.
Switch back and forth between the 1/2″ (13mm) gouge and the 1/2″ (13mm) V-tool as you work to create depth and shadow in the carving. Round the eye sockets and begin to separate the brows from the forehead. Establish the
cheeks and carve them down to separate them from the nose. Deepen the mouth barrel into the sides, and outline the nose. The tip of the nose protrudes more than any other area, so carve everything else deeper.
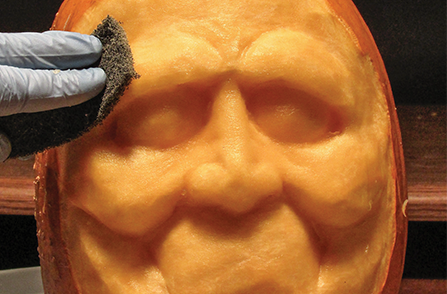
4. Smooth the surface.
After you’ve carved most of the main features, sand and smooth the surface with a medium-grit sanding pad. This makes it easier to see where you need to adjust the main features before adding details.
3D Pumpkin Carving: Adding the Details

5. Rough in the mouth.
This is where you start to create expression in the carving. Redraw the mouth if necessary. Use a 1/8″ (3mm) V-tool to carve the space between the lips to separate the top and bottom lips. Then, use a 1/2″ (13mm) gouge to carve under the bottom lip. It is usually not necessary to carve above the top lip because it is less pronounced than the bottom one.
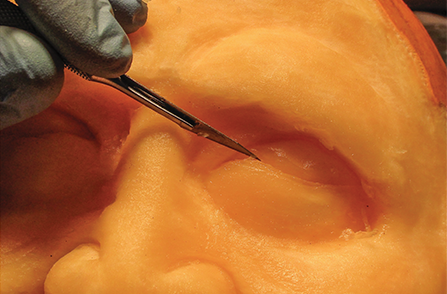
6. Define the eyes.
Use a scalpel with a #11 blade to make V-shaped cuts for the upper and lower eyelids. Then, round the eyeballs by carving small portions away from the edges. The deepest part of the carving is the inner corner of the eye (closest to the bridge of the nose), so I try to make this part as deep as possible without carving through the pumpkin wall.
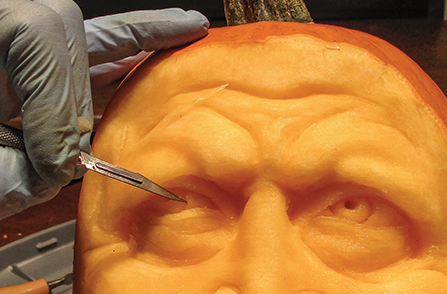
7. Add the wrinkles.
This is where the pumpkin really begins to develop character. Again switching back and forth between various V-tools and gouges, add lines and wrinkles of varying depths to the outsides of the eyes, lower eyelids, forehead, and smile lines in the cheeks.
8. Carve the pupils and irises.
Use a twist drill bit to bore holes for the pupils. Once the pupils are done, use a scalpel to make V-cuts for the irises; try to maintain an equal distance from the pupil. If you would like a “gleam” in the eyes, leave a square high spot in the iris and cut deeper around it. Make this high spot in the same place on both eyes.
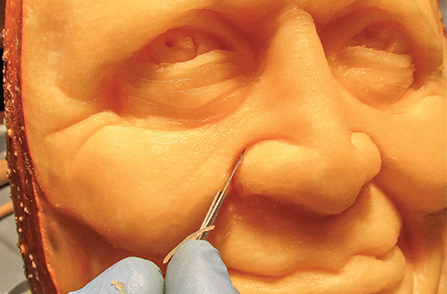
9. Sharpen and define the details.
Use the scalpel to make V cuts anywhere there is a crevice, such as the eye and forehead wrinkles, between the lips, and outside the nostrils. This makes the details look crisp and clean. Carve the nostrils last because they are delicate. Use a small gouge or a drill bit held between your thumb and finger to bore the nostril holes.
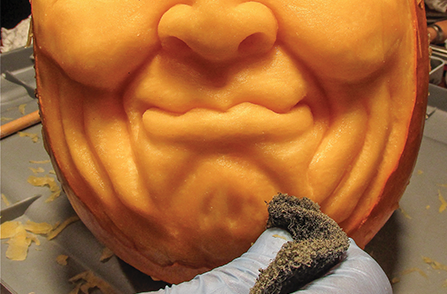
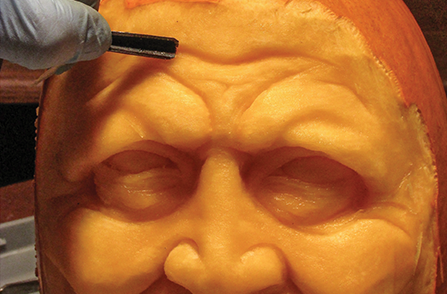
10. Smooth the face again.
Use the medium-grit sanding pad to give the face a soft and finished look. Faces don’t have any sharp edges or flat planes, so round everything.
Other Halloween Titles
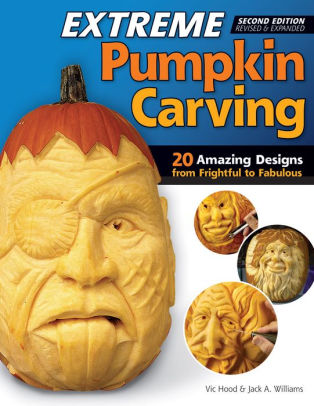
Extreme Pumpkin Carving

Halloween Woodcarving
Get Exclusive Email Offers And Receive 15% OFF On Your First Book Order!

Recent Comments