


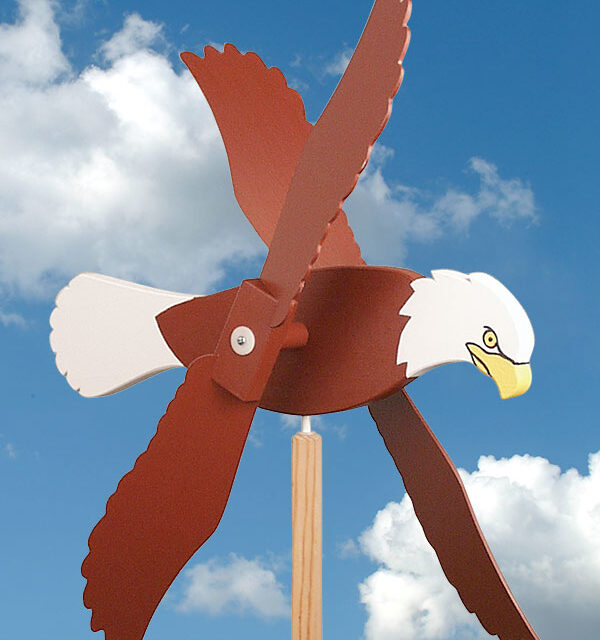
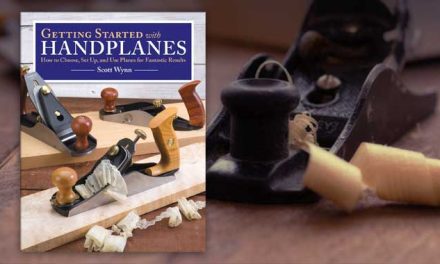
Making a Bald Eagle Whirligig On The Scroll Saw
By Paul Meisel
Spring is upon us! There’s no better time to add fun, new woodworking projects to your home, garden, or workshop. Below is a Bald Eagle Whirligig project from Scroll Saw Woodworking & Crafts Fall 2019 (Issue 76) by Paul Meisel. There are many styles of whirligigs with a wide range of complexity and subject matter. Of the various types, winged whirligigs, like the eagle featured here, are the most popular and easiest to make. Their design is simple – essentially a body with a propeller assembly mounted on each side. The twin blades spin in opposite directions, which provides a lively visual display.
 Getting Started
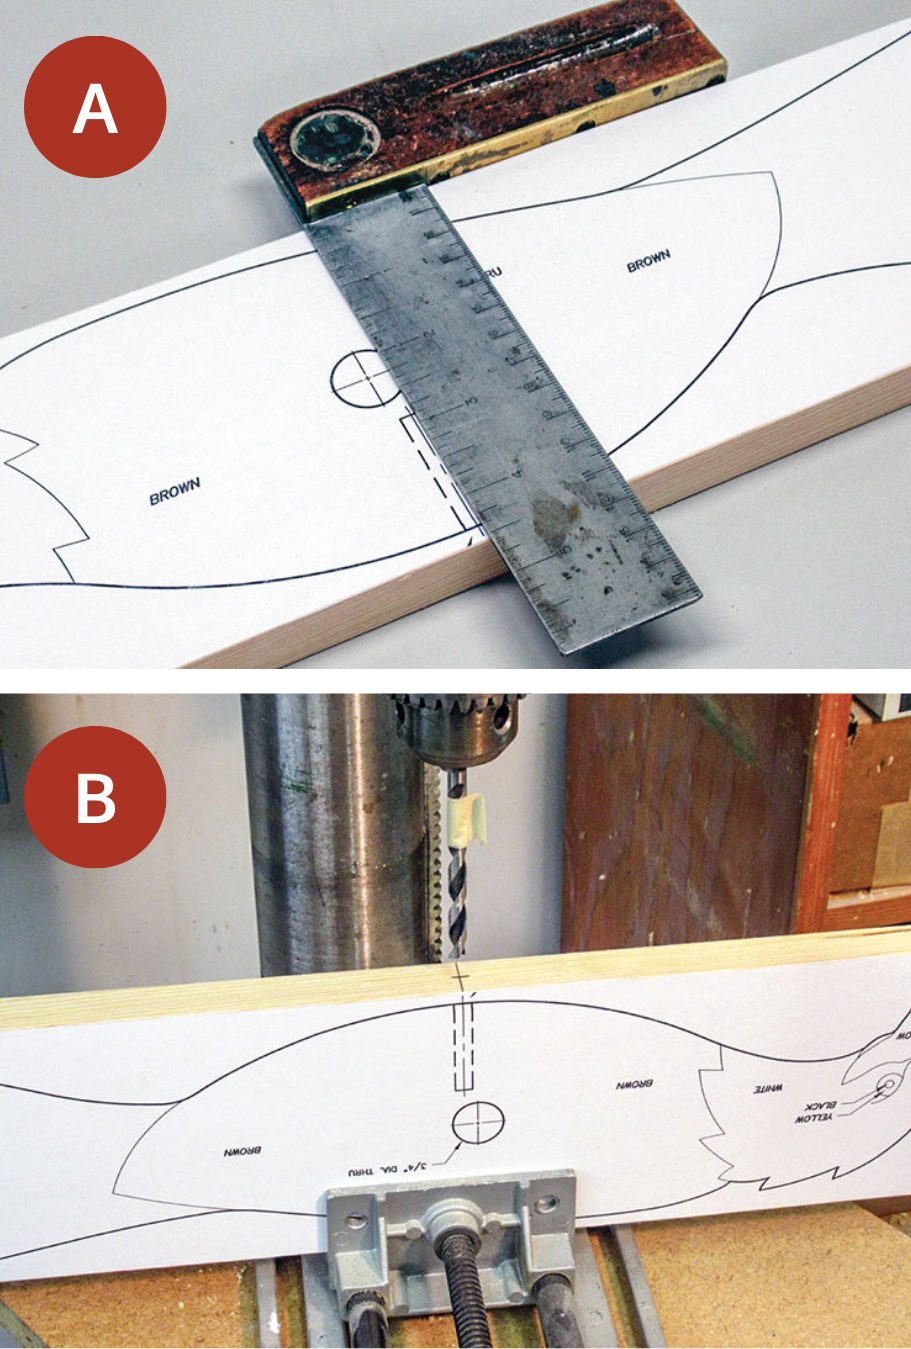
Sand the wood for the body and wings. Photocopy the patterns and attach them to the pine and plywood using temporary-bond spray adhesive. A) Attach the pattern so that the centerline of the 3/4” (1.9cm) hole will be perpendicular to the top edge of your wood. B) Position the wood with the centerline of the 3/4” (1.9cm) hole parallel with the drill bit. Use a piece of masking tape to mark the 1-1/2” (38mm) hole depth. Drill the holes.
Cutting & Assembling
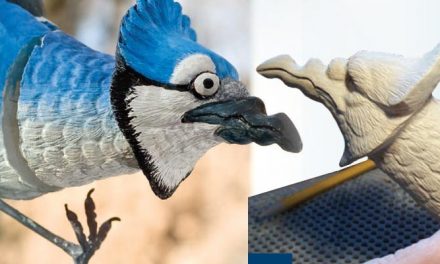
- Cut the eagle’s wings and body. The wings are designed so that, with careful positioning, all four can be cut from one square foot of plywood. Note: stack-cutting the wings will not only save time, but will ensure the wings will be identical in size. This is important for balance.
- Make the wing hubs (optional). Follow this instruction only if you are not ordering precut hubs. Secure the hub blanks in the table saw jig with wood shims, and cut diagonal slots 7/8″ (2.2cm) deep and 1/8″ (3mm) wide in each end on the table saw. Note: Make sure the angles are opposite to each other. Drill 1/4″ (6mm)-dia. hole in the center of each hub.
- Prepare the dowel. This will be an attachment point for the wing assemblies. Drill a 7/64” (3mm)-dia. by 1-1/8” (2.9cm)-deep hole into the center of each end. To be sure the holes are correct, I use a drill press vise or a “V-block” to hold the dowel perpendicular on your drill press table.
- Prepare the mounting stake. Drill a 5/16” (8mm)-dia. by 1-1/2” (3.8cm)-deep hole on one end. Point one end of the stake by sawing 30° angles on all four sides. Use a band saw.
- Insert the 3/4” (1.9cm) dowel into the drilled hole in the eagle’s side. Use water-resistant wood glue. Then glue the fiberglass rod into the bottom of the body.
- Slip the wings into the slots in the hubs and glue them in place. For additional stability, pin the blades in place by driving wire brads through the hubs and into the wings. Note: Take care as to which way you place the wings into the hub. Remember that the wings rotate in opposite directions. Make sure the feathered edge of each blade is positioned so they are angled to the outside (away from the body). Refer to the exploded assembly drawing.
- Slip a 1/4” (6mm) nylon-flanged bushing into both sides of each hub. With #6 3/4” (19mm) round-head screws, temporarily attach one wing assembly to each end of the 3/4” (1.9cm) dowel.
- Mount the completed whirligig on the stake. Keep the mounting stake held vertically in a vise during this process. Spin one wing at a time and let it come to a stop; if the wing is out of balance, it will stop in the same place each time. Sand some material away from the heavy side until the wing is balanced.
 Painting & Finishing
Since whirligigs are used outdoors, it is essential that you choose the best primer and paint. I prefer acrylic latex primer and paints (as opposed to solvent-based paints) for a few big reasons. Wood naturally absorbs moisture from its surroundings. Unlike oil-based paints, latex paint is permeable (breathable), which allows the moisture to vaporize and escape through the paint. Changes in temperature, especially freeze/thaw cycles, cause wood to expand and contract. Since latex paint is more flexible than oil paint, it better withstands these stresses. Additionally, you will find that water-based latex paint is easier to work with and much easier to clean up.
After painting the project, tighten the wing screws as far as possible while still allowing the wing blocks to spin freely. Install the mounting stake in the ground and mount the whirligig on top. The body should rotate freely in the 5/16” (8mm) flanged bushing in the top of the stake. Humidity may cause the wood to swell once the project is placed outdoors, so it may be necessary to back the screws out slightly after a few days.
Materials
- Pine, 1” (2.5cm) thick: body, 6” x 18” (15.2cm x 45.7cm)
- Pine, 2” (5.1cm) thick: stake, 2” x 6’ (5.1cm x 1.8m)
- Baltic birch plywood, 1/8” (3mm) thick: wings, 12” (30.5cm) square
- Sandpaper: 80-, 220-grit
- Wood glue
- Spray adhesive: temporary-bond
- Hubs, two
- Primer: acrylic latex
- Acrylic paints, such as black, brown, white, yellow
- Dowel, 3/4” (1.9cm)-dia.: 4” (10.2cm) long
- #6 screws, 2 each: 2” (51mm)-long round-head
- Fiberglass rod, 1/4” (6mm)-dia.: 3” (7.6cm) long
- Bushing, nylon-flanged: 4 each 1/4” (6mm) square; 1 each 5/16” (8mm) thick: 3/4” (19mm) long
- Wire brads: 5/8” (16mm) long
Tools
- Scroll saw blades, such as Olson: #5 skip-tooth
- Band saw
- Drill press with bits: 7/64” (3mm), 1/4” (6mm), 5/16” (8mm), 3/4” (19mm)-dia. twist
- Square
- Paintbrushes: assorted
Making the Wing Hub Jig
Make sure the scrap of 2 x 4 is at least 6″ long and is flat and square on the bottom and sides. Set the table saw for a 7/8″ deep cut, and the fence to approximately 1 5/8″. Make a pass through the scrap of 2 x 4. Mark the feed direction on the top of the scrap.
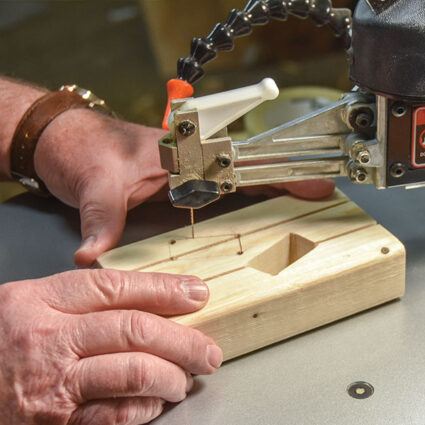
Turn the scrap over and align the corners of the wing hub blank to the kerf in the scrap. Use the pattern below to help position the blank. Trace around the blank to mark the position of the cutout. Drill holes in all four corners of the traced line. On the scroll saw, feed the blade through one of the holes and carefully cut along the lines.
Using the Jig
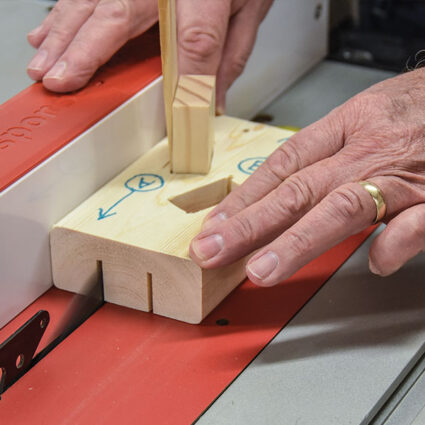
To make the diagonal end cuts, slide one end of the wing hub blank into the cutout, and secure it with a wood shim on the long side. Make sure the blank is seated all the way to the table saw surface and the fence and blade are in the same position as the original kerf cut. Run the jig and blank through the blade in the same direction you made the initial kerf cut. Remove the blank, flip it over and repeat the procedure for the other end.
Note: If the kerf is not wide enough to accept the thickness of the wing, make ALL the cuts first with the fence in the original position. Then you can adjust the fence to remove more wood on the second pass to reach the proper measurement. Always run the jig through the saw in the same direction.
About the Author
Paul Meisel and his team at Meisel Hardware Specialties have designed over 3,500 projects and plans for the home hobbyist woodworker. Dozens of projects from Paul’s collection have appeared in Scroll Saw Woodworking & Crafts magazine.
Enter your email below for the full article, including parts list and project pattern. Feel free to send us your finished creations at editors@scrollsawer.com or on our social media: Facebook or Instagram.

For more articles like this, subscribe to Scroll Saw Woodworking & Crafts Magazine.
Scroll Saw Woodworking & Crafts Magazine is published quarterly for both subscribers and newsstand readers. The editorial team passionately searches for and features interesting and creative scroll saw artists, projects, and techniques. Each issue includes inspiring feature articles and galleries showing artists stretching the art of scroll sawing, comprehensive step-by-step articles outlining the steps to recreate a project, pattern profiles to inspire more experienced readers, and reviews of the newest and most useful tools.
Get Exclusive Email Offers And Receive 15% OFF On Your First Book Order!


Recent Comments