


Gator Snap: Wooden Toy Plans
By Bob Gilsdorf from Making Innventive Wooden Toys
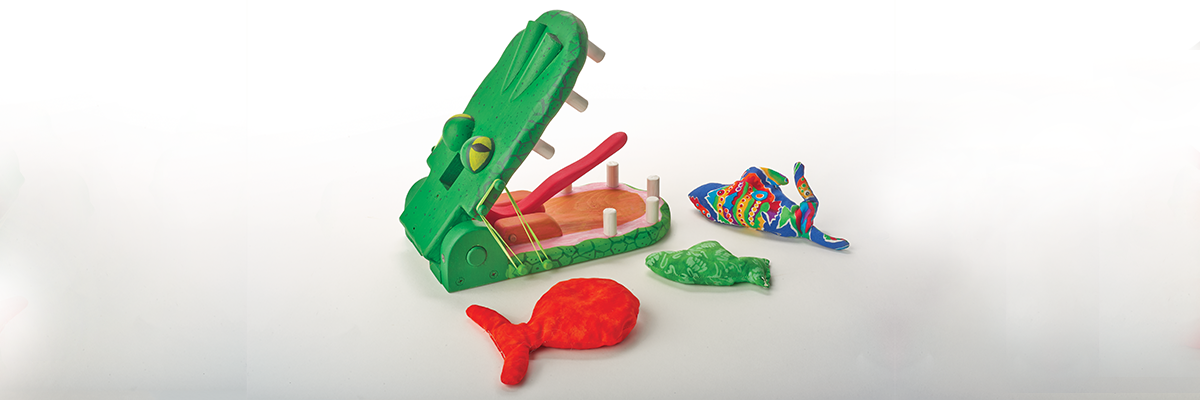
What does woodworking have to do with physics and fun? You’re about to find out! This toy has all the fun of cornhole with the danger of gator wrestling. Toss a bean bag fish into the gator’s gaping mouth, and SNAP — the gator’s jaws slam shut. This wooden toy project for kids was inspired by my son Adam at his gator wrestling class—in Mosca, Colo., of all places. Colorado Gators Reptile Park is set on naturally occurring hot springs to keep the gators happy year round. They offer gator wrestling classes to anyone brave, or stupid, enough to hop into a pond full of adult alligators. So, after a day of watching and hearing huge jaws snap shut I wanted to capture that adrenalin rush without the risk of losing my arm. While gravity gives the toy a nice action, for a more robust chomp, add the optional pegs to the sides and use rubber bands to connect them. Then, watch out! When you trip the action, you’ll know it!
Getting Started
Rip the blanks to the rough sizes in the Materials list. I find it much easier to mark cuts and holes on larger rectangular pieces of wood than individual smaller pieces. This also gives you more leverage when drilling the holes. Attach or transfer the patterns to the blanks.
Book Feature
Wooden Toy Projects: Materials & Tools
MATERIALS:
- Pine, 3/4″ (19mm) thick: 5″ x 27″ (127mm x 685mm); 3/4″ x 4 1/2″ (19mm x 114mm)
- Dowels: 1″ (25mm) dia. x 2 1/2″ (64mm) long; 3/4″ (19mm) dia. x 5 1/4″ (133mm) long; 1/2″ (13mm) dia. x 16 1/2″ (419mm) long; 1/4″ (6mm) dia. x 3 1/4″ (83mm) long
- Wooden sphere (or 2 half-spheres): 1 1/2″ (38mm) dia.
- Drywall screws, coarse-thread: 8 each 1 1/4″ (32mm) long
- Wooden pegs, 9/32″ (7mm) dia.:8 each 1″ (25mm) long (optional)
- Rubber bands: 2 each (optional)
- Wood glue
- Sandpaper
- Beans or rice
- Fabric: per fish 6″ (152mm) x 14″ (356mm)
TOOLS:
- Drill with bits: 1/16″ (2mm), 3/16″ (5mm), 7/32″ (5.5mm), 1/4″ (6mm), 9/32″ (7mm), 1/2″ (13mm), 3/4″ (19mm), countersink
- Phillips screwdriver
- Saws: table or miter, scroll or coping
- Shaping tools: belt sander, rotary tool with sanding drum, rasp
- Hammer
- Measuring and marking tools: tape measure, square, compass, pencil
- Sewing tools (needle, thread) or hot glue gun and glue
Gator Snap: Cutting & Shaping the Parts
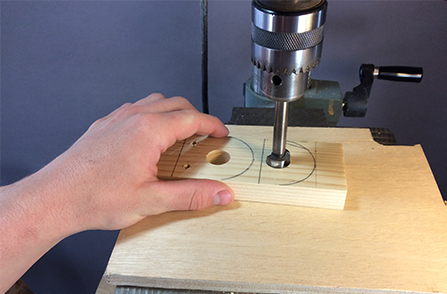
1. Drill the holes in the jaws (A-B) and jaw pivots (C-D).
Drill the holes in the jaws (A-B) and jaw pivots (C-D). Remember to drill a blade-entry hole in the top jaw (A). Drill the holes for the extra chomp pegs (L), if desired. Countersink the 3/16″ (5mm)-diameter holes in the bottom jaw pivots (D) on one side. I use a Forstner bit and a drill press to make the holes for the teeth (I), but free-handing the holes might add a little more character because gators aren’t known for straight teeth.
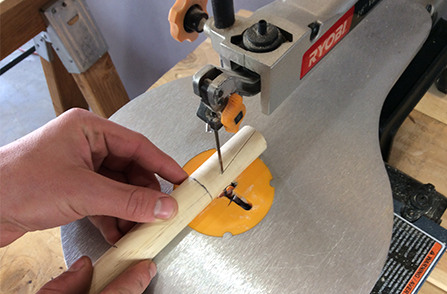
2. Cut the jaws (A-B) and axles (J-K).
Use a belt sander to bevel the back edge of the bottom jaw (B). I remove about 1/4″ (6mm) at a 45° angle to allow the mouth to open wider. Cut the jaw axle (K) and tongue axle (J) oversized at this point. (I always start by cutting them longer than needed because it’s easier to grab and remove them for adjustments.) We will trim them to the final size later.
3. Cut the jaw pivots (C-D).
Use a sanding drum in a rotary tool to enlarge the jaw axle hole in the pivots (so the axle rotates easily). Then, cut the three pieces. Transfer the hole locations to the flat end of the top jaw pivot (C) by folding the pattern down, or by measuring and marking, and drill the screw pilot holes.

4. Cut the tongue holders (E).
Attach the pattern to the side and fold it to the bottom of the blank. Drill the holes; the holes in the bottom help you align the holders properly on the bottom jaw.
5. Drill the axle hole and cut the perimeter of the tongue (F).
The tongue is the only tricky part of the construction. It rotates upward to hold the top jaw open. The tongue is designed to lie flat against the bottom jaw when depressed to minimize the stress on the tongue axle.
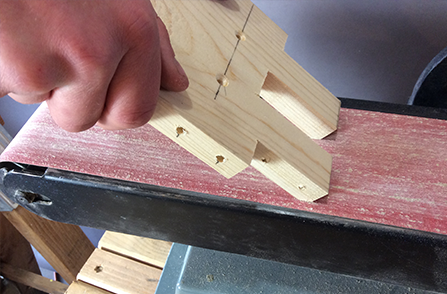
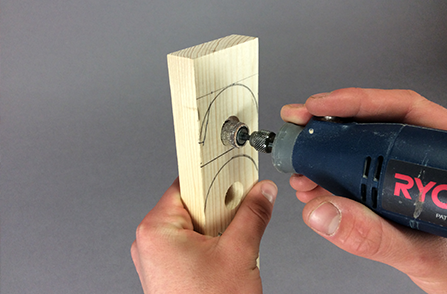
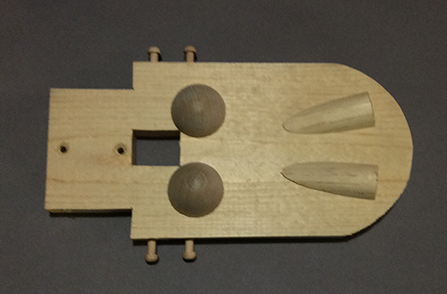
6. Cut the teeth (I), eyes (G), and nostrils (H).
Cut 11 teeth. For the eyes, you can either cut a wooden ball in half or just buy half spheres. Draw the nostrils on the dowel and make an angled cut for the first one. I was most accurate on the second nostril when I kept my hands in the same position and rotated the dowel 180°.
Gator Snap: Testing the Action
7. Attach one of the tongue holders (E) to the bottom jaw (B).
Use a coarse-thread drywall screw through the pilot hole. Insert the tongue axle (J) through the holes in both tongue holders, and screw the second tongue holder into position on the bottom jaw. The axle helps ensure the axle holes are aligned properly. Remove the axle, position the tongue (F), and replace the axle. The tongue should lay flat against the bottom jaw. If it doesn’t, sand its bottom. It should also be able to rotate upward at least 45°. If it doesn’t, sand the back corner under the axle, where it hits the bottom jaw.
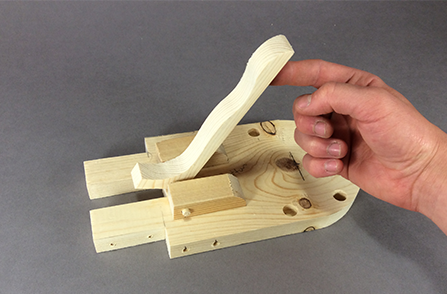
8. Attach the top (C) and bottom (D) jaw pivots.
Use coarse-thread drywall screws. Position the top jaw pivot flush and centered with the internal cut in the top jaw. Connect the top jaw and the bottom jaw using the jaw axle (K). The top jaw should be able to open about 45°. If it doesn’t, sand down the back edge of the bottom jaw more (see Step 2). The top jaw should also move very easily, maybe even a little sloppily, up and down. Remember, this toy may be subjected to dirt, grass, and an afternoon thunderstorm, so precision joints are likely a bad thing.
Gator Snap: Assembling the Toy
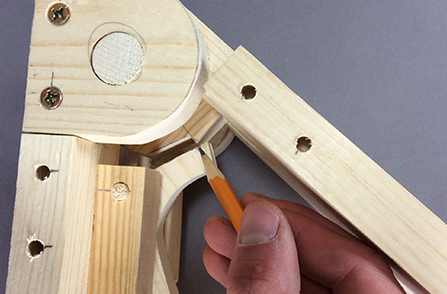
9. Test the tongue latch.
Lay the gator head on its side and open the jaws as far as possible. Lift the tongue to see if the back of it will engage the top jaw pivot to hold the top jaw open. If the back of the tongue is too long, mark the location where the edge of the latch hits it and cut off or sand it. Reassemble the gator head and check the latch again. This time the tongue should hold the mouth open. Slight pressure on the tongue should release the mouth.
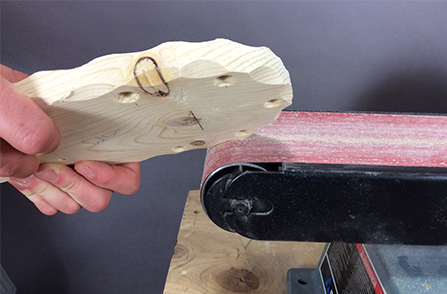
10. Shape the jaws and tongue.
I used the end of a belt sander, but you could use carving tools, a rasp, or even sandpaper. Gators are anything but uniform, so have fun adding some personality and perhaps a few battle wounds. Round all of the corners of the tongue except the back latch.
11. Decorate the gator.
Glue on the eyes and nose. Paint the top jaw a slightly darker green than the bottom jaw. The inside of
a gator’s mouth is fairly bland, but I made the tongue bright red to make it more visible. Paint the teeth separately and then glue them in place. Paint the extra chomp pegs (L) if you’re adding them.

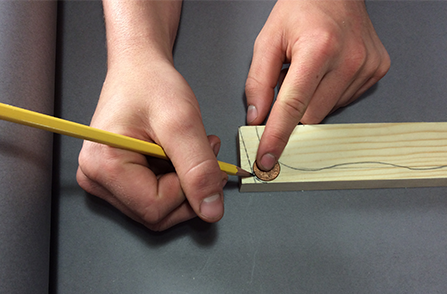
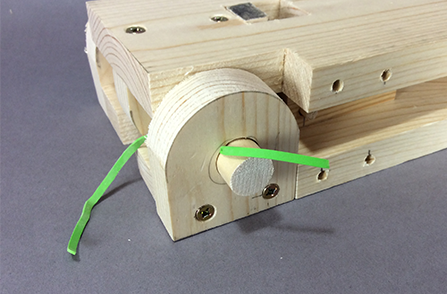
12. Lubricate the contact joints.
Use graphite to reduce friction on pieces that rub against each other, such as the latch and the axles. I rub the side of a pencil on the surfaces to get a solid gray color. If you want more chomp, install the pegs into the sides of the jaws and use rubber bands to pull them together. Trim the axles to their final sizes.

13. Sew the fish bean bags (M).
Don’t have a sewing machine next to your scroll saw? Me neither. During the prototype phase, I cut fabric into a fish shape and then hot-glued the edges. This was a pretty rustic-looking fish. After proof of-concept, I enlisted my wonderful wife’s help to sew some actual fish-shaped bean bags. Another fun possibility would be to just fill a work glove with beans or rice and glue it shut. Any small stuffed animal would also work, but you’ll probably get some disapproving looks.
14. Lock the axles in place.
The holes in the tongue holders and lower jaw pivots may be a little oversized to the point where the dowels fall out. If that’s the case, insert a piece of rubber band alongside the axle in the holes. This will hold the axles in place and still allow you to remove them to make repairs.
Other Gismo Titles
Gizmos Volume 2 (2015)
Big Book of Gizmos & Gadgets!
Get Exclusive Email Offers And Receive 15% OFF On Your First Book Order!

I just love these designs……………………amazing ! John Nelson