


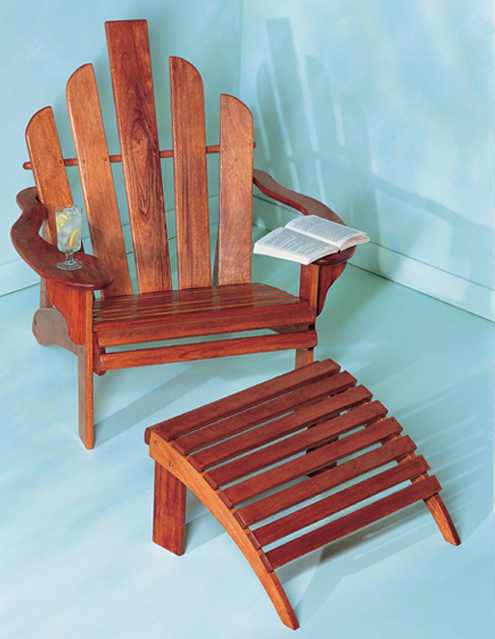
Adirondack Chair Wood Project Plans
By Philip Gardener and Andy Standing from Practical Weekend Projects for Woodworkers
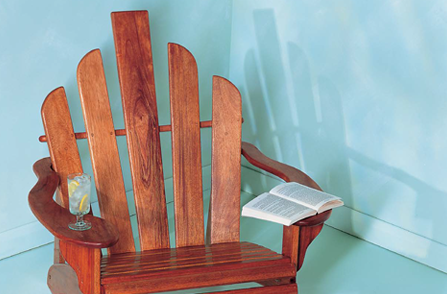
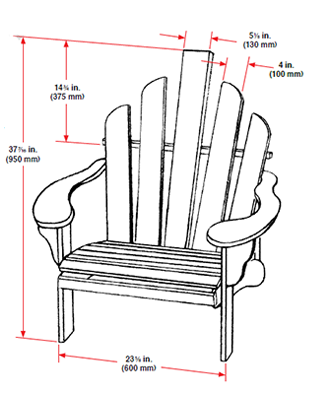
This style of sturdy and comfortable patio chair is common throughout North America, where it is called an Adirondack chair, the name deriving from the range of mountains in upper New York State. These Adirondack chair wood project plans can easily be built in a weekend and will become your favorite outdoor resting spot and conversation piece. All the lumbers are simply screwed and glued together, using no joints. It is possible to construct this chair from almost any lumber, even 11/16 in. (18 mm) exterior-grade or marine plywood. To finish, I used a two-part epoxy coating. This is expensive and tricky to apply, but once the wood is properly coated with epoxy, it becomes totally stable and virtually maintenance-free.
Practical Weekend Projects for Woodworkers
Discover 35 woodworking projects for beginners to make in a weekend! Intended for both the novice weekend carpenter and those who have some basic skills, Practical Weekend Projects for Woodworkers provides straightforward, step-by-step wood project plans, photographs, and useful exploded diagrams. From home decor items such as contemporary shelves and book ends to bed frames and cabinets, there is something for every skill level.
Tools
- pencil
- straightedge
- measuring tape
- square
- marking gauge
- sliding bevel
- string
- screwdriver
- backsaw (tenon saw)
- panel saw
- jigsaw
- power drill, 1/8 in. (3 mm), 3/16 in. (4 mm), 1/4 in. (6 mm), and 5/16 in. (8 mm) wood bits, size 8 plug cutter
- block plane
- jack plane
- workbench
- belt sander (optional)
- orbital (palm) sander (optional)
- beam compass (optional)
- spokeshave (optional)
Hardware and Wood
Hardware, etc.
- 200 zinc-plated countersink screws 1 1/2 in. (38 mm) x No. 8
- 40 zinc-plated countersink screws 1 3/4 in. (45 mm) x No. 8
- 4 brass bolts 2 1/2 x 1/4 in. (65 x 6 mm) with nuts and washers
- epoxy wood glue (system 106 or equivalent)
- sandpaper in grits 80 to 300
Wood
- 8 pieces 23 5/8 x 2 x 1 in. (600 x 50 x 25 mm) (seat slats)
- 2 pieces 35 7/16 x 5 15/16 x 1 in. (900 x 150 x 25 mm) (side rails)
- 2 pieces 19 11/16 x 4 x 1 in. (500 x 100 x 25 mm) (legs)
- 2 pieces 7 7/8 x 4 x 1 in. (200 x 100 x 25 mm) (armrest brackets)
- 2 pieces 29 1/2 x 7 7/8 x 1 in. (750 x 200 x 25 mm) (armrests)
- 27 1/2 x 6 11/16 x 1 in. (700 x 170 x 25 mm) (curved seat slat/back joining rib)
- 2 pieces 23 5/8 x 3 9/16 x 1 in. (600 x 90 x 25 mm) (back braces)
- 2 pieces 24 3/8 x 4 x 1 in. (620 x 100 x 25 mm) (outer back slats)
- 2 pieces 28 3/4 x 4 x 1 in. (730 x 100 x 25 mm) (inner back slats)
- 33 7/16 x 5 1/8 x 1 in. (850 x 130 x 25 mm) (center back slat)
- 27 1/2 x 2 x 2 in. (700 x 50 x 50 mm) (strengthening blocks)
Chair Woodworking Tutorial:
1. Lay the foundation.
Draw out the rails freehand onto the 35 7/16 x 5 15/16 in. (900 x 150 mm) lengths. Use the full length, and make sure that the rails are not less than 4 in. (100 mm) wide at any point. Scribe the back to the bench top while the leg is clamped in position, but this time, instead of cutting the front end of the rail flush to the leg, let it project forward about 4 in. (100 mm) and round it off. Mark the position of the leg on the rail and unclamp. Mark two flats on the front that you have drawn; these will take the front two rails, the uppermost needing to be 9/16 in. (15 mm) forward of the front of the leg. Draw the flat 2 in. (50 mm), add another 9/16 in. (15 mm) gap, and then draw the second 2 in. (50 mm) flat. Cut this out with a jigsaw and copy the shape to its pair. Finish off to a smooth surface with a belt sander and bolt the legs to the rails.
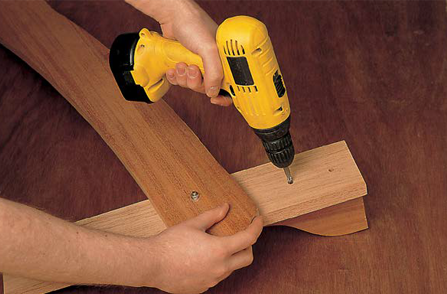
2. Assemble the seat slats.
The top of the legs will now need to be marked and drilled for the armrest brackets. Remember to drill for
the plugs first, then the shank. Drill the pilot holes when you assemble. The brackets can be a simple triangle or a little more ornate; you will get both brackets from one short length. Assemble the seat slats.
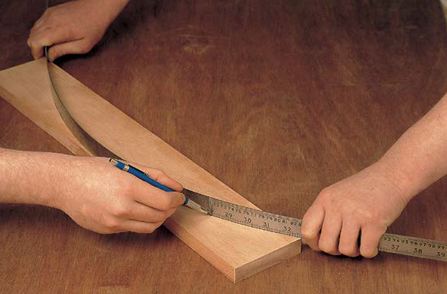
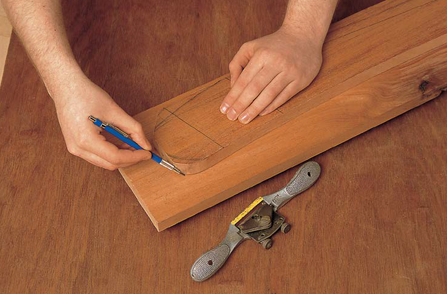
3. Configure the curve of the seat slats.
When marking out the curvature of the final seat slat, the most effective method is to use a steel ruler as shown. As you increase the pressure at either end of the ruler, you can alter the ellipse of the curve: equal pressure gives an equal curve. The lumber you use should be wide enough to leave a waste piece of about 2 in. (50 mm) at its narrowest point; this will form the reinforcing rib behind the back. When you have decided on the amount of curvature you want for the back slats, mark and cut with a jigsaw.
4. Add the seat flats.
Drill the holes for screwing the final slat to the rails and mark the centerline. Now position a flat across the curve 2 in. (50 mm) each side of the centerline, then use the slat spacer to mark a gap of 9/16 in. (15 mm) and after that a further 4 in. (100 mm) flat, as shown. When making the chair, use the actual back slats as a guide from which to mark off, prior to shaping them, rather than separate guide ones. Plane to the lines of the flats and then clamp them in place on the seat assembly, checking slats and rails for square.
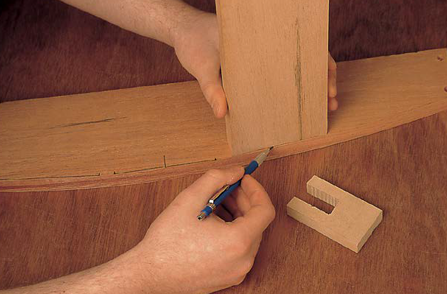
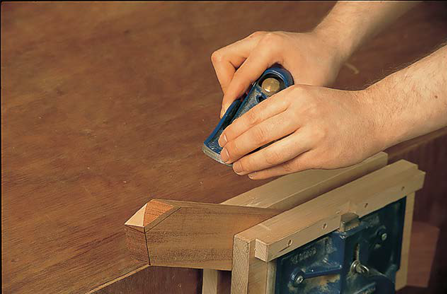
5. Complete the front profile.
Position the waste piece left over from step 7 by using the spacers, 9/16 in. (15 mm) away from the clamped slat. Use a small waste piece about 1 in. (25 mm) thick to transfer the flats to form the front profile of the reinforcing rail for the back slats. Cut to the scribed lines with a jigsaw.
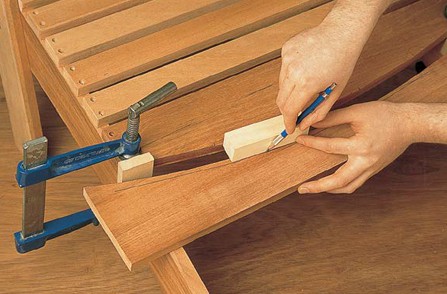
6. Glue and add support.
Unclamp the final slat from the assembly and screw five strengthening blocks, each about 3 9/16 in. (90 mm)
long, to the underside, to give an added glue area to the base of the back slats. Any strong hardwood will do for the strengthening blocks. Screw the blocks from underneath to the rear of the final rail, running along each flat. Plane them flush using a block or a jack plane to achieve a consistent bevel of about 85 degrees.
7. Layout the back slats.
Place the final slat edge down on the workbench and lay out the five pre-cut slats that form the back. The two 24 3/8 in. (620 mm) long back slats are placed at the outside, then the 28 3/4 in. (730 mm) slats, with the longest at 33 7/16 in. (850 mm), placed in the middle. Try to get an even distance between each slat at the top. Position the waste piece from step 3 about two-thirds of the way along the back to form a rib. This takes trial and error; you may find you have to reduce or increase the splay of the back, or lengthen the flats on the rib. When the fit is acceptable, mark the back slats where the rib sits and set aside. Mark each slat for the top profile and the bottom angle. Cut to fit with a jigsaw.
8. Assemble the back.
When cut, drill and screw together and place the assembly back on the rails. At this stage, the back is
fragile and will flop about, so take care. Check the fit of the rib again and, if good, drill through the back slats, two holes per slat, taking great care that the drill does not burst through the face of the rib. Screw the rib and back slat temporarily in place to provide some rigidity—every other screw hole will be sufficient at this stage. From the narrowest point of the rib draw a smooth line that follows the curvature of the back to each end. Draw a half-round to finish level with the two end back slats. Remove, cut the waste with a jigsaw, sand or plane smooth, and refit.
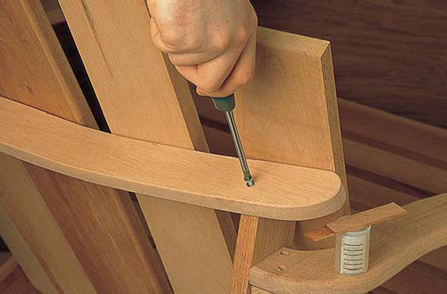
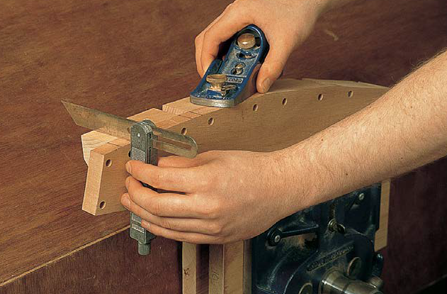
9. Add support.
Fit the two braces that support the back underneath the back rib. Bolt them to the inside of the back of the rails. Leave the bottom width of the braces at 3 9/16 in. (90 mm) and taper the upper end so that it is the same width as the rib. Cut the bottom as a half-round and the top as a compound miter, meeting the back face of the outer back slat and the underside of the rib (see right photo for detail). Mark the compound miter by scribing from the relevant faces, and use a sharp block plane to plane down to the lines (left photo). When correctly shaped, drill and screw the top in place and use a bolt to attach the brace to the bottom to the rail!
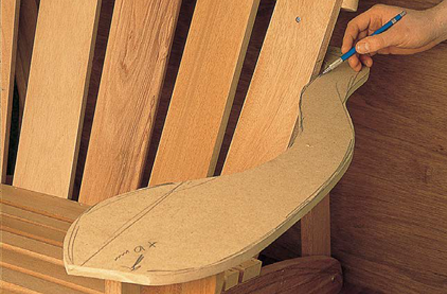
10. Shape the arms.
The key factors influencing the shape of the arms are: at the front, you need enough space for a large gin and tonic, and the back needs to curl around the outside of the outer edge of the outer back slat and butt up to the outer face of the braces. The best way to achieve this is to use a scrap piece of MDF or plywood and obtain the shape by a process of trial and error. Use a level to position the arms, then mark the underside where it meets the brace. Fit a small block at this mark and then screw the arm down onto the block. The front of the arm is screwed down into the front leg and armrest bracket. When gluing up, pour a little glue into these holes as you are screwing into end grain.
11. Finish your piece.
When applying epoxy resin, use rubber gloves, mix accurately according to the manufacturer’s instructions, and work quickly—drips and spillage can be cleaned off later. Mix only as much glue as you can use in 25 minutes. Glue the legs, rails, and slats together, screwing and bolting as you go, then mix more for the plugs. Let everything cure for a day, then clean off any excess glue with a chisel and sandpaper and cut the plugs flush.
Other Carving Titles
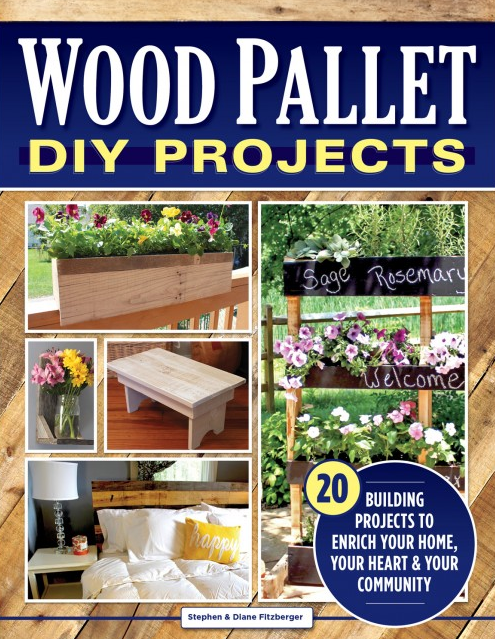
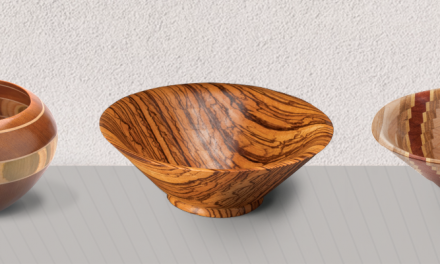
Wood Pallet DIY Projects
Create 20 step-by-step wood pallet projects from upcycled salvaged pallets to create beautiful one-of-a-kind projects. This book shows how to make useful products for the home and garden out of reclaimed wood from shipping pallets. From garden beds and plant stands to bookshelves and tables, authors Diane and Steven Fitzberger, will guide you through the process of sourcing and preparing pallets for each project.
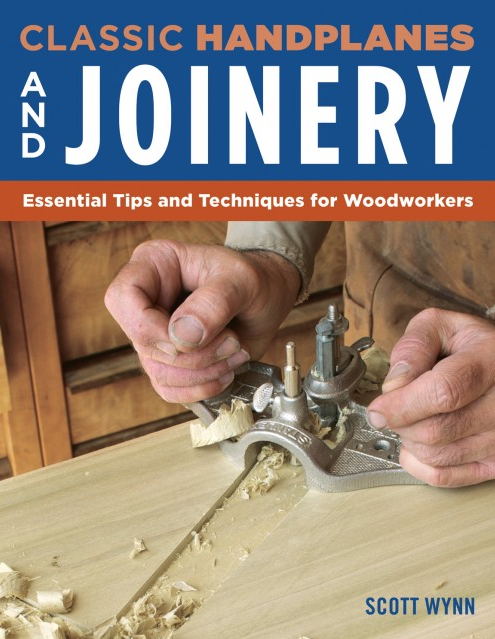
Classic Handplanes and Joinery
This comprehensive manual on hand-cut joinery and hand planes provides an essential reference for modern woodworkers and furniture builders. Author and woodworking instructor Scott Wynn shows how to create almost any traditional furniture joint quickly and accurately using hand planes. Readers learn how to choose, set up, maintain, and master the most popular joinery planes, including plow planes, rabbet planes, router planes, shoulder planes, specialty planes, and more.
Get Exclusive Email Offers And Receive 15% OFF On Your First Book Order!
Recent Comments