


Personalize your toolbox – ideas to carve, paint, and decorate
By Rev. Jim Paulson
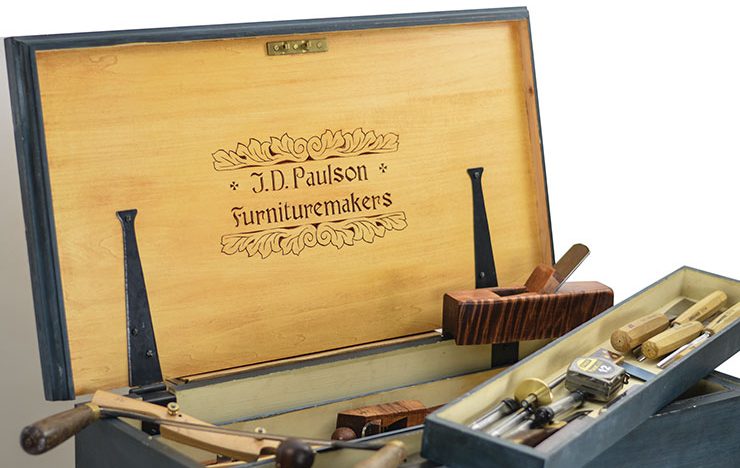
There’s nothing like the challenge to stay motivated and inspired when the winter doldrums set in. Try these fun, easy woodworking projects to beat the winter blues! This project provides tips for embellishing your toolbox, whether it be homemade or pre-purchased. These techniques can also be used to personalize other woodworking projects you have at home. This project can be found in the Woodcarving Illustrated Winter/Spring 2016 (Issue 74). Full article and project patterns can be downloaded at the end of the article.`
Making a Custom Lid
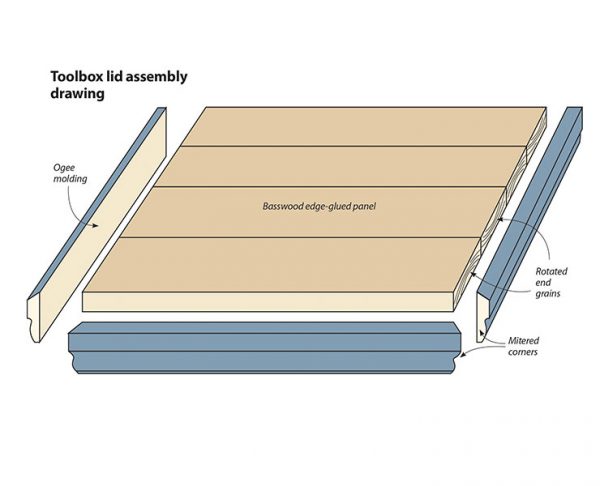
The easiest way to personalize a box is to add a new lid. Edge-glue at least four pieces of basswood together, rotating the pieces so the grain alternates to reduce cupping and warping. The basswood is easier to carve than many types of wood used in toolboxes. Cut the basswood glue-up to fit the box exactly. Plane or sand the surfaces smooth.
Next, design your lid. I used organic designs inspired by the chip-carving legend Wayne Barton and the title and music of a favorite hymn printed in an Old English font. You might want to use a poem or a line from a movie. I used a Becker-style font for the numbers. On the underside of the lid, I used the same font to carve my name and added a leafy design I use as part of my business logo. Enter your email in the form below to receive the alphabet pattern I used. Use graphite paper to transfer the pattern to the lid, and carve the design using standard chip-carving knives and techniques.
To keep dust out, I used a router to give 3/4″ (19mm) thick by 1-1/2″ (38mm) pine an ogee profile, but you could also purchase 1-1/2″ (38mm)-wide pine molding. Cut 45° miter joints on the front edges of the side pieces and on both ends of the front piece. Glue the molding to the lid, drill pilot holes, and reinforce the joints with 6d finishing nails. Do not attach molding to the back; it will interfere with the box opening.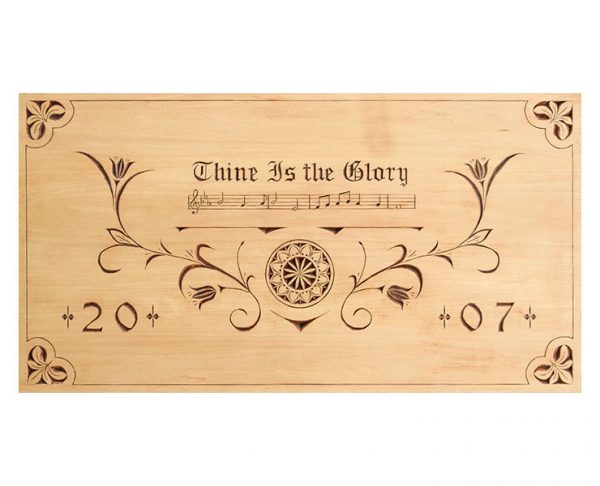
Finishing the Toolbox
Sand the surfaces with 220-grit sandpaper, cover the molding with masking tape, and seal both sides of the basswood panel with Minwax spray satin polyurethane. Allow it to dry, sand lightly with 220-grit sandpaper, and remove the sanding dust. Apply cherry gel stain with a brush and immediately wipe off the excess with a rag. Touch up the crevices with stain. Allow the stain to dry, and then apply a couple more coats of satin polyurethane to the stained surfaces and let it dry. Remove the masking tape.
Working with Milk Paint
Wet the wood to be painted lightly with a spray bottle and sand lightly after the wood dries; milk paint can cause the wood grain to rise. Mix the paint you need for the day according to the manufacturer’s instructions (you often mix powdered paint with warm water and let it stand for a short time before using). Apply the paint with a disposable brush, and wet the tip of the bristles occasionally to help apply the paint smoothly. You might need to apply a second coat for even coverage; buff between coats with 220-grit sandpaper or a green ScotchBrite pad to remove any undissolved solids. I painted the box and lid molding with black milk paint, and then applied a coat of soldier blue. You can buff with sandpaper or the ScotchBrite pad to reveal a bit of the first coat for an antique or worn look. Seal the milk paint with a mixture of boiled linseed oil and paraffin wax.
Embellishments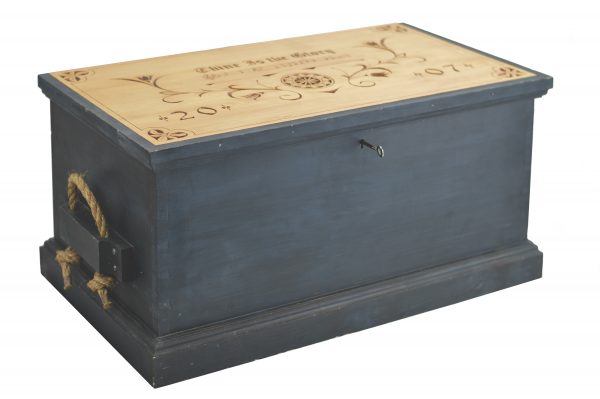
I attached my lid with black strap hinges, hold the lid closed with a chest lock, and added rope carrying handles. Place the hinge screws carefully so you don’t damage your carvings. Tools can get heavy, so instead of attaching the rope handles directly to the sides, I drilled holes in 2×4 stock to accommodate the rope, and cut them to a decorative shape before gluing and screwing the blocks to the sides of the toolbox. I painted the rope blocks to match the rest of the box exterior. I also created custom trays to fit inside my box; I painted the trays with buttermilk milk paint.
About the Author
Rev. Jim Paulson is a seasoned woodcarver, 18th century artisan re-enactor, blogger, and chairmaker who lives near Bowling Green, Ohio. A former earth scientist, Jim serves as a full-time ordained pastor and on-call chaplain in the Evangelical Lutheran Church in America. Jim began carving in 1982 and builds reproduction Windsor chairs. His woodcarving interests principally involve chip carving, Scandinavian flat plane figure carving, and hand carving the seats, crests, and arms of Windsor chairs. You can view his work at blackswampwindsors.com or read his blog at jimthechairmaker.wordpress.com.
Enter your email below for the full article and project patterns. Feel free to send us your finished creations at editors@woodcarvingillustrated.com or on our social media: Facebook or Instagram.
Materials
- Wooden toolbox
- Basswood, 3/4″ (19mm) thick: at least 4 pieces sized to match the top of wooden box
- Pine molding, at least 1-1/2″ (38mm) wide: enough to run around three sides of the box lid
- Wood glue
- Fine-cut finish nails: 6d (2″, or 51mm)
- Offset strap hinges, black finish: 1 pair 8″ to 11″ (203mm to 209mm)
- Gel stain, such as Minwax: cherry
- Spray finish, such as Minwax satin polyurethane
- Milk paint: buttermilk, pitch black, and soldier blue
- Sandpaper: 220 grit
- ScotchBrite pads: green
- Boiled linseed oil
- Paraffin wax
- Graphite paper
- Disposable Brushes: 1″ (25mm), 2″(51mm)
- Painter’s tape
- Jute rope, 1/2″ (13mm) dia.: 48″ (1,219mm)
- Round-head wood screws, #6: 8 each 1-1/4″ (32mm) long
Tools
- Pipe clamps
- Chip carving knives, such as Wayne Barton premium
- Router with 3/4″ (19mm) ogee bit (optional)
- Hammer
- Drill with bits: 1/8″ (3mm)-dia. twist, 5/8″ (16mm)-dia. spade
- Screw drivers: slotted
- Portable thickness planer or hand plane

For more articles like this, subscribe to Woodcarving Illustrated magazine.
Woodcarving Illustrated magazine is published quarterly for both subscribers and newsstand readers. The editorial team passionately searches for and features interesting and creative carvers, projects, and techniques. Each issue includes inspiring feature articles and galleries showing artists stretching the art of woodcarving, comprehensive step-by-step articles outlining the steps to recreate a carving, pattern profiles to inspire more experienced readers, and reviews of the newest and most useful tools.
Get Exclusive Email Offers And Receive 15% OFF On Your First Book Order!
Recent Comments