


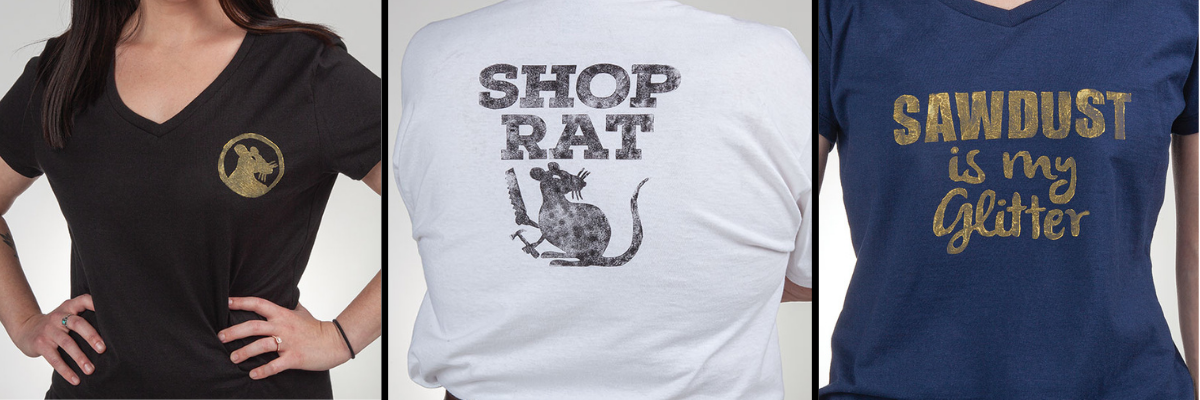
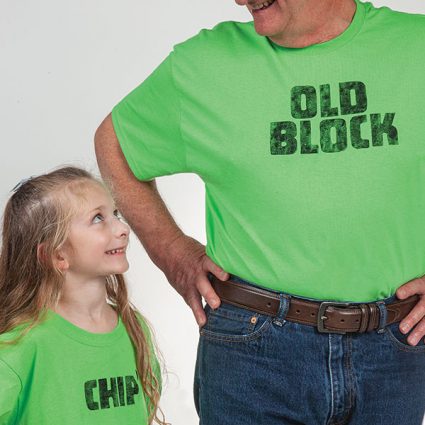
Making Block-Printed Tees from the Scroll Saw
By the Staff of Scroll Saw Woodworking & Crafts Magazine
There’s nothing like the challenge to stay motivated and inspired when the winter doldrums set in. Try these fun, easy woodworking projects to beat the winter blues! The project below is perfect to do with the whole family. Gather your partner and kids or grandkids to make fun block-print tees! This project can be found in the Scroll Saw Woodworking & Crafts Magazine Spring 2021 (issue 82). Project patterns can be downloaded at the end of the article.
Choosing Materials
Smooth, breathable, natural fabrics such as cotton, linen, or cotton/linen blends work well for block printing; avoid anything too coarse, as it will pick up ink irregularly. We steamed our T-shirts to remove any wrinkles and hung them so they were completely dry before printing. (Wet spots can cause the ink to bleed.) You could also iron the material, if preferred. Choose an ink. Make sure to search specifically for fabric-friendly block-printing ink, as some varieties are rated for paper only. We used oil-based ink, but you could use water-based, if desired.
The former is more tacky—ideal for transferring small details, such as the mouse whiskers in our Shop Rat design—but takes significantly longer to dry. Be sure to pick up a small rubber brayer to roll out the ink, as well. For the lettering, choose a relatively hard wood that cuts cleanly and is not overly porous; we resawed pieces of scrap walnut and mahogany to 1/8″ (3mm) thick, but use what you have on hand. MDF, maple, or cherry work well, but we would not recommend oak, pine, or similar. For the backer, almost any scrap wood will work, as this will not come in contact with the ink or the fabric; we used 1/2″ (1.3cm)-thick ply.
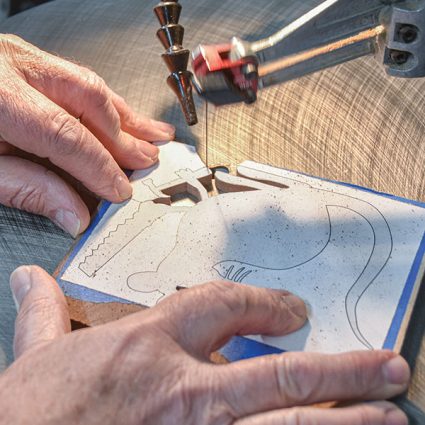
Making the Block
Photocopy the pattern, making sure it is a mirror image of the final product. Reserve a second copy for reference. Make sure the surface of the wood is smooth before applying the pattern, as an uneven surface will create difficulties as you ink the stamp later. Apply the pattern with repositionable spray adhesive, drill any blade-entry holes, and cut the designs.
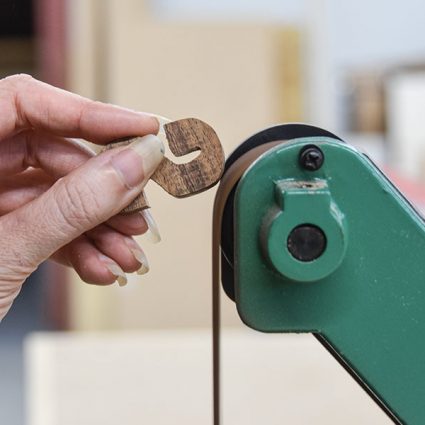
Note: For some of the more detailed pieces, we found it was useful to cut just outside the pattern lines and then sand the pieces to size on a belt sander.
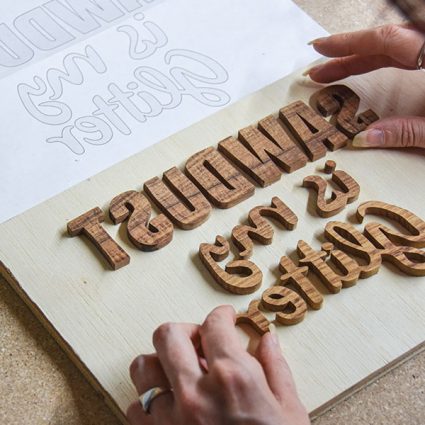
Remove the patterns and hand-sand any fuzzies away. Attach the elements to the piece of scrap plywood with wood glue, using the second pattern copy for reference.
Note: The letters should be backward, so the resulting print reads left-to-right. Let dry completely.
Applying the Ink
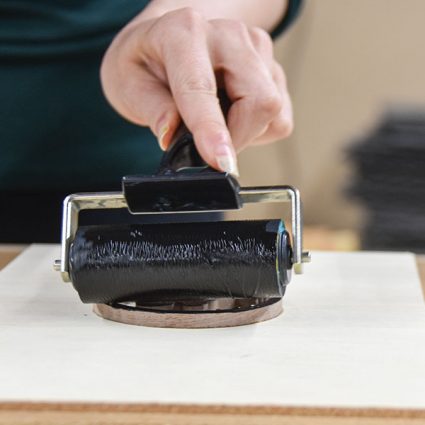 Spread a small amount of ink on a smooth, nonporous surface, such as a spare piece of plastic or the back of an aluminum sign. Roll out the ink to distribute it evenly over the rubber part of the brayer. Then move the brayer over to your woodblock stamp (shown above). Roll the ink in an up-and-down motion over just the surface of the stamp, being sure not to get any ink on the flat surface of the plywood. Then roll the ink in a side-to-side motion over the same surface, applying ink to every part of the design.
Test the design on a piece of paper; we used thick pieces of watercolor paper, as well as regular computer paper. To do this, place the paper squarely on the wood block, anchoring it with one hand and burnishing it (or rubbing in a circular motion) with the other. Then peel the paper off, being careful not to smudge with the wet ink. This preliminary step allows the wood to absorb the ink, resulting in a smoother load for subsequent inkings. It also alerts you to any irregularities of ink distribution caused by uneven pressure during burnishing, letting you improve your technique before printing the actual T-shirt.
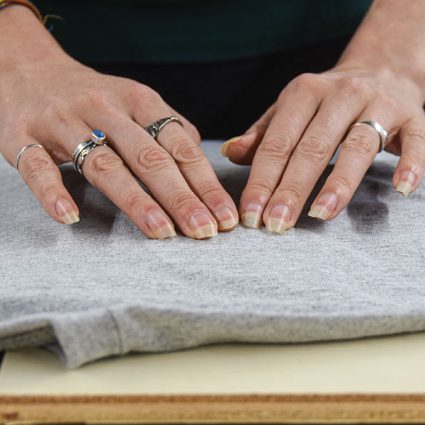
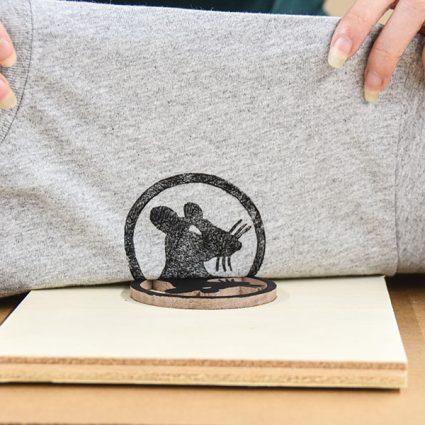
Reapply the ink to the stamp. Fold the arms of the T-shirt back, position it in front of the stamp, and press it down carefully. Lay out the arms of the shirt on either side and burnish the surface with your hand until every element of the design has been covered. Carefully remove the design as before and lay the shirt out to dry. If you used oil-based ink, let it cure for at least a week before washing; water-based inks dry within a few days. Clean the brayer and inking surface with soap and water; wipe down the block with a dry paper towel before the ink dries.
Other Applications
Once you’re comfortable with the basics, try applying your design to other items, as well—tote bags, notecards, pillow shams, you name it. Flip through back issues of Scroll Saw Woodworking & Crafts, too; many of our previously published fretwork designs work great as prints. And make sure to write in with photos once you’ve tried this project for yourself; e-mail editors@scrollsawer.com.
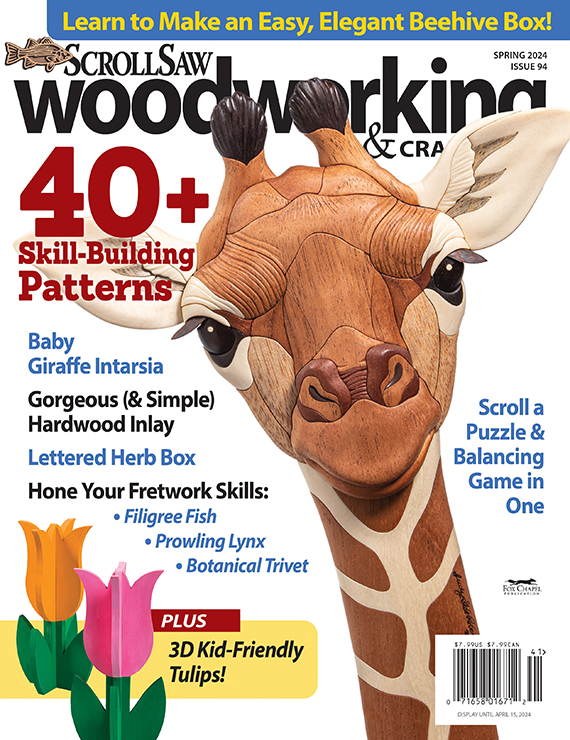
Scroll Saw Woodworking & Crafts Spring 2024
Featured in this issue:
- Valentine Card Segmentation
- Beehive Box
- 3D Tulips
- Birthday Decorations
- Hummingbird Portraits
- Unicorn Intarsia
- And more!
Get Exclusive Email Offers And Receive 15% OFF On Your First Book Order!

Recent Comments