


How to Make a Wooden Bowl without a Lathe
Excerpt from Scroll Saw Wooden Bowls: 30 Useful & Surprisingly Easy-to-Make Projects by Carole Rothman
Carole Rothman is proof that it’s never too late to start a new craft. She began scroll sawing at age 60 and now at the age of 70 she has several books on scroll sawing under her belt, is a columnist for Woodworker’s Journal, and she has become an expert scroll saw artist in her own right. She’s recently updated and expanded her book Scroll Saw Wooden Bowls: 30 Useful & Surprisingly Easy-to-Make Projects which is now on sale! While wood bowls are typically made with a lathe, Carole shows how to use the more accessible scroll saw to create 30 beautiful projects. Below is a sneak peek of the beginner bowl project inside.
 “The first bowl I ever made was cut from aspen. Aspen is soft and inexpensive, which makes it a low-risk choice for a first bowl. If you’ve never worked with aspen, you’ll be surprised at how attractive it is when sanded well and shellacked.” – Carole Rothman
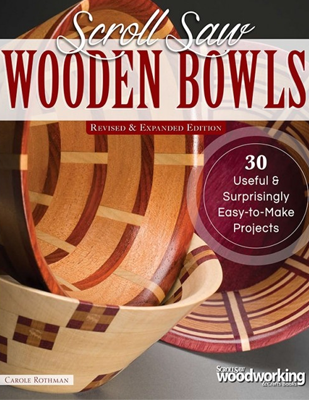
Scroll Saw Wooden Bowls
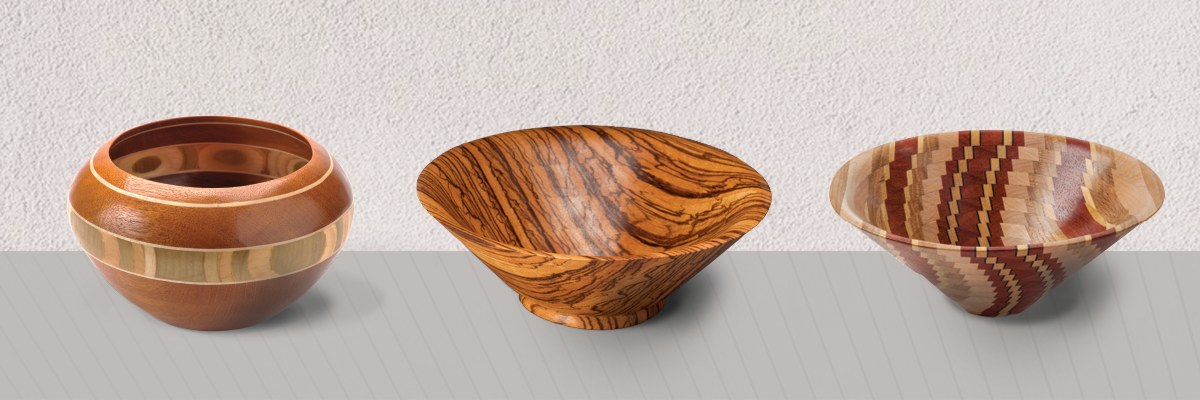
While wood bowls are commonly made on a lathe, guided resource by Carole Rothman offers 30 projects for crafting beautiful bowls with the more accessible scroll saw. Projects start for the beginning crafter with a basic starter bowl then guide the reader through more advanced bowls with flared angles and inward curves. Patterns and step-by-step instructions are provided for each project. Other projects include a vase, a ginger jar, and a candy dish. Whether you’re new to making scrolled bowls or have many under your belt, you’re sure to find projects you’ll enjoy and challenges that will help move your work to the next level.
Basic Scroll Saw Bowl
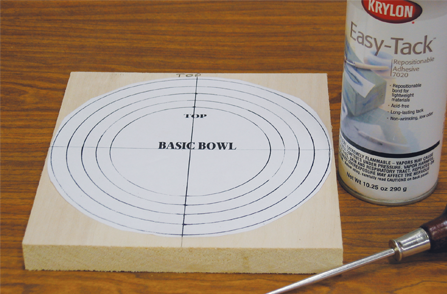
1. Drawing Guidelines and Preparing the Pattern.
Draw two intersecting lines through the middle of the bowl blank. These form guidelines that help you align the rings properly when gluing up the bowl. Mark the top of the blank. Aligning the pattern. Apply the repositionable adhesive. Puncture the middle point of the pattern with an awl, and place the point of the awl at the intersection of the two lines on the wood. Line up the guidelines on the pattern with the guidelines on the wood and press the pattern into place.
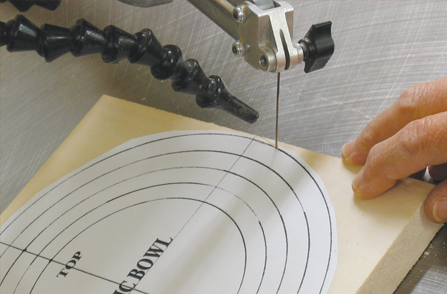
2. Cutting the Outline.
Tilt the table of your scroll saw to 28˚, left side down. Use a #9 blade, tensioned tightly, to cut clockwise along the outmost line. Let the blade cut freely to avoid distortion and keep the proper angle. Remove bowl from waste. Mark the top of the bowl on the outer face of the blank. This will help keep the rings oriented when you glue them up. Extend each of the four guidelines onto the outer face of the blank.
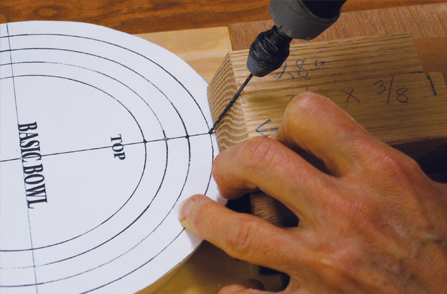
3. Drilling the entry holes.
If using a hand drill or rotary tool, mark all entry holes with an awl to prevent the bit from slipping. Place a 28˚ angle guide so it faces the center of the blank. Drill all entry holes with a #54 or 1/16″ (2mm) bit.
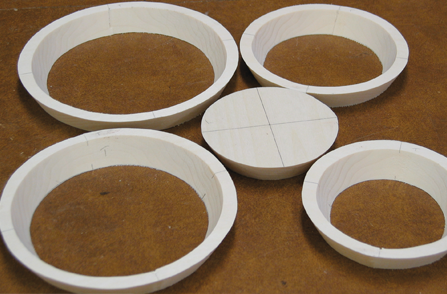
4. Assemble the Rings.
Complete the first ring. Insert the blade through the outermost hole and cut clockwise along the pattern line to complete the first ring. Place the ring on top of the remainder of the bowl blank. Transfer the guidelines from the pattern to the inside face of the cut ring. Extend guidelines from the top of the ring onto the inner and outer edges. Cutting the second, third, and fourth rings. Insert the blade through the next entry hole and cut out the second ring as in above. Mark the top and extend all guidelines. Repeat for the third and fourth rings. Each should line up with the previous ring. Stack the rings, keeping the tops oriented, and match up the guideline extensions. Extend the marks from ring to ring on both the inside and outside surfaces so you can re-align them easily.
5. Preparing for gluing.
Erase all guidelines on the top face of the rings to prevent them from appearing as tiny dots on the sides of the bowl. Stack the rings and hold the stacked bowl up to the light. Look for spaces between rings. If you find any, sand the ring faces smooth until the spaces disappear.
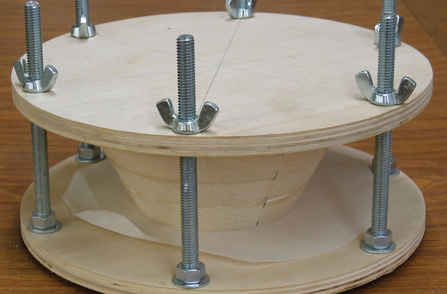
6. Gluing the Rings.
Set the base aside. Stack the rings and do a final check for alignment. Starting with the smallest ring, dot the top of the ring with glue. Spread the glue, covering surfaces thoroughly. Press the next ring firmly into place. Check alignment and adjust rings if necessary. Repeat for the remaining rings. 11Using the bowl press. Place the glued-up rings in the bowl press, using wax paper above and below the rings. Tighten the wing nuts alternately, as you would on a car wheel, exerting firm but not excessive pressure. Let dry for a few minutes, unclamp, and clean up any glue squeeze-out. Re-clamp and let dry thoroughly.
7. Sanding the bowl interior.
Use a spindle sander with the table set to 28˚. Be sure the bowl contacts the spindle only at this angle. You can also use an inflatable ball or flexible pad sander. Be sure the inside of the bottom ring is round—it cannot be corrected after attaching the base. The bottom of the smallest ring should be at least ¼” (6mm) wide for gluing to the base. Sand the top of the base smooth and glue it to the bottom ring using the bowl press. Let it sit for about five minutes, then remove it from the press and clean excess glue from the inside bottom surface as thoroughly as possible. Return to press, and let dry.
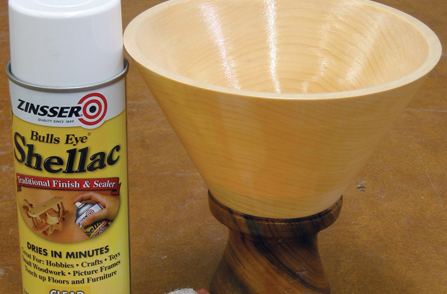
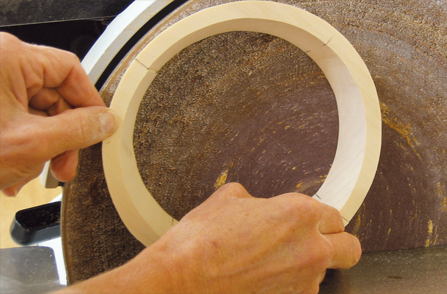
8. Sand and Finish the Bowl.
Use a vertical belt sander or flexible pad sander to sand off all irregularities. Use progressively finer grits until the bowl is smooth. Re-sand inner surfaces if necessary. Try to keep the width of the top rim even. Round off the edges of the top ring and base. Apply mineral spirits to the bowl to reveal glue spots. Mark any with a white pencil or chalk. When the bowl is dry, sand off the glue spots. Apply the first coat of shellac and let dry. Smooth the surface with a 320-grit sanding sponge or 0000 steel wool. Vacuum, wipe with a damp cloth or paper towel, then recoat. Repeat until the desired finish is obtained.
More Scroll Saw Titles
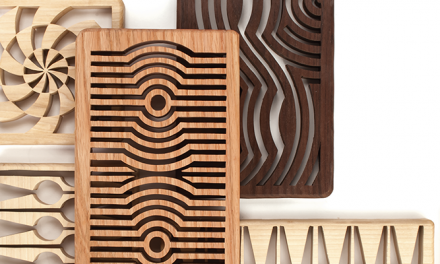
Fresh Designs for Woodworking
Awaken your modern design aesthetic with 21 striking contemporary designs for the home. The fusion of nature’s elegant shapes and modern architecture’s bold symmetry yields a dynamic and engaging collection of designs for scroll saw woodworking.
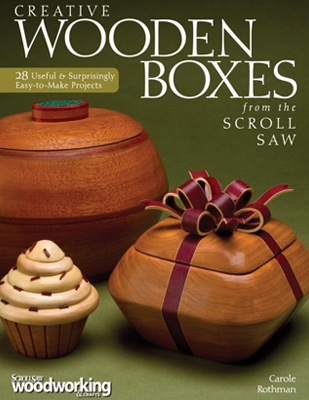
Creative Wooden Boxes from the Scroll Saw
Carole Rothman brings you how to make bandsaw-style boxes, jewelry boxes, and lidded boxes on the scroll saw. Inside, you’ll find 28 beautiful and creative designs for boxes you’ll love to make and love to use.
Get Exclusive Email Offers And Receive 15% OFF On Your First Book Order!


Wooden Bowls, 28 useful and surprisingly easy to make projects. I purchased this book three years ago. I hadn’t done any wood work for 50 years but this was good fun. I purchased a very old scroll saw at an estate sale but ran into a problem on my inner ring cut. A hole needed to be drilled for the blade to pass through. The problem was the scroll saw blade has a pin at each end and the clearance hole was too big. I found a way around that and carefully followed the instructions for a basic bowl. Wow ! I made two other bowls with oak and paduka wood. Then, using both maple and walnut, I created the ginger jar with a lid. The instructions in the book were easy to follow and the results very pleasing. When working these projects I get sore arms so I just leave the workshop and come back a few days later. Carole and Scroll Saw, “you did good”. Thank you for this book!
Chris
Have you ever made a sphere out of two bowels? I am having trouble finding any info on this.
Thank you
Hi Chris
I am trying to get some information on how to scroll saw a sphere from two scroll saw bowels
Where can I purchase” Wooden Bowls ” ,without using a lathe ?
Are you looking at using a scroll saw? If so this book would be perfect. > Scroll Saw Wooden Bowls, Revised & Expanded Edition