


Turning Kids’ Drawings into Scroll Sawn Art
By Megan Yardley
There’s nothing like the challenge to stay motivated and inspired when the winter doldrums set in. Beat the winter blues and get inspired by your kid’s artwork by making a charming scroll-sawn piece! You can gather the whole family for this fun, easy, 5-step project by Megan Yardley. This project can be found in Scroll Saw Woodworking & Crafts Magazine’s Spring 2021 (Issue 82).
Plan the Lines
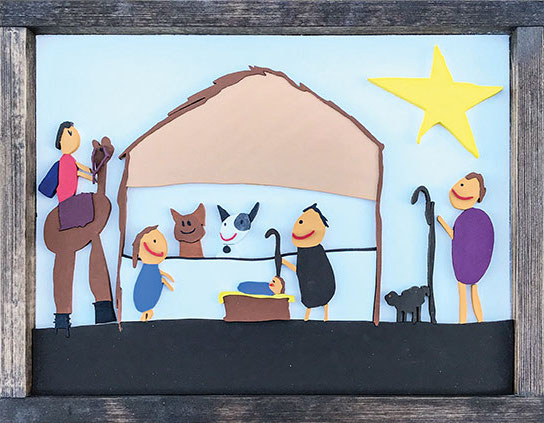
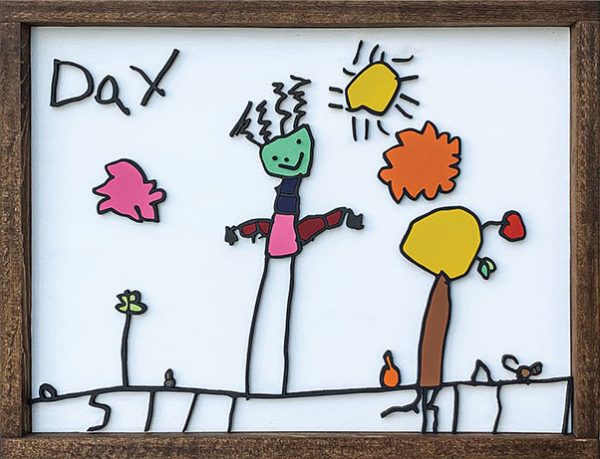
Photocopy the drawing and set the original aside. Look over the photocopy and decide how you want to divide the elements. Most of the time, I divide pieces along the color lines indicated in the drawing. You could paint some of these details on later rather than cutting each tiny piece, but I find that cutting as many pieces as possible gives the finished scene more impact. (For an important exception to this rule, see note below). When outlines or text are involved, as in Dax (see above), or if lines are particularly thin, as in Nativity (see above), I bulk those areas up slightly to increase the structural integrity of the pieces. Mark up the photocopied drawing with a pen, to reference while cutting. I try to resist the urge to “neaten up” the design too much, because the flaws and jagged lines in a child’s drawing are what make them so special. This also makes the piece easier to cut, because it doesn’t have to be perfect!
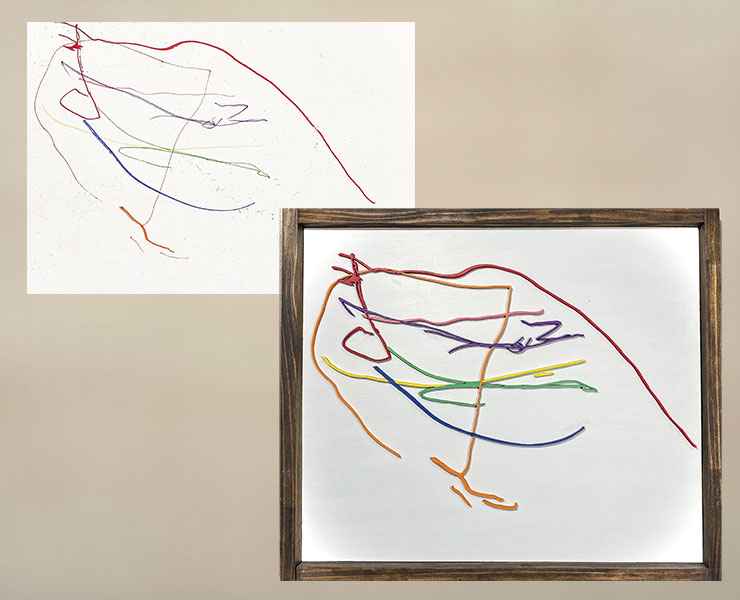
Note: Sometimes, with drawings that consist only of intersecting lines—such as Clara’s at right—I choose to keep the lines connected rather than separating them by color. This keeps me from having to cut too many microscopic pieces that might get lost. It also makes assembly easier.
Plan the Layers
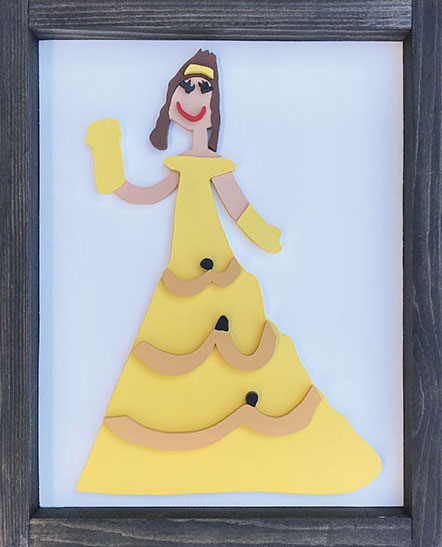
Decide which pieces you would like layered. For example, if you want to give the eyes some dimension, plan to cut the pupil and iris from different pieces of wood, so one can sit on top of the other. In the scrolled version of Belle (see right), I chose to layer the dress details on top of the piece for the dress, and the face details on top of the face piece. Be sure to print extra copies of the drawing/pattern based on the number of individual layers you will have.
Choosing the Right Materials
Plan your background; I typically use 3/4″ (1.9cm) plywood, pine, or birch, as they’re affordable and their light color is easy to paint over. For cutting out the drawing, I typically use 1/4″ (6mm) MDF, which is pliable and easy to sand (especially for tiny details). You could also use plywood for particularly delicate areas, if desired.
Cut and Finish the Pieces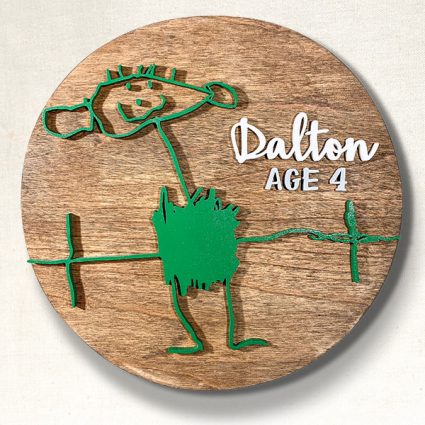
Cover your respective blanks with blue painter’s tape, and then attach the marked-up photocopies of the drawing to the surface with spray adhesive. For really tiny pieces and thin lines, I use a #2 blade. Note: You could use a larger blade, but this can cause the wood to break more easily. Cut the pieces and remove the patterns and tape. You may need to number the backs of the pieces to help with assembly later. Hand-sand the pieces to soften any sharp edges and remove fuzzies. You could also use an orbital sander for larger areas.
Add color. I recommend spray paint for as smooth a finish as possible, as long as the colors match the original drawing. If you can’t match the colors with spray paint, mix up some craft store acrylics instead. While the pieces dry, prepare the background. I sometimes paint mine white to mimic the original paper of the drawing; for room signs, such as Dalton’s (see above), I use assorted stains to make the grain pop.
Assemble and Display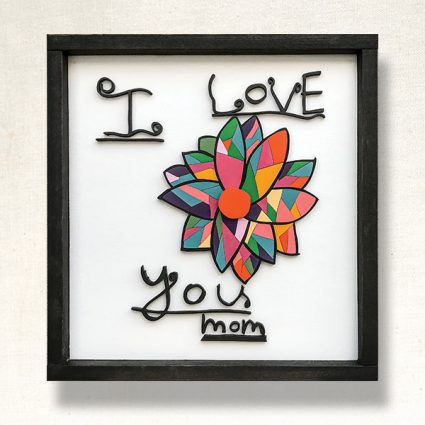
Often the most challenging part is gluing down the finished piece; it can feel like you’re putting Humpty Dumpty back together again. In the end, the result is well worth any frustrating moments, as you have a truly wonderful memory to hang in your home gallery. Place all pieces on the background in the desired positions. Glue each piece down individually, using tweezers if necessary for the really small pieces.
Add a frame. I make my own frames using 1×2 boards from Home Depot. I cut them down to size with a miter saw and assemble them using a nail gun, sometimes applying paint to contrast with the background (see I Love You, Mom, at right). It’s nothing fancy, but they’re fairly easy to do and give the piece a nice “finished” look.
Turning a kid’s drawing into wooden art is worth trying at home. I’ve found it to be simple, meaningful, and endlessly customizable—and it lasts far longer than a child’s construction paper drawing!
About the Author
Megan Yardley lives in Kaysville, Utah. She enjoys traveling the world, riding horses, and being with her family. See more of Megan’s creations on Instagram @sassy_sawdust_designs.
Feel free to send us your finished creations at editors@scrollsawer.com or on our social media: Facebook or Instagram.

For more articles like this, subscribe to Scroll Saw Woodworking & Crafts Magazine.
Scroll Saw Woodworking & Crafts Magazine is published quarterly for both subscribers and newsstand readers. The editorial team passionately searches for and features interesting and creative scroll saw artists, projects, and techniques. Each issue includes inspiring feature articles and galleries showing artists stretching the art of scroll sawing, comprehensive step-by-step articles outlining the steps to recreate a project, pattern profiles to inspire more experienced readers, and reviews of the newest and most useful tools.
Get Exclusive Email Offers And Receive 15% OFF On Your First Book Order!
Recent Comments