


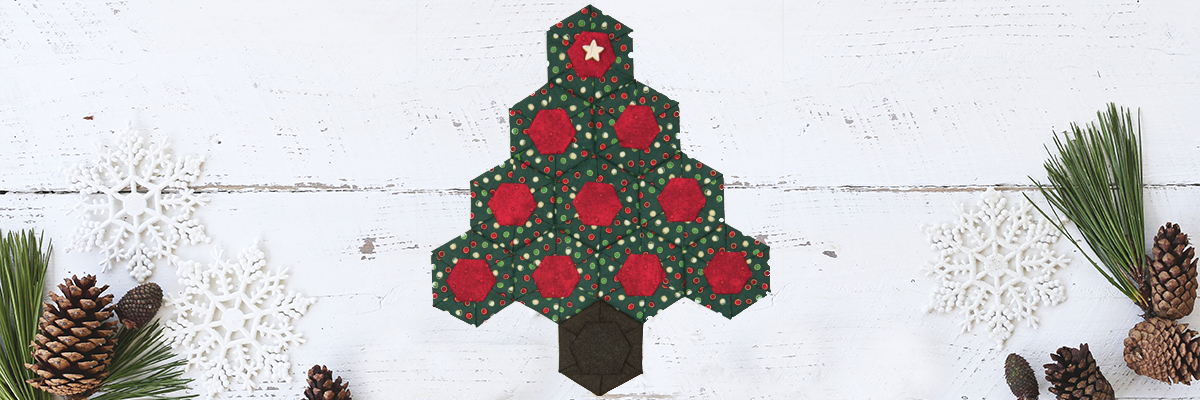
O Christmas Tree Wall Quilt
By Mary M. Hogan, Published in the DO Magazine Presents Quilting Techniques & Projects
O Christmas Tree, O Christmas Tree, here’s a freebie from dear Santa! Hey, you’ve got a whole 48 days until Christmas is here— so get quilting! When you want a simple project to whip up quick, hexagons are the way to go. And the delight they will put on your gift recipient’s faces will be worth every stitch. This festive project is featured in DO Magazine Presents Quilting Techniques & Projects and Mary’s Fast-Fold Hexies from Pre-Cuts & Stash.
This Christmas quilt pattern is made using the 5″ circle, 2 ½” circle, and the Small Hexagon Template. Enter your email below to unlock these free quilt patterns. For a larger wallhanging, use the larger templates and make 11 large hexie units. Finished size: 10″ × 11″ | 11 Hexie Units
Materials
Note: Fabric requirements are based on 42″ wide fabric. WOF = width of fabric.
- (10) 5″ precut squares or (1) fat quarter green dot fabric
- (10) 2 ½” precut squares or (1) fat eighth red fabric
- (1) 5″ precut square or scrap brown fabric
- (1) 2 ½” square or scrap brown fabric
- 1/8 yard lightweight batting (45″ wide)
- Star sew-on button
- 5″ Circle Template
- 2 ½” Circle Template
- Small Hexagon Template

DO Magazine Presents Quilting Techniques & Projects
Mary M. Hogan provides step-by-step instructions for using her fast-fold hexie technique to sew hexagon quilts in half the time. Janet Houts and Jean Ann Wright show how to use the versatile circle of nine grid for endless design possibilities. Patricia Sanabria-Friederich presents unique quilt designs inspired by the distinctive mosaic tile floors of her native Costa Rica. The book also includes fun and festive projects for precut fabric bundles, with superb contributions from Wendy Sheppard, Jean Ann Wright, McB McManus and E.B. Updegraff.
Cut the Fabrics
1. Cut the Fabrics
From green dot fabric, cut: (10) 5″ circles. From red fabric, cut: (10) 2 ½” circles. From brown fabric, cut: (1) 5″ circle and (1) 2 ½” circle. From batting, cut: (11) hexagons using the Small Hexagon Template
2. Trace the pattern.
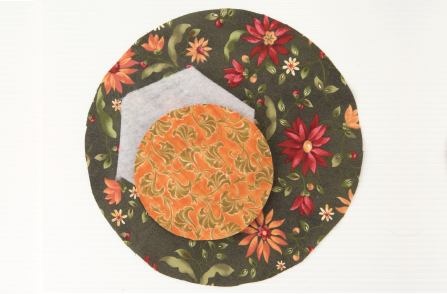
Prepare the templates, using paper for circle templates and cardstock for hexagon shapes. Using the 5″ Circle Templates and Small Hexagon Template, cut two fabric circles and one batting hexagon.
3. Orient the Fabric Circle
Orient the fabric circle so the lengthwise straight of grain runs vertically to keep hexagon from stretching after construction. To find the center of a 5″ fabric circle, fold in half then in half again, finger-pressing each fold.
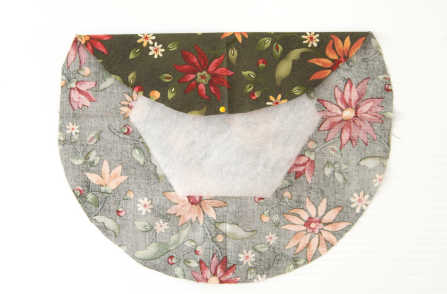
4. Fold the Fabric.
Place circle wrong side up on a pinnable work surface. Center batting hexagon on the circle as shown, matching points with the horizontal fold line on fabric. Place a pin through the center of batting, fabric, and work surface. Fold over the top edge of circle, as shown, so the fold meets the pin at the center. Finger press the fold.
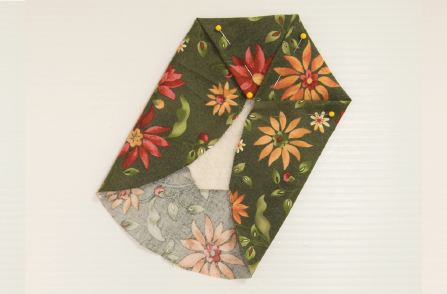
5. Continue the Hexagon
Working clockwise, fold right point created by the first fold to the pin at center and finger press. Continue to work
clockwise around the circle, folding point to pin, and finger press. Use pins as needed to hold folds in place. After the fourth fold, make sure the first and fourth fold are parallel. If not, open and fold again or adjust the last fold slightly.
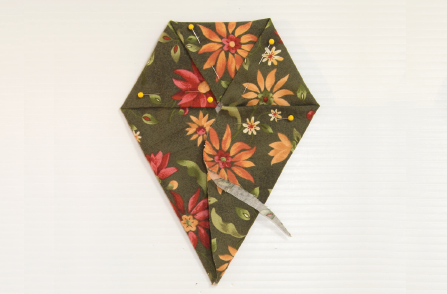
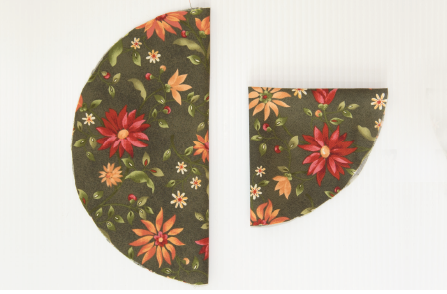
6. Trim the Curve.
Before making the final fold, trim the curve as shown, so the raw edge will not show after making the final fold. Fold last point to the pin. This hexagon is referred to as the base hexagon. Set aside.
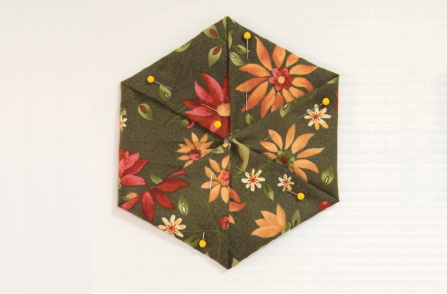
7. Construct your Hexie Units.
Construct 10 hexie units with green dot bases and red toppers, and 1 hexie unit with brown base and brown topper.
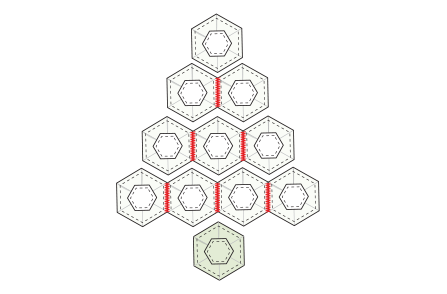
8. Assemble and Sew.
Lay out hexagons as shown. Sew hexagon units together into rows either by hand or machine. Machine Sewing: With right sides up, butt two hexie units together. Using your selected stitch, pass hexagons through your machine, taking care that stitches span the edges of both hexie units. Hand Stitching: Place two hexie units right sides together. Using a single thread, bury a small knot at the beginning of your stitches. Make a few very small stitches to lock thread in place. Whipstitch along one side of the hexie units. Sew to the end and take a few locking stitches and bury the thread.
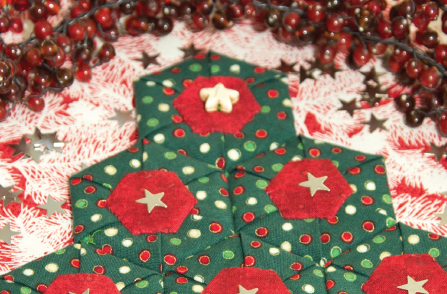
9. Add Embellishments & Finish.
Consider adding embellishments to your Fast-Fold Hexie projects such as the star button and charms in the photo. Hand embroidery stitches, heat-set rhinestones, and contrasting or decorative threads are just a few ideas to try!
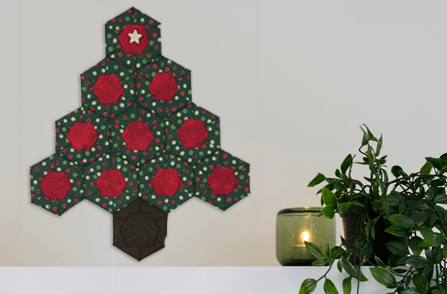
10. Hang!
Hang this beauty over your mantel, give to to a special friend, or use it as a trivet!

New Quilt Book Releases

Creating Art Quilts with Panels
Fiber artist Joyce Hughes uses free motion quilting, thread painting, trapunto, overlay, three-dimensional effects, machine techniques and a variety of embellishments to create stunning pictorial quilts. In this book, she shows you how to take an ordinary fabric panel and turn it into a beautiful impressionist-style quilt.
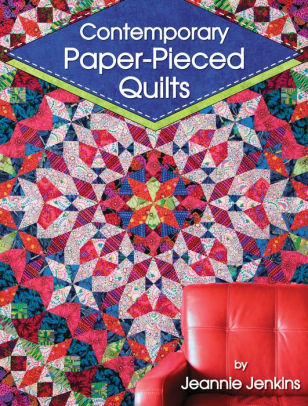
Contemporary Paper-Pieced Quilts
Get Exclusive Email Offers And Receive 15% OFF On Your First Book Order!


Recent Comments