Add a Stone Painting Effect to Your Next Woodworking Project
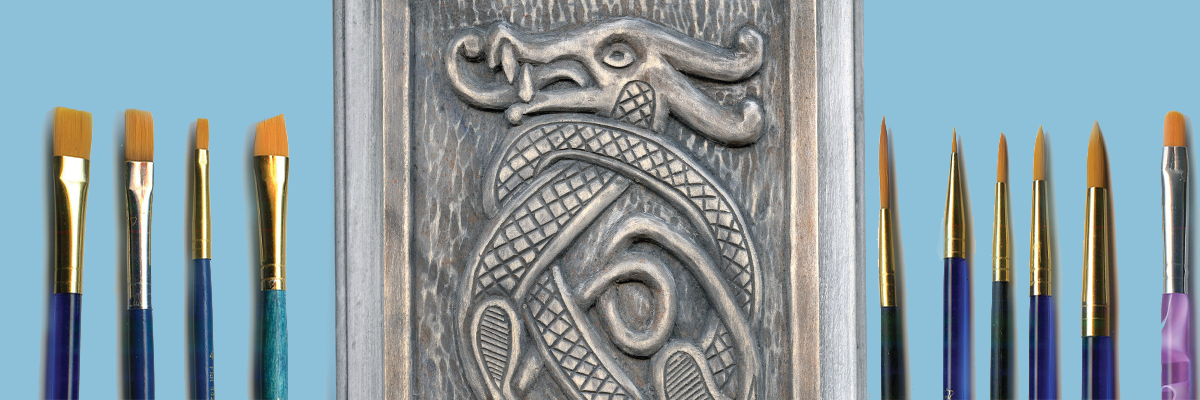
Stone Dragon Painting Technique Project
By Lora Irish in Finishing Techniques for Wood Crafters
Turn wood into stone with this painting technique by acclaimed author and artist Lora Irish! In this tutorial, Lora uses use acrylic craft paints to create this interesting paint technique, then adds a final oil stain at the end. Lora suggests using Bassword because it has a very clear, white coloring. Because basswood is especially porous, it does not take oil-based stains well without the use of a pre-treatment sealer like polyurethane or spray sealer.
Supplies:
- Painter’s tape or masking tape
- Assorted flat shader brushes
- Old, stiff toothbrush
- 220-grit sandpaper
- Soft, clean cloth
- Spray sealer
- Pale raw umber oil stain
- Acrylic paint color palette used: carbon black, titanium white, payne’s gray, burnt umber, burnt sienna, and gunmetal blue
Instructions:
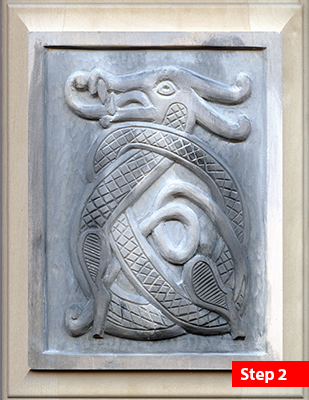 Apply painter’s tape. Apply painter’s tape outside the 1/4″ (0.5cm) border surrounding the carving. Cut long pieces of the tape, place them into position, and press firmly. Block out the frame. The painter’s tape will protect these other areas from being painted.
- Paint swatches of color. Place a small amount of titanium white, Payne’s gray, burnt umber, gunmetal blue, and burnt sienna on the palette. Thin each color with an equal part of clean water. Brush two wash coats of white on the carved area of the plaque. Because ou mixed equal parts paint and water, this coat will not give full, solid
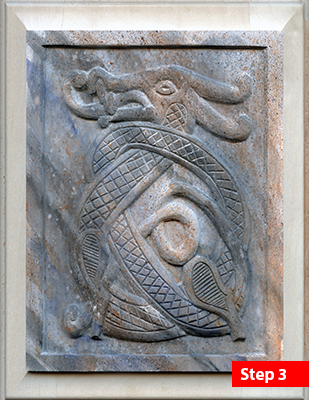 coverage. While the white coats are still damp, pick up a small amount of Payne’s gray and mix it with the white on the palette. Working along the diagonal of the plaque, brush a few random strokes of the gray-white mix over the white background. Pick up a little gunmetal blue, mix it with the white on the palette, and apply it to the carving in the same manner. Next, add a small touch of burnt umber to the gray-white mix and repeat. Add a small amount of burnt sienna to the mix and repeat. The background should now contain many shades of white, gray, blue gray, and brown. Allow these coats to dry for about half an hour.
 - Add splatters of color. Clean the palette
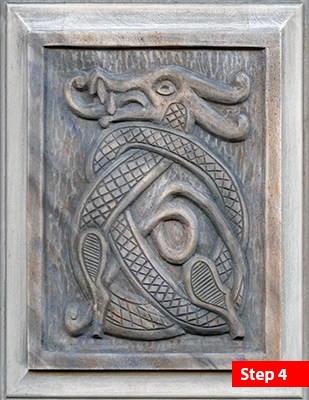 and then place a small amount of each paint color on it. Do not thin these colors with water. Work one color at a time for this step. Use an old, stiff toothbrush to splatter a coat of each color on the
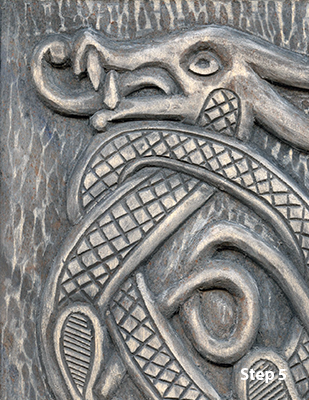
carving (For more on this technique, see pages 85–86 of Finishing Techniques for Wood Crafters). - Sand. After the paint is completely dry, sand the carved areas, background, and routed edges of the plaque using 220-grit sandpaper to remove some paint from the high areas of the carving. Sand gently and lightly. In some areas, only remove a layer or two of color; in other areas, sand all the way down to the raw wood.
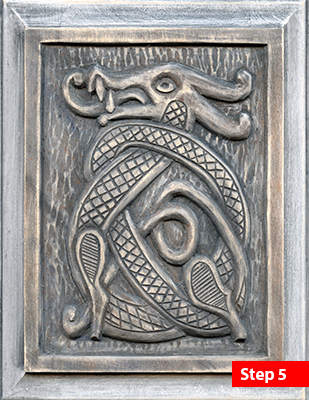 Clean the dust from the board using a soft, clean cloth.
 - Finish. Seal the work with two coats of polyurethane spray sealer. Allow the sealer to dry thoroughly. Follow the manufacturer’s instructions to apply an oil-based stain to the carving. Wipe away the excess oil stain with a soft, clean cloth. Allow the stain to dry overnight. Finally, seal the work again with one to two light coats of polyurethane spray sealer. When you add the sealer, it emphasizes the color tones of the sanded wood and the darker color tones. Even if a sealer or finishing coat is crystal clear in its own coloration, it always alters the color of the wood or paint beneath it. This is why the finished piece looks so different from the previous step’s image.
For the pattern of the Stone Dragon, check out page 137 of the Finishing Techniques for Wood Crafters book.
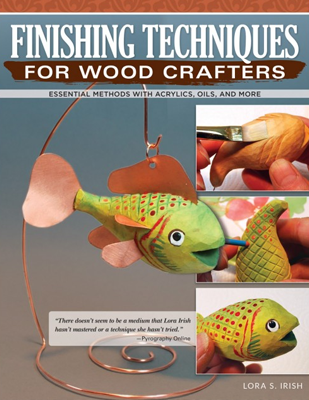
Finishing Techniques for Wood Crafters
Learn how to choose, prepare, and apply the perfect finish for your next creative wood project with this practical guide to finishing techniques! Inside you will find 14 sample projects for techniques like vintage finish or realistic skin tones, step-by-step instructions, and over 300 photos and drawings help illustrate every step. These painting and oil staining/antiquing methods techniques can be applied to all wood crafts including carving, woodburning, gourds, and scroll sawing.
Get Exclusive Email Offers And Receive 15% OFF On Your First Book Order!



Recent Comments